Cut, soak and paste
To ensure the best and least annoying (to myself) result I cut each of the decal pieces as tightly as possible, following the edges of the prints. This way the excess adhesive surface would be the smallest possible. Thanks to the tininess of some of the decals this led into having little surface to grab on, which in turn made applying and positioning them quite a bit slower.Funnily enough the decal sheet had some "extra" decals which didn't have a place marked on the instructions - and as a muggle of sorts I couldn't guess where to apply them. Some of them looked like markings for refueling (or service hatch) markings, though. In the end I decided not to start guessing and did only what the instructions suggested.
A couple of the decal types had an extra one (those red marks on the top and the pluses in the rear fins), but for some pretty weird reason the NO STEP texts on the wings weren't in sufficient quantities. The instructions demanded n of them and the sheet had n-2. To make matters worse, two of them went irrecoverably tangled, so the left wing was going to have a noticeable amount of markings missing. Had I been smart I would've applied these symmetrically instead of the way I did now: right wing first, then the left one, the problem would've been insignificant. But as all the decals had gone on pretty well with only a gentle amount of swearing, I didn't expect problems with these, either. I really don't know why these ones were so damn problematic.
If you noticed the nose, you'd notice that only the left side has the mascot owl. Maybe it's nothing weird, as I have been accustomed to seeing them only on that side, whatever the picture / mascot / pin-up girl was. The sheet contained two of these owls but the beast didn't really agree with me and tangled up badly. My nerves did the same thing and I threw the whole semitransparent ball away in disgust.


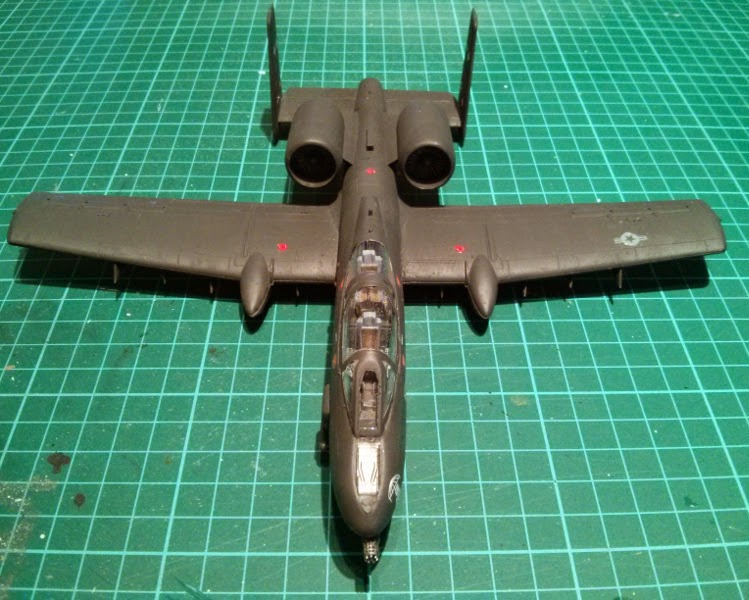 |
| They are straight, trust me |


 |
| Even those landing gear pods have some markings |
 |
| Swoosh! |
I guess that's all about the decals, but they just stand out so very annoyingly. Silvering is the term I've heard. So, I guess I have to go and dig out my "matt finish" contained and apply it all over.
The big boys always tell that before doing the decals and weathering one should apply a shiny varnish / coat and afterwards a matt / dullcoat. But I really haven't given a rat's behind about this sort of hi-fi tinkering nor have I felt the need for them. That includes this project and I should've followed the example instead of doing what I always do.
Then someone has the gall to ask why I prefer painting the markings myself... Here's a good example of that! Oh well, who am I to tell others what to like and how to approach their hobby :)
Final mess
I painted the wingtip lights, the one on the right green (VGC 72029 Sick Green) and the left one red (VMC 70926 Red). After they dried I applied a good layer of Vallejo's matt varnish (70520 Matt Varnish) in two sessions. Maybe that helped a bit with the eye-searing silvering effect and maybe it didn't. Out of curiosity I took a couple of photos:


Next week we'll be taking a look at those excercise bombs. I promise it, not that there's anything else to do on/with/to the model, anyway...
No comments:
Post a Comment