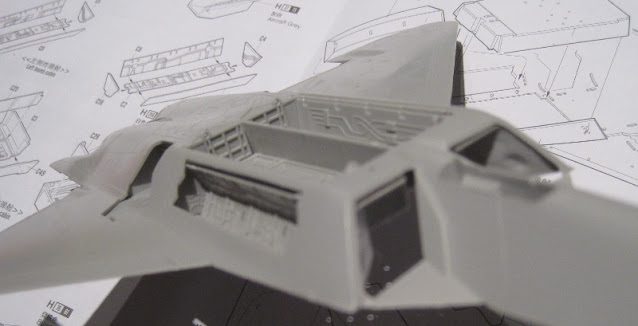
C is for cockpit
Again, following the neverending traditions of airplane modeling I started with the cockpit. The ejection seat was amazingly detailed, it even had some container-like cylinder shapes beneath it and it was made out of five individual pieces. Nice touch, I say, but no one can see them if and when the plane's built the "normal" way.Where the explosives live
As I got carried away with the build I forgot to take pics of the first stages. Do try to survive.I was to build three bomb bays, of which the centermost was the largest one and issueless to assemble. The side bays, on the other hand... Well, they took a bit more work and they didn't sit in as nicely as I would've thought. I trust that if they suck, I can somehow camouflage them - if by nothing else, I'll glue their doors shut to keep my hideous secrets safe.
The engine intakes got some very funnily shaped vanes (inside the airframe). I had to turn and turn them in my hands and on the model quite a few times because I just wasn't sure how they were supposed to go on. Despite being installed just the way the instructions (vaguely) say, there were insane gaps but I guess they'll be somehow masked or hidden later on.
Both main landing gear bays were just big boxes. They fell in just nicely. I'd like many more pieces to work like that.
A drum magazine engine
Well, the engine nozzles looked like a combat shotgun's drum magazine to me... I also didn't really know if the vanes were absolutely correctly set. The instructions weren't too clear on that again so I decided that they could be dynamic or something. That's what my excuse is going to be if someone wonders.At this part I, obediently following the instructions, glued the airframe halves together and tightened the most critical-looking points with masking tape. I finished up that evening but gluing on a couple of sensors and then left the setup to cure. [70]
The next evening I attacked the rear wings eagerly. They were nicely problem-free to assemble and attach in place. Into the bomb bays (in the photo the main bay was done and the side bays untouched) I glued the pylons but left the bombs and missiles for much later. I decided that I'd paint the plane in this state and glue all the hatches, doors, wheels and the nose landing gear after everything else was done.
Working this way I'd ensure that the painting of large surfaces would be as problem-free, quick and as simple as possible. At least the last time the landing gear bay doors were a bit on the way while airbrushing. Trial and error is the way I find these things out.
 |
| This looks quite sci-fi -esque |


No comments:
Post a Comment