Mastodon

26.6.13

On vacation: setting up the balcony

Rushing kills you

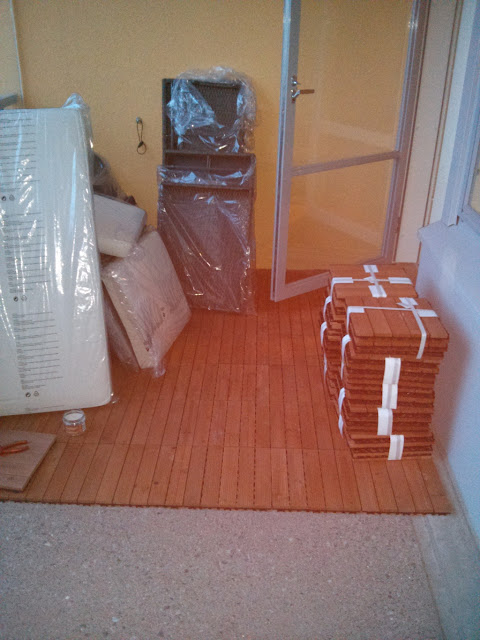
Now, after living in our apartment for about one and a half years we finally managed to get a grip of ourselves and invested into something to cover the depressingly cold, uncomfy and grey concete floor. The short-lived summery weather didn't hurt our interest in this project in the least.


To cover the floor a set of 30x30 cm puzzle pieces were assembled. All of them ended up pointing to the same direction because in the beginning we thought that the physical limitations (surface area) wouldn't allow us to set them up nicely in the chessboard pattern. Afterwards we noticed that, yes, indeed, we could've done that after all. Hindsight++.


All in all I think I wasted two about one-hour sessions with these tiles. Of course I could've done all that in one go, but thanks to other things invading my calendar, I just couldn't spare that time.


Who sits on the floor?

While the floor was going to be worked on, the old foldable and easily relocateable chair-table set had to be replaced with something sturdier, comfier and more permament. It took me something like those two one-hour sessions to assemble the sofa, chairs and the table of the set.


This was a nice, quick and easy project that improves the apartment quite a bit. As the end result the balcony has been much lots comfier and quite a bit more appealing, too, to sit in - and it's been used much more than ever before. It's very pleasant, thanks for asking!

19.6.13

Tinkertinkertinkertinker

Engine nozzles

These engine nozzles were in an interesting shape to say the least. As you can see in the photo, there's a ridiculous mold line in the middle of the damn things. It didn't take more than a couple of minutes to file that garbage out of the way, I was just baffled. Maybe it's just the age showing or a weird, weird planning in general.


Wings

Next step: I smashed the wings on and left the plane on its roof to allow the wings to cure in a proper-looking position. Thanks to that I couldn't attach the rest of the control surfaces and I'll just do that a bit later.  Though as it [the model] was belly-up, I went and glued the landing gear doors on. The setting up was fascinating to say the least because there were no attaching points anywhere, all I had was the tiny studs but no holes for them, so the only guidance was the tiny strut in the front of the landing gear well.

The landing gear itself will be built and painted separately and attached only in the end, whenever the whole plane has been painted. That's wisest, I believe.


14.6.13

Minor rhinoplasty and intake venting

Simple is beautiful

I filed down the nose cone's attachment points, as it ended up having some odd angles that didn't really belong to the plane. For some reason I didn't dare to go overboard in my fear of completely ruining the model. Basically in my mind even a minor improvement was much better and more valuable than a potential waste of the whole project. How very surprising, don't you agree?


While I was working, I slapped the engine intake vents on their places. Then I stopped to wonder if I should proceed to attach the wings or the landing gear doors. I wasn't really sure of which was the best approach, so I didn't do anything else. Maybe I'll attach those doors first. Perhaps.


11.6.13

The ongoing arms race

Old age doesn't come alone

My past birthday brought me, among some other things, stuff like this. I guess I'll come up with some kind of use for these artifacts... Bwahahahahahahaaa!


Washes, pigments and tweezers

4.6.13

More madness

The pilot

I worked out a set of belts that aren't supposed to be called seat belts but something else. In any case, I cut up a couple of slices of Tamiya's maskin tape and looped them around my pilot's shoulders and had them connect at his crotch. Then I applied a bit of Devlan Mud to tone the bright colour down, hoping it'd work here as well as in the M-10's interior.
While I was excitedly fooling around I bent a bit of iron wire to make the ejection seat launching handles. Somehow it just ended up being a bit too big... And the stick's way too weird, in an odd place and it even looks wrong. There was no way I could've started fixing that one as well. Enough was enough.


The workspace

Finding a good and clear pic of the Mig's throttle lever was surprisingly difficult or my g-skills are again a few points too low. In the end I decided that a black-painted handle-like piece attached to the inner left side of the cockpit works just nicely. Then I painted a few green lines and shapes to the display blocks I built the last time to pretend that the multifunction displays had some content. To their sides I added a few red dots to represent buttons and/or indicator lights.


The tools

I met the infamous Lasse last week one afternoon regarding this project. The totally casual and normal-looking plastic piece swap took place next to the Central Railway Station and no one paid any attention to us. What was it all about? Well, my model was unarmed and he just happened to have a load of excess Soviet weapons in the same scale... Air to ground weapons was the theme and what's better than that?


The pic offers some AA-8 missiles, PTB-1150 external fuel tanks, UB-32 M-57 rocket launchers and a S-250 OFM rocket. Excluding those ef-tanks this stuff looks like it means business and that's just what I like!

The hull

As my final task in this iteration I glued the hull halves together and tightened it with some tape. I'm afraid that the nose has to be filed and sanded a bit because it looks a bit rough just in front of the wings. You can see it in the photo, I believe. In any case I try to keep myself in check so this project doesn't get any more out of hand than it already is.