Mastodon
Showing posts with label Tricks. Show all posts

26.2.25

Launcher assembly

A wooden A-stand

This launcher was a simple device, it was built from four pieces. These pieces were supposedly wooden, I just failed to discern any woodgrain on either side of the parts. I had not had a more perfect opportunity to try another of Uncle Night Shift's tricks that he has used a few times to make plain polystyrene to look more like actual wood.


Before anything else I snipped the pieces off the sprue and got the large excess chunks off. On the flipside the bits were much uglier than the outside, especially the main part #1 had huge lumps of ejector pin marks and whatnot that made it look more like a Lego piece. When that was done I made some passes along the parts with my file cleaning brush.

At this point I didn't stop to clean them up with liquid cement but just built the frame itself. I started by leaving the hinges free to move so I could play with the angle. That didn't work, it wouldn't stand on its own without collapsing. So I glued it in a fixed position.


Munitions

With the frame done I built the four rockets. Two of the rockets were of the 28cm HE variety, the other two were 32cm napalm rockets. Wurfkörper Spreng and Wurfkörper Flamm in the original language. This photo here showed that especially the second from the bottom especially needed some more cleanup.

Launcher leader

The time I had available allowed me to assemble one of the five figures, and the randomly chosen one was the boss of the unit. He was looking at his wrist watch for the launching times, hand ready to swing down for the FEUER! command. Cleaning these dudes was going to take some time, and I was already stressing about painting them.


My mood was going to decide if my next step was going to be the people assembly, or the launcher crate PE folding step. My decision was also going to be heavily influenced by the time I had the next time I sat down with this kit. Another possible path was also just a simple cleanup session to get the rockets paintable, or glue-cleaning the rack's wooden parts. Ah, the excitement!

22.5.24

Final, weird details of the pre-painted Panther

Enginerding tools

I had asked much earlier, if Project Assistant II wanted the tools painted separately and at that point the answer had been yes. So I spent a moment one evening to paint them: dark grey base for the metallic parts, and wooden parts with AK Interactive's wood set in a couple of layers. This time I went for the darker browns. Then I sorted the bits into order and superglued them on.

The superglue applicator trick

Maybe I lamented about my superglue being runnier than what I preferred the previous time I used it, and that had the habit of increasing the risks of making a mess. Now I learned from some smarter internauts. I just dropped a tiny puddle of superglue on my palette stand-in and used a bit of bent wire to apply it in places. For my requirements this was more than accurate enough, as I got the glue exactly where I wanted to.

Shovel and wire cutters, C-hook missing

Extinguisher, startup-crank, axe. C-hook 2 missing

Sledgehammer and a prybar, the top one was molded in

Especially the fine-tuning sledgehammer's handle looked fine by me. Funnily enough I hadn't realized earlier that the lump in the end was an attachment piece, but the model's owner didn't mind my silly mistake.

For some reason the Project Assistant II was very eager to get the jack installed onto the tank, even though she didn't know what and why it was. Still, I built it and obediently installed it.


Oil wash

Again with a gracious permission I added shadows with Abteilung's Sepia. I didn't go overboard, I just wanted to see and show that the details could be made pop out with a tiny bit of paint. I think it took maybe half an hour all in all, and I didn't even touch the road wheels because I didn't want to make the rainbow darker.


Now the parade of colours only missed the final touches of the artist, if it was to be had, and then a final protective layer of Humbrol's dull cote.

18.1.23

Jagdpanzering 3

Third session

Now that I found one of my pin vices I could proceed with the rear armour plate. Or punching holes through it, as the remaining pieces for this stage required locating holes for their pins.

Rather excitingly 66,666...% of the freshly drilled holes were left to wait for a bright future. As long as the instructions were up to date, I was expecting zero problems with these.

An effect test, again 

Next I cleaned up the lower glacis plate for installation. Based on the recommendations of a couple of colleagues, I had listened to some episodes of Uncle Night Shift in 'tube and while that guy was taking his processes to a few levels further, some of his ideas sounded plausible for me to try even if I wasn't going to try all of his ideas. One neat little thing I saw in one of the first clips I saw: making/improving the flame cut markings in the armour plate edges in the jigsaw-puzzle -like joints using a hobby knife (and then toning it down a bit with a quick and simple dash of liquid cement).

Just to be kind of safe, I started with one section only. The result looked neat, and it didn't take much time at all. At this point I didn't play with the liquid cement and postponed it to a later timeslot.


At least based on this test on the lower glacis plate the results were nice-looking and a pretty hassle-free thing to do. How that affected the full model itself remained to be seen.

Lower hull work

Now I  glued the front- and rear armour plates into the bottom hull. A good amount of the suspension setup got also installed, the road wheel spring housings were still waiting for their turns.

What in the Empire had been done next to this model, as the bottom of the model was that splashed?


2.10.19

Undercarriage II

A new ascent

The previous post about the shuttle ended in a bit of a minor key, now I had found new excitement. To attempt to scratchbuild a full new set of landing gear was not the sensible option. I just could not rely on me getting anything reasonable built and especially something that was sturdy enough, consisting of polystyrene and contents of my thousand piece box.

I had heard a good bunch of times in Adam Savage's doings the idea of mixing baking soda with superglue, your superglue would set the glue even faster and strengthen the bond. This was something I really wanted to try out, because that might save my badly mangled landing gear and also potentially help carry the weight of the model.


The other day I had gone to buy a couple of lenghts of different profiles of polystyrene, third-pipe of two consecutive diameters, two cylinders of the same diameteres and a bracket-shaped beam in case I needed to support something. The last time I thought I'd maybe add a piston-like construct for support or something like it, to both keep the structure more sturdy and also to bring some real-world-inspired styling to the operation of the landing gear setup.

Kitchen-y tools

The first step was to drop a few pinches of baking soda onto a metal lid I have been using as a palette. My vague understanding was that the cyanoacrylate-sodium bicarbonate operation could be approached a couple of different ways:

When filling gaps or holes you'd fill it with the baking soda and then apply the liquid superglue on top of that. This should result in a flat and sturdy surface.

When making a joint stronger you'd sprinkle the baking powder on top of the glued area and that'd accelerate the curing / drying and also strengthen the seal considerably. Kind of welding but with glue, it has been said. This could also be done so that the other part would get the glue applied on it, while the other got the baking powder and when those got joined, the case would be closed rapidly. Though that'd require that everything was pretested, dry-fitted and especially thought of well, properly and in time, because this method would leave little to no time for readjustments.

Against my typical cautiousness and general waryness of anything unremediable, I decided to go with the last approach. My superglue just happened to be suspiciously old...

The attachable piece I covered thoroughly with baking soda

The target area covered in superglue
Yeah, because my superglue was best before at least two days ago, as I realized immediately when poking the bottle, I decided to make sure it stuck by also sprinkling the baking powder on top of the setup afterwards. The risk of my glue being way too old and its components mostly separated and might not set at all but instead fill my landing gear bays with suspicious and disgusting goo was a noticeable one.


Because of my suboptimal materials this handy trick didn't work this evening just as nicely as the big kids told on the street, but it did work better than outdated and halfway-dried-in-its-bottle superglue has worked in the past. The left landing gear unit set into its slot in a decent time.

21.12.16

Germanification

Spoils of war

Perhaps my choice wasn't specially surprising. In short the IS-2 would be in the desperate hands of Wehrmacht. To make this apparent I used a different shade of green (VMA 71096 Panzer Olive Green) to paint over the Soviet white markings so that they'd be both covered and they'd seem to be painted quite hastily. I also tried to get some runny paint effect done here and there to make the whole cover-up look more panic-driven.


You can recognize the krauts by their markings

Of course the tank had to have some Balkenkreuz so that the other germans would recognize it as a friendly unit. Based on some googling for german-captured soviet tanks they always had much, much larger and kind of overdone block crosses and there were more of them, sometimes in weirder places than normally. That made sense, as it wouldn't be of much consolation if you had some friendly markings but the Panzerfaust-wielding Volkssturm member just couldn't see it and fired in panic.

I freehanded an amount of black plus signs both in the hull and the turret. For the placing I rotated the model in my hands in different angles and I tried to choose so that whatever the rotational angle between the turret and the hull were, you would always see clearly at least one or preferably more of the Balkenkreuz.

When the black paint had dried I took a smaller paintbrush and painted white edges to each of the pluses. I kept up the theme of hastiness and maybe even frantic sloppiness with some paint running down and general imperfection of the shapes. These weren't painted with stencils, but quickly slapped on as soon as they knew that their captured tank was useable.


What about our dear friends in the Luftwaffe?

Otherwise that was all good and nice, but you couldn't necessary tell that from the air, if (when) the Luftwaffe pilot was busy and maybe not too well informed. At that time in the history this may not have been too far from the truth (or it could be overoptimistic for the Germans, even). I decided to try making a scale model flag.

My first attempt was just misusing some tin foil from the kitchen. I had read and heard that if you painted kitchen paper with a 50:50 diluted white glue you'd get something neat. In case the tin foil approach failed I could try that one. Or I'd try the kitchen paper or tissue paper flag some other time.

This approach was simple. I tore off a decent piece of the tin foil (1) and airbrushed it with white primer. Being the lazy bastard I am I then just put a paint bottle cap in the middle of the white area to act as a mask. Then I blasted red (VMA 71085 Ferrari Red) from different angles while holding the cap in place with one hand (3).


Just as soon as the paint had dried decently I cut off the excess to get a more or less flag-shaped and proportioned piece. Then I painted a skinny swastika on it by hand.


While checking it out I noticed that this flag was way too large to be draped over the turret, so I put it to the next best and clearly visible place: on the rear deck. That pair of tow cables could be lying on top of it to keep the rag somehow in place. In the next photo the foil sheet was there just lying freely and without too much of a care in the setup, but you could tell it was quite thin.


Weathering a bit

Of course the tank was way too clean and nice. Just like the nazi rag was way too ... well ,the way it was. Something was to be done. First of all I loaded my airbrush with more or less aptly named dirt (VMA 71133 Dirt) and then sprayed that broadly and from an unusually long distance. My idea was just to get a sort of a filter over the monster, a dusty layer, if you will.


Pigments

My weathering subproject progressed the next evening as I worked on the bolt heads and some random edges with a HB pencil. To add to that I dug out my pigments (that included Vallejo pigment bottles, a Tamiya Weathering Master kit and two Tamiya Weathering Sticks - "Light Earth" and "Sand" (the third one, "Mud" I had apparently misplaced completely)).

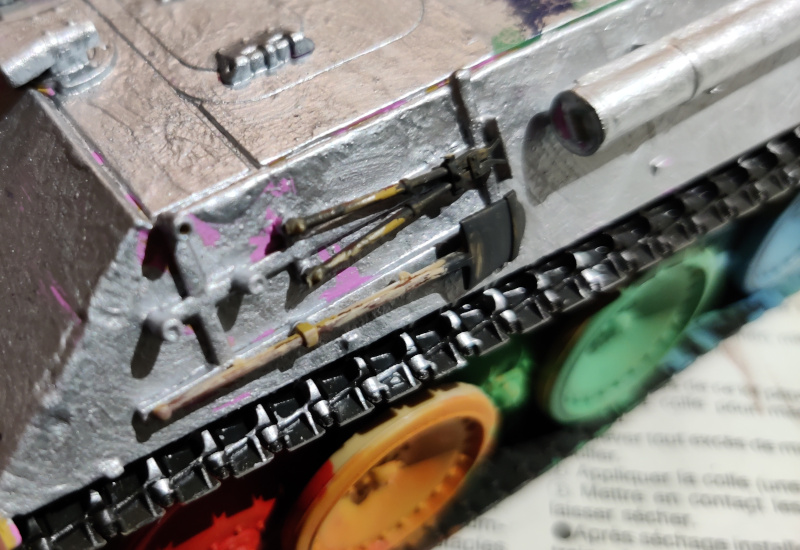
On the muzzle brake and the regions around the ends of the exhaust pipes I used black pigment ("Carbon"). Then on some selected spots, such as the glacis plate track links and the ends of the fuel drums I used "Fresh Rust". On the hull itself I mostly used "Natural Umber", "Burnt Umber" and "Burnt Siena" powders. This time I didn't work that much on the track dirtification. My main attention was on the hull, especially the walkable areas, and the turret, the handlebars and wherever people would've been walking with their filthy boots. Oh and on top of the flag, that wasn't going to stay clean at all.


As you may have noticed I didn't plug the two extra drill holes - I poked around them with an old and dull xacto knife to get them a bit uglier and angled. Then I painted their interior surfaces with steel (VMA 71065 Steel), maybe to represent the holes made by AP ammunition, from the time this tank was still owned and operated by the Soviets.


One more time

I wasn't entirely happy with the dustiness yet, so I made more of a mess in general - I used a small brush to spread Burnt Umber here and there, quite liberally. Then I applied more Natural Umber but in smaller amounts. That was enough and looked good to me, so I then loaded my airbrush with Vallejo's Pigment Binder and applied that generously. I noticed immediately that I should've turned my compressor's output pressure down quite a bit, as now some of the pigments flew off with the blast of binder and air, even though I started spraying the liquid quite far away from the model itself. Maybe I'd do this better the next time.