Mastodon

30.9.20

Steely details

Brushing the little bits

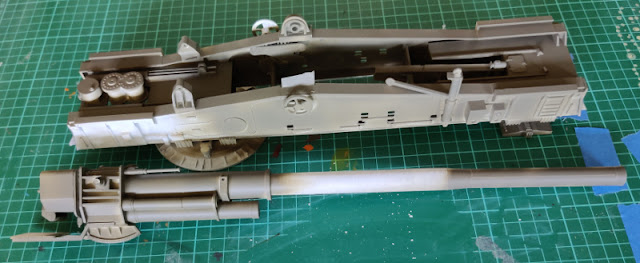
At this point I started rechecking the instructions for what actually were the bits to be painted metallic after I had already blasted the whole thing green. Off the top of my head I remembered that the cylinders of those two cans (but definitely not the lids) in the carriage's front were to be painted, in addition to a couple of other small pieces. But of course I was wrong.

The hydraulic cylinders had the lids on the painting list, as were the weird tracks on both sides of them, and a set of rails and stoppers framing the ramming device. The handles to control the setup's elevation were painted as instructed, as were the handwheels for the elevation for the gun barrel itself. Though unlike what the Revell folks wanted I only painted the outer rim and left the spokes green, as I expected to be painting them some other colour rather soon. As you could see below, the setup was already looking a bit dazzly for a weapon of war and I didn't even follow the suggestion of painting the gun cradle's axles metallic. Just to see how it worked I only painted the innermost part and even that seemed a bit weird.

Steel highlights of the carriage

Maybe the barrel itself was somehow tolerable, I still had to iterate through the little rods with the steel paint. I just felt that this was a bit too weird this way.

The steel highlights of the cradle and the barrel

Round 2

After a good night's sleep. I felt that it was way too blingy and more like a beginner's first Warhamer 40,000 tank or something, all it lacked were a few dozen skulls and shit. Still, I did an image search and quite a few finished models looked just like the instructions wished, but especially the hand wheels looked like they had been lifted off of a clown car. The parts that were to remain steely I was going to drybrush with either of my duller/darker metallics, so that they wouldn't stand out quite that much, as if the device was fresh out of the factory.

So I repainted the handwheels, the inner ring of the gun axles and a few sloppily painted overflows. It was noticeably better this way. On the handwheels painting over the metallic was a bit less covering than perfect, but maybe it'd work as paint being worn, just done the opposite way than usual.

Repainted metallic pieces

The rammer's through-like bit I did paint metallic, with the "it'll be dirty later" looming in the horizon. As the carriage was now it was better than before, but still pretty striking and not in the best of ways.

Carriage's metallic pieces updated

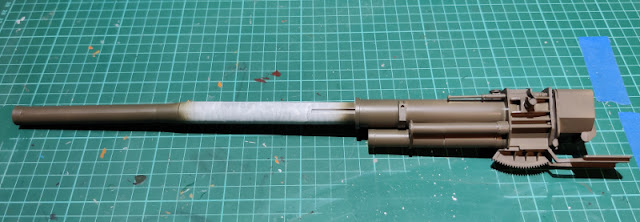
At this point I removed the final piece of the gun's rear end and painted the remaining pieces: the tail end of the barrel and the rods with steel, the rest green just in case that it could be seen from a strange angle later on. In the natural lights and bare eyes the model's pieces didn't look quite as weird as seen through the digital camera.

The tail end of the gun, painted

23.9.20

A steel barrel

Sun mask

I spent a decent time masking the cannon's barrel, to be sure. Protecting the tipmost part was a simple setup of two overlapping pieces of tape, but on the stem side that didn't fly. As the end of the paintable area was where the barrel went inside the housing setup that was going to remain green, I had to cover the mouth of the other one first. I just applied a bunch of tangential pieces that anded up looking like a strange sun. That was enough to protect the greenery from overblasts.

Masked middle section of the barrel

Painting!

The instructions kept telling that every metallic piece had to be painted as aluminium, but I wasn't going to even consider such nonsense, I loaded the airbrush with steel (VMA 71065 Steel) and blasted away. As was to be expected, the contrast between a bright metal and the dull, boring green was almost eye-searing.

Steel-painted middle section of the barrel

With the tapes removed and on its own it maybe looked a tiny bit less awful, but still damn weird. My next step was going to be painting the rest of the metallics with a paintbrush, and I didn't expect the situation to become any prettier. More bling on a flat green bulky thing? Not a promising mental image.

Cannon's parts, with masking tapes removed

16.9.20

A drab world of olives

First splashes of colour

Getting to one of the painting stages I was pretty eager to see how the atom cannon behaved when it looked more like its real self instead of an untextured 3d model. The paint I used was Olive Drab (VMA 71016) as instructed, even though any of the german camo greens would've also worked just fine. On my first painting session the time was, as always, somewhat limited, so I tried to get a decent enough coverage that showed if the whole thing made any sense. While I had to hold on to something, there were noticeable unpainted patches on both ends of the carriage.

Osittain oliivinvihreäksi maalattu lavetti ja putki

Second round

On my next painting session I covered up what I had skipped the previous evening and fixed the shadows left by the first painting round. Slowly the cannon started looking like a proper thing in the universe, even though painting the whole damn thing in one boring colour felt just like that: awfully boring.

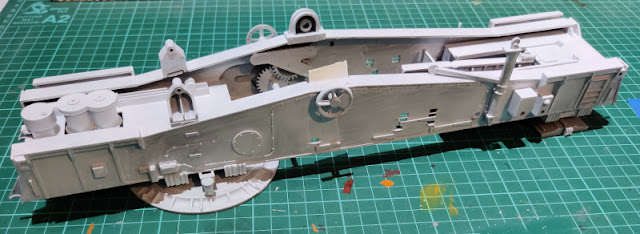
The carriage

The biggest problems of the carriage's painting were more or less hidden, inside the frame itself. With some good luck no one, including the unforgiving eye of the camera, would ever notice anything, but the risk existed. A few details were still waiting to be painted, but those I didn't even dream of airbrushing at this point anymore.

Oliivinvihreäksi maalattu lavetti

Maybe a bit of weathering would make this a bit more interesting. Also the assembly of the cannon would bring some more excitement to the build.

Oliivinvihreäksi maalattu lavetti

Carriage's bottom


Barrels of fun

I took (I thought) a great deal of care of painting the cannon's barrel, its cradle and their neighbours, while leaving the middle part of the barrel untouched, for it was going to be painted with a steel-type paint. For a while I was unable to make me mind if I should or should not disassemble the rear part of the gun and paint it in pieces (and multiple sessions). Being a lazy character I didn't do that, but maybe undo some parts for the next cycle.

Oliivinvihreäksi maalattu putki kehtoineen ja peräkappaleineen

Oliivinvihreäksi maalattu putki kehtoineen ja peräkappaleineen

9.9.20

Fixing the priming

There we go!

You could immediately tell what was the best tool for this sort of work. During a couple of evenings I redid the priming with the freshly treated airbrush on the components I had already built, and the results were on a completely different level. Of course the brushed-on primer layers could be seen through, but perhaps it wasn't that sort of a crime on a cannon. Those beasts were going to get crummy in any case, living in the nature and all.

The carriage, re-primed

The carriage I redid all around, inside and outside. The cannon's barrel with its cradle and related equipment got painted too, this time I had set the moving pieces into a "ready to fire" mode. The middle section of the barrel I left as it was, as my thought pattern was that it was going to get painted steely in any case, but I really couldn't figure out later, what did that have to do with anything in the first place...

The barrel etc., re-primed

The barrel etc., re-primed


2.9.20

It came back home!

Badger badger badger...

It didn't take many days from the dropoff until I got the sms informing me that the servicing was done. Within a couple of days I took a quick early evening drive to fetch it and ask some stupid questions about the process. My airbrush had indeed been dirty, but I had also at some point managed to install the tip into a wrong place, which had definitely not helped with the issues. Luckily I had not broken a thing, so I gained some scratches on the device and a "you silly fool" moment for myself. The time & materiel costs were less than 50€ and the amount of time and effort, not to mention madness, they saved were worth much more. All in all, a great deal from my viewpoint.

Airbrush after service

Now I needed to get some time to return to the priming, in addition to everything else. If I had enough time for everything, that is.