Mastodon

29.3.23

Jagdpanzering 13-14

Thirteenth and fourteenth sessions

13

For this wagon I started the track assembly process the same way as one of the previous individual link tracks: with the straight track parts that were located under the roadwheels. I measured the ballpark length with the 1cm grid of my cutting mat.

With a pretty simple test I got a value of three track links for about a centimeter of track. 13 * 3 = 39 per side for just this part (the whole track was supposedly about 33cm, meaning about 99 links per side). Getting more than three of these links stay dry-fitted together at a time on this cutting mat was foul, so I ended up laying together three at a time, gluing them, and after a bit gluing those three-link subchunks together.

Tedious as something very tedious? Yes.

During one session I got these two thirteen-centimeter pieces done. But because the remainder was longer and had to be bent around, I didn't think I could get them both ready in one go, so the other one would have to wait for the following session.


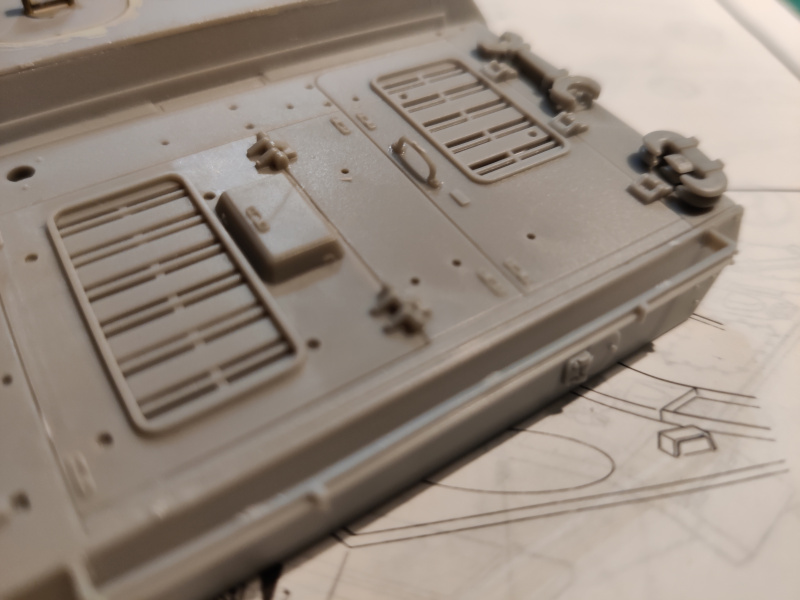
As you may have noticed from these photos, all the wheels were still loose while I was laying tracks. I had this delusional idea of being able to build the tracks so that I could take them and the wheelsets out and put them back without swearing.

14

The left/right edge of the mudguard thing was just so much on the way that I wasn't quite able to move the tracks in and out the way I had thought I could, and every time I tried anything the return rollers were falling all around. Shockingly I got fed up with it and glued them all in place. In the photo below I had set up the front loop, and was gathering my thoughts.

At this point I remembered that using some masking tape to get the track links to stay in line, and I'd get things done much more rapidly. I tried with the masking tape I first saw (crappy tape that usually didn't stick even onto itself) and it worked pretty well. As a twist ending getting that cheap tape off my track was difficult, so for the next track I quickly fetched my Tamiya masking tape.

The left track

Now that I got the right track done I had the time to take some more in progress photos. Here I was measuring the actual lenght of the remaining track instead of guesstimating. Had I remembered this on the right side, all of this would've gotten built noticeably faster.


My basic failure struck here. I had some but not a lot of time left, and I kinda wanted to get the left track done in the same session as well, instead of waiting for the next opportunity.

And what has been said time and time again about rushing?

Laying the track links in was quick, the gluing didn't seem to be problematic. Maybe I allowed my glue to set a while longer than I needed to, because I was somewhat worried of my connections failing due to wet glue and weak bonding. The result was that bending the track to follow the curves cracked a couple of connections a bit. While tweaking one I was poking around too much and the failure snowballed around the area of the frontmost return roller.

Just a tad annoyed I raised my hands and stopped touching the tracks completely right that moment. Maybe I'd return to it after a few days, maybe I'd just leave it as it was.

I spent a couple of extra minutes by gluing all the hubcaps to the sixteen roadwheels. This way the model was ready for my next step, whether it was a fixing or a priming session.


22.3.23

Jagdpanzering 10-12

Tenth, eleventh and even twelveth session

10

This session got started by me going through each of the flame cut edges I had been working on throughout the build. Somehow I had managed to not notice that I hadn't treated each of them yet. Whoops.

While looking at these edges I decided that if I didn't manage to glue and press the casemate's front plate snugly against the frame I would be puttying and sanding for sometime, and more than I had expected. That stuff was tedious, but one couldn't leave the model looking like this, either.

Anyway, I glued the exhaust pipe into the rear of the machine. While that was settling in place I spent a while being terrorized by the roadwheel-side of the Revell track links. Those were full of massive chunks of excess plastic from the moulds. Without a quick visual confirmation on the sprues in the box I was expecting them to be equally awful all around.

I was pondering if I should have picked up a file or the dremel into my hand next. With this track link count and amount of annoyance I was gently leaning towards the motorized tool but I had to remind myself that it could be a bit of a brute of a tool for this business.

To top this all I had been postponing the final cleanup of the roadwheels and their colleagues, but at this point in the construction process all I had left was the unfun like cleaning and fixing. Without more interesting options I accepted what was coming and picked up a file. About thirty calm minutes later these bits were ready for the next stage.

11

For this stage I changed my posting decision so that I combined the following 2x45min sessionfuls of whining to this one post. I still documented and numbered my photos so that I could follow my own time usage. The rest of you might not be that interested in such details.

First I clogged all the extra cracks, crevices and holes with putty. The many years old Mr White Putty was baffling in its quickness to dry. I had gotten used to the process of me first squirting an amount of putty onto something, and then applying it onto the model in smaller amounts. It was still good enough to get the issues fixed, but the next time I'd buy something that would give me a bit more time to work with it. I really wasn't bothered if I had to actually wait a bit before sanding/filing.


After that I finally started working on the track links, in this photo some of them had been filed smoother, while the lower row showed untouched links with the ejector marks. I just filed them with a small flat-headed file (I tried a few, this one worked the best for me here) and did that on enough links to get the upwards-facing ones fixed. Oh yes, I was about to cheat by leaving the ones you couldn't see from normal viewing angles untouched.

12

Well of course I couldn't just leave them unprocessed, because the knowledge of doing this the lazy way (or not doing even that much) would've bothered me later on. And as we have all noticed, one could never count on the angles, either.

Amazingly I got the full set filed during my 45 minutes. At some point I calculated how many I had left, and as it was only 96 to go, it felt like it was going to be done in a blink compared to the pile I had filed already. All this felt pretty nastily in my filing-hand's wrist.

After filing the track links, I sanded away most of the annoying paint stains and the few badly cleaned up plastic bits in some corners. Not all of the prepainted stuff was removable in a reasonable time, but the improvement felt good. The armoured surfaces may have suffered a bit from my over-rough sandpaper. This sounded like another case of a new round in the endless arms race just behind the corner.

In my own opinion I managed to clean the rear side hull's  unnecessary gaps shut and cleaned up pretty nicely. I was almost surprised by the fact that patience brought better results than rushing. Who'd thought?

Finally I washed the whole damn thing clean of plastic dust and whatnot. First I did the triplet of track link sprues, and then the tank destroyer itself. Then I just left it inside its box on top of some kitchen paper to dry, and to prevent redustification.

15.3.23

Jagdpanzering 9

Ninth session

Looking at the instructions it was pretty clear that the building process was nearing completion. Thanks to my time situation this would still consume a session or two, depending on how I'd approach the case of the road wheels and the tracks.

7.5 cm Panzerjägerkanone 39

A casemate alone wasn't too useful, you had to have a barrel to conduct business. I got so excited building the 75mm cannon that I forgot to take any in progress photos. That hinge setup was annoyingly painted also on all connecting surfaces, so before anything I had to scratch off an amount of paint, to ensure the glue taking hold.

The barrel sat nicely insided its armoured friends, and the Saukopf behaved well, too. The barrel still needed some work, it had some irregularities around the seamlines.


Warping

Now I started gluing together the upperhull and the Panzerwanne. This first photo showed how warped the halves were, when I pressed the hull together in the rear end. There was a clear gap of many millimeters in the front. Had I failed this miserably or had time played its tricks on me and the plastic?

By carefully poking and pressing I found out that the halves fit together well, so it apparently wasn't a construction error on my part. I decided that this would be fixed with patience. So I glued the hull halves together in the rear, and let the glue flash.

After a while I quickly tested my approach by pressing the front into place, the glue in the rear held as expected. I then glued the next ~quarter of the way and let that flash. Again a trial and I glued the third quarter. This way I got the frame installed nicely and straight in four steps.

The fit of all of the front edges wasn't perfect as shown in the next photo, I would have to fill them a bit later on. At this point I finally went through my attempts at the flame cut effect with liquid cement, which softened the grooves.

Random details

The flimsy feeling bit in the rear end of the tank was to hold a length of track, so I assembled a handful of links and after the glue had cured enough I dropped it into the holder. In my usual caution and paranoia I had been a bit too cautious, and was short a link. I added one more track link and it was good. At this point I refrained from gluing the track part into place, as I wasn't quite sure of my painting order yet.


The exhaust barrel

This was a surprisingly productive session, I even had time to start with the exhaust pipe. The (relatively) massive thing consisted of only a couple of pieces, I just didn't have enough time to also glue it in place.

8.3.23

Jagdpanzering 8

Eighth session

When I got back to the model, I ended up taking care of the rear deck's assortment of engineering tools and the other equipment. One of the backup spare roadwheel holders (on the leftmost hatch, right next to the jack) snapped while I was removing it from the sprue. Despite its flimsiness I managed to fix it.

The deck contained tools that have become very familiar with other German tanks, such as those wire cutters, shovel, axe, the aforementioned jack, crank and also the barrel cleaning rod in sections on the rear wall of the casemate.

The 75mm PaK 39 had to be shortened a bit from the tip, according to the instructions. I didn't install the muzzle brake, also because my friend Tape had already liberated it from the kit to his own projects before he sold the set to me. That didn't affect my project, especially as the component wasn't required. I cleaned the seams a bit after gluing the halves together, especially the partially painted bits revealed some ugly lines.

As an interesting thematic leap the build path went to the fenders that were glued to the bottom of the casemate itself. There were ample opportunities to get corkscrewy results, but I seemed to have avoided them nicely.

Armoured plates were installed to shield the side grilles. At this point the drawings were abysmal and the pieces themselves had no clear "install here, this way" bits, slots or holes. I went eyeballing which has traditionally been a recipe for a disaster or two.

 Another to the opposite side. No, it didn't look right at all.

I proceeded by gluing the fenders to the rear end of the tank as well. During the process I fortified the connections a couple of times, in case my pretty old jar of glue was getting a bit less than reliable due to impurities. There were some signs of it, but so far extra gluing had been enough to fix any issues.

1.3.23

Jagdpanzering 7

Seventh session

Most of this session's time went into the rear deck's setup. First I installed the engine deck's side grilles. I was a bit concerned about their position being good, but in vain.

While the grilles were setting I glued on the headlight. I didn't check yet if I needed to pull an extra length of electric cable or was it good enough for a modeler like myself.

After that I returned to the rear deck to glue in the various handles and such.

The second hatch of the engine deck slipped in effortlessly. In addition I glued onto the deck that massive double-ended megawrench (or spanner, however you prefer) and the Zughaken or C-hooks (tow hooks, thanks Adam Mann for what I learned today).

That flimsy-looking and -feeling bar in the rear scared me a bit, but maybe, just maybe it wasn't going to get hit much and snap while installing something else. One could hope.