Mastodon

31.7.19

A cockpit update

Going my own way

This project pretty much begun with me searching for reference pics of the cockpit. Comparing to the Lambda-class shuttle cockpits in the movie this model has surprisingly few details in common, and I certainly wasn't going to go down the road of insane detailing. So I pulled a decision from my sleeve to use few colours for the buttons and displays (black, white, red, metal) even if a couple more would've been at home there (that meant I skipped a terminal-green and blue).

The basic bits

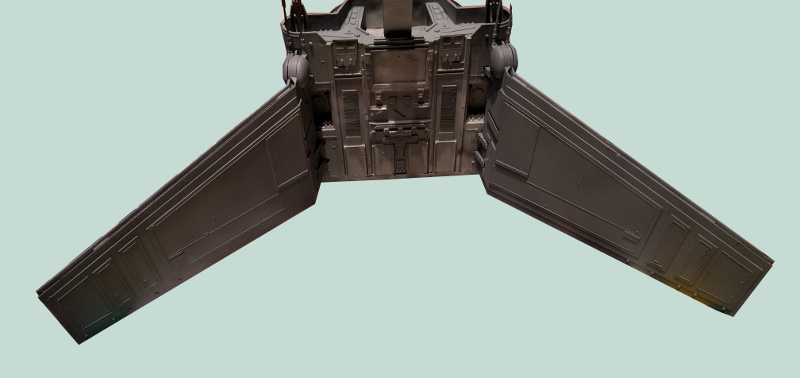
I started my detailing process by applying dark grey (still the same VMA 71123 USAF Dark Grey) to some of the surfaces that had gotten a bit too much overspray during the airbrushing sessions, such as the console panels. On the plain surfaces the very gentle hint of grey/white was just fine, as the overall look remained dark. While I was at it I also painted the frame edges where the viewport glass was going to be glued, as if it worked for airplanes, it was surely work here as well.

To give this cockpit a bit more worn-in look I drybrushed some surfaces with Steel (VMA 71065), which I also used for some randomish bits on the outside of the cockpit and the hull itself. The most noticeable marks of wear and tear I made on the door panels and the ramp in front of it. Finally I did a very gentle drybrushing of Steel on all the buttons, switches and displays.

Detailing

Both on the left and rights sides of the door was a set of lamps. In the Return of the Jedi they were a bit like blue WLAN signal strength markings. This model, on the other hand, had three light panels that I decided to drybrush with pure white (VMA 71001). My idea was that it'd look pretty nicely, but it wouldn't still be an attention-stealer.

Then I kept on applying white drybrushing over the buttons, because in my world just about all of them were going to be like that. For a short moment I was thinking if the light panels should later be treated with a satin or gloss varnish, but most likely they'd look more wet than shiny.


Now it was the turn of the displays and the things that looked like good old-fashioned dials on the dashboard to get black (VGC 72051). I decided that the plain black was going to be only a very limited thing and in very tightly contained number of things in the cockpit itself.

Next I returned with the white paint to add detailing to the displays I had just given a black backdrop. Both the pilot and the copilot (I was assuming) had somethingthat looked like a <= 14" CRT display in front of them. The leftmost one got a series of dotty rows to represent lines of text as an idea of a text-based status information or a system log, whatever they were reading from their MFD. To the rightmost one I tried to paint some kind of a X/Y axis for coordinates, for example.

Finally I took a bit of red (VMA 71085 Ferrari Red) and touched up a few buttons and button-like protrusions. Some of them were lonely and some were in small groups. What were they all about? I hadn't got a clue, some may have been "don't touch this self destruction thing accidentally!" kind of warning colours, some "this is important, so it's clearly highlighted" and so on. As I had thought before, maybe some keys could've been painted green and blue, without looking out of place, but at this stage I didn't feel the need for it.

Reinstalling the seats

As soon as these things were done for the cockpit, I glued the seats back in. Back in the day I had painted them, maybe according to the instructions, maybe because I just felt like it, with plain brown on the cushionage and lightish grey on the edges and backs. The contrast was strong and it looked kinda silly to me.

Now I repainted them with the dark grey (VMA 71123). Thanks to the overspraying effect I mentioned above, they were now clearly darker than the floor but not outrageously so. The seating part (the cushionlike part) I now painted flat black (VGC 72051). In my mind they now looked like a believable "metal frame with some sort of a disgustingly uncomfy vinyl-like padding" scenario.


24.7.19

The white bits, part 2

Finishing the wings

This was a pretty straightforward step in my project, plodding on the same tracks as the last time. Now I mixed my paint much more angrily, so the annoying half-dry paint spatters didn't cause issues

I begun by painting the bits I held onto before and proceeded to touch up the greebled trenches in the wings, just to be sure. Some of those needed another run, anyway.

Then I rotated the wings up and in a neverending circular motion airbrushed them with off-white. To finish up the session I attacked a few sections again, such as the shoulder-mounted double blasters' curved shield plates and the front edges of the hull armour (the front-facing surfaces I just covered with a post-it note to keep them not turning white by accident).


A generic look-around

Just to show how the whole thing had changed I took photos from the back and the front, also to show the greeblies. Of course they'd be much more impressive if the photos weren't scaled down so far, but I wasn't going to upload massive pics just to show a #wip feature.


I was surprisingly happy with the effect at this point. Of course there were some things that I was going to end up fixing still, but that's how it's always been and will remain so.

17.7.19

White overspray

Off-white

I had finally reached the stage of this renovation project where the look of the vehicle was going to change visibly from the previous iteration. Last night I remembered that I had bought ages ago some off-white for national insignia painting (mostly for Balkenkreuzen, and I still hadn't gotten to try out the sets of stencils I bought many years ago now!) and such. I thought that maybe I'd try it out and in the end, if I felt like it, blast a tiny bit of plain white from above, very gently. Maybe it couldn't even be noticed at all, maybe it'd add a bit to the result, but we'd find out in good time.

This was in line with the "shade by shade towards the final colour" method. The first and potentially only white was Insignia White (VMA 71279), that got its first appearance in the 'Mumblings now, and not on a German blocky cross, as I had stupidly assumed.

The cockpit submodule

Regarding the cockpit I decided that of this bit only the swanhead-like part was going to end up white. The neck - or the part that joined it to the hull (whatever this airlock / corridor was called in the specs) was going to remain grey. Maybe the look I was going for would work in real life, at least as an idea it sounded good, because the iconic features would be highlighted natually and the visual support surfaces and areas would also bring some depth to the entirety. Besides, if it was all the same colour, the shuttle would end up looking much more boring.


The spaceframe and wings

This time I started with the hull itself. The edges I painted by blasting from the center towards the outer edges, to protect the front and back ends from silly and unnecessary overspraying.

Next I pointed my attention and my Badger towards the wings, starting from the freshly-greebled areas with a gentle touch. I didn't want to drown the greebled trenches with paint, ruining the depth effect, I did as gentle a touchup I managed.

The wings themselves were pretty straightforward. Again I had either mixed my paint badly or it was a tiny bit drier than necessary, as the airbrush spat some flakes pretty much constantly. Perhaps a part of the reason was the high temperature at that moment, but these excuses didn't really help much with my irritation.

Again I left a small patch uncovered on the top wing for my own safety. Just like I said the last time, a 100% flat factory-like application of paint was not my goal (splotchless, yes, but...) and the fluffy cloud effect gave it a more used look.


Continuation ponderings

On the next session I'd cover up the handhold area and I'd wrap up the other surfaces of the rotating wings. After that I was going to be thinking with my head glowing red in which order I'd approach what detail and subtask.

The current plan was that I'd mask off certain rectangles for various greys. Maybe all of them weren't going to be dark grey, the middle grey could work on most, then I could use a different light grey on symmetrically located bits just for variety. Maybe I'd do that to one per wing surface, but at this point I knew I'd pretty much make up my mind on the spot, when I got that far and the compressor was already purring.

Some sort of an application of a light wash was looming in the horizon one. I was also thinking that I could apply some rain streaks on the shuttle sitting somewhere in its landing configuration. The engine exhaust ports were their own still shrouded mystery, as I don't think I was going to leave them as they used to be, glowing white.

Dry-fitting to check the effect

Now I wanted to check how my chosen look worked, because it was still decently easy to change direction. I felt it looked nice in white and the dark, totally untouched cockpit looked great already. The contrast was good and I couldn't really but wonder why in the Empire was I so fixated to flat grey over a decade ago.


10.7.19

Rainy grey but in space

A brief return to the previous look

What else is the 'Mumblings but doing the same thing all over again endlessly? Now I made the Imperial Shuttle via a layer of white primer to a dark grey basecoat and then to just about the same shade of grey it had worn for over a decade. Just by my visual comparison this grey (VMA 71120 USAF Medium Grey) was pretty close if not exactly the same as the old Revell enamel paint. This was not planned, nor was it important, as it was just a step between dark and light. I just found it somehow amusing.

The nose part

This phase got started from the most critical part, the nose. I protected the insides with a post-it piece and thus minimized the repainting needed on the inside. It had to be said, it did look pretty nice this way already, but somehow I managed to keep my natural laziness leashed - at this stage at least.


The main body

Painting the hull and wings went amazingly quickly, with this paint being fresher / runnier. The first round was actually very enjoyable, especially when compared to the last three evenings of slow grinding.

I begun with the insides of the folding wings, then proceeded to the hull and as I still had time on my hands, I got to the top wing as well. The last two of this photoset showed how I left the rear end of the stationary wing unpainted to give myself a handhold for twisting, turning and rotating the model. I made a concious choice to let the paintjob look a bit "cloudlike" instead of aiming for a 100% flatness, but I also didn't go for a strong preshading effect anywhere.


No, I had not forgotten that the wings had those more or less rectangular shapes that needed to be darker. I had planned on doing those after taking care of the white layer, making the masking much simpler.

The real world threw some extras on my way for about a week, before I got to proceed with this greyness-increasing process. At this point the underbelly of the Ondiv was waiting for the project to get to the stage where the rotating wings could be glued permanently to the landing config.


3.7.19

A dark basecoat

Decisions

As anyone reading through this silly blog of mine has noticed, painting anything white has not been a recurring theme here. Thinking of it, the only examples I could quickly come up with were the sillily translated Pesterers and a Lanceful of ComGuards 3rd Army BattleMechs.

Always based on what I'd read on the various forums and such I painted my white targets starting from a dark paint and going gradually towards the light. That has served me decently well in the past, so I decided to stay on the course. I didn't feel that black or my beloved black grey would have been needed as the basecoat this time and I chose a shade lighter dark grey (VMA 71123 USAF Dark Grey) to start with.

The distinctive nose

The only area that was going to remain very dark was the cockpit interior, so I started with that. I blasted it very thoroughly from all the angles to get the coverage at maximum. Then I proceeded to paint the upper outside and then leave it to air dry for a while. Later on I returned to complete the lower half.


At this point the nose was finished for the time being, but I wasn't gluing it onto the spaceframe in a good while yet. This way I'd get to paint the insides much more easily, not to mention that painting the next layers on the outside would end up being much easier as well. The protruding cockpit wouldn't also suffer from overspray - nor would it be causing issues with shadowing other parts either. This was my assumption at least.

Spaceframe, the

The Ondiv required quite a bit of spinning around, rotation and its own very peculiar painting plan. I had to start with the spaceframe, the main wing and the flight mode - time outward facing wing surfaces first so I'd avoid making extra messes anywhere and doing unnecessary masking.


Wow. The pic above ended up being a bit strange... While airbrushing around I noticed a new problem had raised its ugly head: my paint was too thick or it just dried a bit too quickly inside the airbrush. One of the best advantages of the airbrush was that it allowed quick, even and light coating of large surfaces when all the settings were at their widest - while allowing for precise and small cone of spraying with tighter settings in skilled hands. Now the flow ended up being quickly at a pencil's width and a very basic overspraying turned into a constantly more annoying and physically bothersome colouring in.

That did not end up being a massive issue. For my last session I mixed in some thinner and got the final wing surfaces done while only going halfway mad. A very concious decision was made when I left the bottom of the shuttle untouched, to wait for the duration of a few project steps.