Mastodon

25.8.21

Eleven

Tightly on the second decade

Charts, charts, charts. I hadn't checked the Stats page in ages, and it took me a moment to find the more useful view (which, IIRC, was clearer in the old UI). The first pic showed the all-time views, apparently the peak for 'Mumblings was in the early '17.


The graph for the last 12 months was less exciting: some little squiggles with inexplicable random spikes. Weird stuff.


Latest year's accomplishments

Since the previous one I had the posts to finish up the Atomic cannon, at some point I built the Imperial TIE Pilot's bust and painted the wonderful Megatron statue. Risking my neck-shoulder area with my frozen shoulder I also added Bumblebee and Optimus Prime to my row of Metal Earth Models models. The months after have been spent inside the King Tiger.

Apparently slow progress and long individual modeling projects, that's how I could sum up my latest years, regarding this hobby of mine.

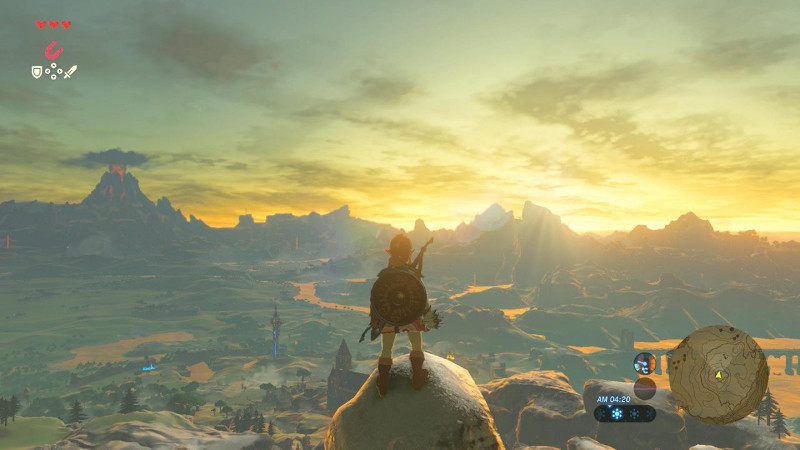
This has been affected by the time available. For example this year's modeling hours have been also disappearing to WiiU's Legend of Zelda: Breath of the Wild (I found two Divine Beasts (Vah Medoh and Vah Ruta) in the summer, but as the little guardian bots in some Shrines ("Mild Test of Strength" already made me go "yeeeeeeah, I'm going to exit and ignore this annoying thing forever"), I imagined that these expected boss fights would not be something I was going to enjoy or want to grind through. Instead I've used my time adventuring and just wandering around the impressive world. Both of the Project Assistants have enjoyed the game a lot.

I also finally got myself together and started playing Fallout (the first one, which I had managed to avoid so far, along with Fallout Tactics). So far I've replaced the Vault 13's water chip and I believe I was just going to look for some trouble in my freshly acquired BoS Power Armor. Most likely I'd march to punch some Super Mutants, with aimed punches/kicks into carefully targeted locations. My screenshots are in a hideout of GoG Galaxy, those that I've remembered to take.

So there's been stuff going on, not all of it has ended up here. Not yet at least.

18.8.21

Maybach HL 230 P 30 / painting

Basecoating

Getting the motor into its proper look started by airbrushing a layer of grey (VMA 71048 Engine Grey) over the bright red. The instructions were talking about black grey, I chose to cover my back by doing a layer of something else first. If not for no other reason but to prepare for my black grey paint having dried a bit too much and causing some painting issues.


Darkness

I painted all the almost black bits with a paintbrush (VMA 71056 Black Grey), trusting on the earlier engine grey layer to cover everything properly. In my mind this gave a bit of a nicer shading too. The exhaust pipes and whoknowswhatpipes I left alone. To avoid making a mess, I left the engine's painting to dry overnight.

A clean-ready motor

Once again I didn't take any work in progress photos when my painting excitement took the driver's seat. My third engine-painting evening I spent on the details, as the bulk of the engine didn't need anything else at this point.

The air filter's lid on top of the motor I painted off-white. I didn't care to attempt to make it incredibly clean-looking or as if it was untouched. That'd been unnatural. Instead I let the white coat to look imperfect.

Both exhaust pipe chunks I painted rusty (VMA 71080 Rust), even though the red brown would've also worked just fine, especially if the motor was a new one. In the front of the motor a central bit, and on the rear part the double magnetos (as far as my image comparison skills took me) were painted as flashy metallic bits (VMA 71065 Steel). Finally those narrow, liquid-carrying pipes I painted red brown, in accordance to the rules of the tank's interior.


11.8.21

Testing the interior colours

Correct shades

Just like I started with the red primer, I tried first the red brown (VMA 71271 German Red Brown) onto the rear hull's large fuel tanks. Using these small volumes as the first layer on top of the red primer the change wasn't that incredible.

Moving on I started painting the tank's insides and spent most of my time ensuring that the countless shadowed areas got painted. Here the red primer was helping, because it wasn't going to jump out as badly as something like, say, white primer. Damn, I had been smart.


After the red brown paint had cured the paint was browner than I had imagined. Of course it was still missing details and all possible weathering. This large amount of pretty dark interior paint was still a bit confusing to me, as I had thought that off-white was the key in the interior walls.

While I still had a few minutes to spare, I used it to start working on the drive sprockets, idler wheels, the engine's friends (tanks, pumps, whatnot) and the cooling setup. As always, these were going to need a couple of sessions from different sides.

First maskings

My next evening started with masking tape. I sealed off the red brown areas to get the thing in line with the painting instructions. The firewall's human side and the floor of the ammo shelves became white.

These creamy white (VMA 71119 White Grey (grauweiss)) insides were almost blindingly bright compared to the earlier bone-coloured primer. The contrast between these and the red brown areas was also somewhat steep. While I was on this I also painted the insides of the upper hull and the turret's main piece.

In addition to these I also took a moment to paint the equipment living between the driver and the radioman. This was mostly a simple reminder for myself to go through these objects properly instead of forgetting them brown.


4.8.21

Bright priming

A break from building

Being very eager to paint this thing as accurately as I could manage, and because I just saw them in the shelves of Hobby Point when I went by, I had bought a couple of colourful primers that felt like a good match for the upcoming task. Red for what was going to be hull red, whiteish for those creamy chunks, that was the plan. While fooling with these I'd also finally start on those pieces that I had left to wait for priming *cough* road wheels *cough*

Round 1

I started with a bit of red primer (VSP 70642 Pure Red). After the first couple of puffs of the airbrush I felt a bit silly, as it was somewhat perverted to paint a tank bright red. I got over this sense of strangeness, as the coverage increased some more. When I was done with the first pass of the red parts, I switched to the lighter one (VSP 70627 Skeleton Bone) and went roughly over the combat compartment's white-to-be bits.


The engine I started painting upside down, purposefully, because I found it easier to hold onto from the top, while rotating and painting the submodel. That's why the aif filter cover was left for the next round.


I did the same with the fuel tanks and whoknowswhatpumps. They started to look like something now, even if I hadn't really done anything but giving some colour on them. Somehow that just gave some depth to the surfaces, in my opinion.


Rounds 2 and 3

During the next two priming rounds I did pretty much the same everywhere. First I finished painting those parts that I had previously only started on. Then I primed the already built parts of the tank's hull and proceeded to the tedious road wheels and other parts living nearby on the sprues.

This first photo showed how I had painted the insides of the top hull light, just as I did with the support beams that were going to be living behind the driver and the radio operator. I didn't do all the pieces now, as I wasn't sure if I had enough paint for a full set, and if I didn't, I had no idea when could I go buy some more.


Round 4

For this stage I painted the top of the hull, from the outside, prettily red (I bet someone had already done a bright red Panzer and added a yellow shield with an outline of a prancing horsey to the side), as well as the outer shell of the turret. What a setup this was going to be, indeed.