Mastodon

24.11.21

Turret basket's mechanism complex

Fine mechanics

I started assembling the equipment that I assumed to have something to do with the rotation of the turret and that was going to live on the bottom of the turret's basket. This was something I hoped that would again get a bit clearer as the build progressed.

The first larger component was supposed to be glued at a freely set angle. Again the success of my guess ("well, it looks like in the weird-angle picture, so maybe it's ok") would be judged when the different subassemblies were joined together and not a moment sooner.


This photo here showed somehow, how the physical piece and the illustrations of the instructions weren't exactly and perfectly aligned in their common reality. Maybe that wasn't going to become a problem.


I kept working on the subcomponents. Next up was the seat that I thought to be the loader's, as it was installed far away from the crank.


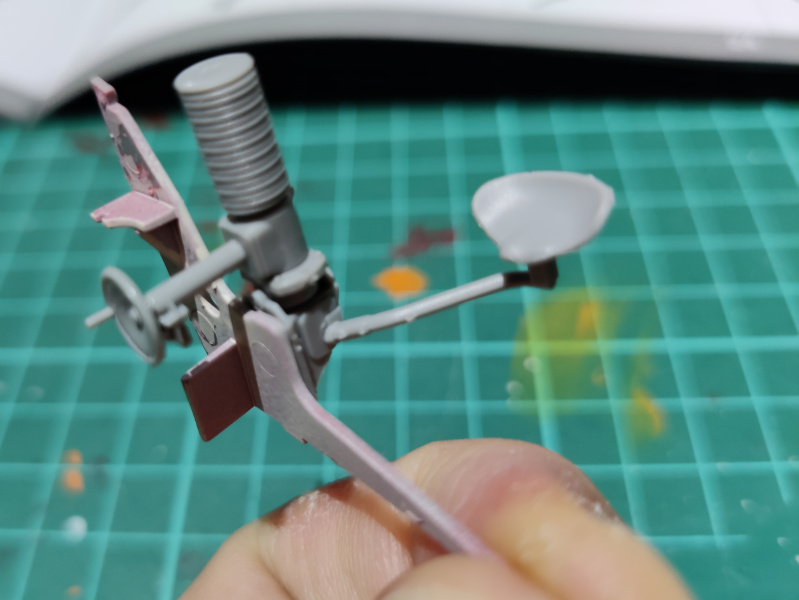
Like I have complained before, getting these freely installable pieces somehow aligned was about to give me more grey hairs. In the photo below I was holding from the narrow end of the important frame, that was very strangely bent, and that worried me quite a bit.


Mechanisms onto the basket

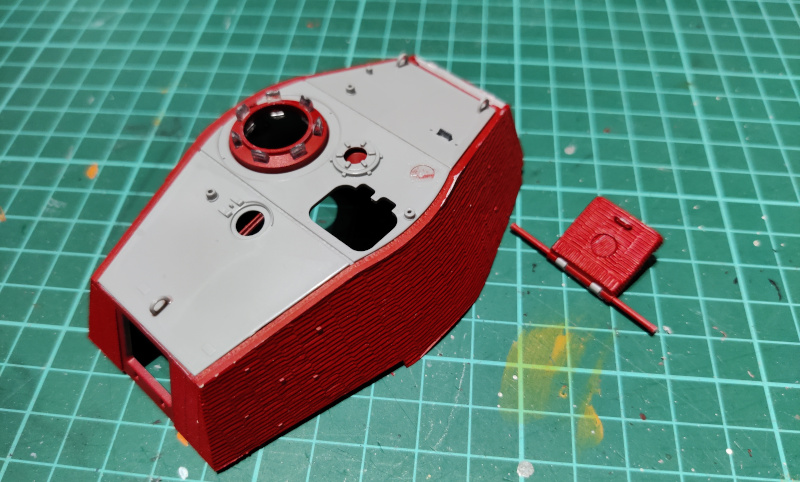
After the mechanism setup was done I prepared the basket floor by adding the necessary maintenance hatches, boxes and liquid tanks. When I had the mechanism frame's second frame-half in the curviness of the pieces and the fitting issues jumped up like a cat whose tail you walked on. I only felt like swearing mildly at this point.


With some gentle violence and phased gluing on I got the complex installed onto the basket. At this point I trusted that I'd get it all done decently at some point.


More funny moments, the basket's rear arc's backplate was just glued on so that you had to trust it was meant to be aligned by the basket's outer edge. I really, really, really didn't enjoy this method of "glue this here so you can find out ten steps later, which angle it actually needed to be set to".


More fun stuff: at this point I noticed that I had forgotten to install one of the subassemblies for the adjustments. Installing that correctly required a handful of dry-fitting rounds, because the instruction sheet's fancy isometric pictures were useless.


Slowly more stuff materialized onto this complex that was, as you may have guessed, unexplained. I started to think that I was expected to buy a highly technical sourcebook to go with the model (I'd enjoyed that to be honest, had I thought of it in time).


The workspace here was kind of familiar from a couple of decades ago. If I didn't know better, the bottom-right place was the gun aimer's place as there was a crank for controlling the horizontal rotation and the gun's elevation, or that's how it definitely looked like to me. Then again, that was a specialist job that didn't exist in this tank so it had to be the gunner's place. This then confirmed my earlier guess that the other seat was for the loader.


For some reason only now I got to install the support structure to the front arc of the basket. Had this been done two weeks earlier (in actual calendar time), the whole cursed thing would've been so much sturdier and straighter. But no, we couldn't have had that.

17.11.21

Towering

The outer shell

At long last my King Tiger project rose to a new level. I was a bit concerned about the shell of the turret and its insides fitting together as I had just found the hull fitting to be a major challenge. Like a few other pieces so far the turret's top plate was a bit too flat compared to the angle that was required by the walls. So I first glued it on from one end, had that bond cure, and then proceeded forcing the rest in place. This didn't need much force, which was a positive thing again.


The insides of the turret were going to be somewhat crowded, there were numerous hatches and everything needed a piece or seven attached to it. Next to the fire extinguisher you could see a pretty common detail, the Nahverteidigungswaffe or its inner tube, but all this other stuff... wow!


Masking and painting the commander's cupola's periscopes sounded very hardcore at this point to me. A very complex setup, with all the pieces, but it also was so very much cooler than the typical solutions I've encountered so far.


Both the inner and outer sides of the turret were progressing slowly and carefully, a hatch, hoop and a handle at a time. My slowness came mostly from the cleanup of the tiny bits.


Now I had to choose whether I wanted the gunner's hatch open or closed: if you were going to build it open, you needed to use an extended piston x; if you wanted it to be closed you had to use the short/retracted piston y. Sadly just about everything inside the turret remained a mystery to me, just like in the combat compartment.


Funny thing, the commander's cupola's periscope protectors were one short (piece A2, the second of two of those needed). I retraced my steps through the whole instruction manual and what I had built, in case I had accidentally and stupidly used an A2 when I needed something else. 

No, I had not, there were no wrong pieces anywhere, this was the only place where this piece was needed. Where could I lose a bit like that and why? Oh well, it was lost and I could not find it, so the tank was going to go into battle with a missing bracket over a periscope head.


The commander's MG rack I could've left off, especially as there wasn't going to be a machine gun to be attached to it. I still did it, to compensate for the other failures. Or to ultimately highlight them, we'd find out (a lot) later.


The turret's outside was now as complete as it was going to be at this point. It took a foul number of evenings, mostly due to the impressive amount of very small pieces that needed a good amount of cleanup. I left the track link -hanging hooks off on purpose, I did not intend to use them at all. My motive for that was that if I was going to have to swear and use some force when attaching the turret's outer shell onto the rest of the turret, I didn't want to have to worry about these details on top of everything else.

This wasn't anything I could've called dry-fitting the turret, as the outer shell of the turret lazily lounging on top of the tank's deck wasn't a realistic thing. It was still nice to see that all these slow, tiny steps ultimately showed some actual progress. After weeks of staring at them, that is.


10.11.21

Rear hull - and connection issues

Dry-fitting the upper hull

The combat compartment and the engine room were finally complete for attaching the upper shell of the hull. First I just set the top hull onto its place and added the bits still missing next to the drive sprockets. With those I meant the arcs which included, among other things, the places where the hoops for the front tow cables were to be installed later on.

While I was playing around I glued the smaller details into the rear armour plate. While working on these it finally dawned on me what those rear-bottom hull's weird bits were there for: that's where the armour plate was attached to. That was pretty interesting.


Before attaching the rear plate I took a look at the shape of the model from behind and I saw something I really, really didn't like to see: the top armour didn't fit at all on top of the hull but grimaced like Harvey Dent himself. This was bad news for a proper attachment. Violence and brute force were not a solution here, even a small amount of pressing made the build groan nastily.


No sense in lying down under a barrage, I plopped the upper hull off and worked on the things I could actually affect at this point. The fitting issue had to be pushed into the background for slow processing.

A simple next thing followed, I built the jack and left it for a separate painting session. I had taken a few photos of some Henschel-built railroad jacks at the Asturias railway museum in Gijón, for reference. These jacks looked pretty much the same as the tank jacks, so I couldn't go too far off if I took a close look at my old vacation photos.


Finally I glued on the rear armour plate and installed everything on it except the exhaust pipe edge blocks and the aforementioned jack. My idea was to paint this as it was now, then attach the jack before doing a general weathering round.


3.11.21

Internal details again

Lots of small stuff

The hull's inner ceiling was my next main target. The turret's opening's rear arc had a rail for the MG clips, I glued a bunch of those in place. Next to the driver and radio operator a couple of new boxes were installed, and for the driver a special piece that I interpreted as the periscope's rotator setup. All the periscopes were made of transparent plastic, so I had to remember to mask their openings before airbrushing around.

To make things less easy the radio operator's MG 34 consisted of very small flimsy pieces and I was about to lose my cool with some of those. After taking a couple of deep breaths and forcing myself to try to take it a bit easier I got the thing done.


This week's processes were organized a bit erratically, as  I worked on assembling some things while some others were having their paint dry. Right after the previous session's assemblies were set I built the next ones (such as those jack-like (tiltable!) devices next to the expected heads of the two guys sitting in the front) and started painting the pre-primed red-grey things again to be white-grey while I waited for some other pieces to settle.

Following traditions I painted the MG 34 flat black for weathering and little details. All the turret-adjacent clips I painted olive green. Their bases ended being black, like before. Most likely the colour-coding was supposed to tell the users something, I had not found anything so far.


The surroundings of the front hatches I painted whiteish by hand, as soon as I had all the new pieces in. I had encountered so many interesting new details that I had never seen or heard of before.

At this point I had to mention that I worked on the machine gun out of sync, so the next few photos of it were snatched from the future, in the middle of the following posts. Tactically I had managed to ignore two small but essential pieces from the weapon. I glued them in and painted them flat black, too. After that had dried, I drybrushed the setup with Gunmetal.

Both clips got painted Dunkelgelb, just like most of the clips nearby. The handle I decided to paint Mahogany (VMA 71036) just because I saw the paint at a lucky moment. This was a pretty low-contrast choice, but maybe it didn't hurt in a shitty tank?


While dry-fitting the machine gun's barrel stuck out of the tank just the way it was expected to. While positioning it I just had to be careful not to knock off anything else inside. Damn cramped tank, this one.