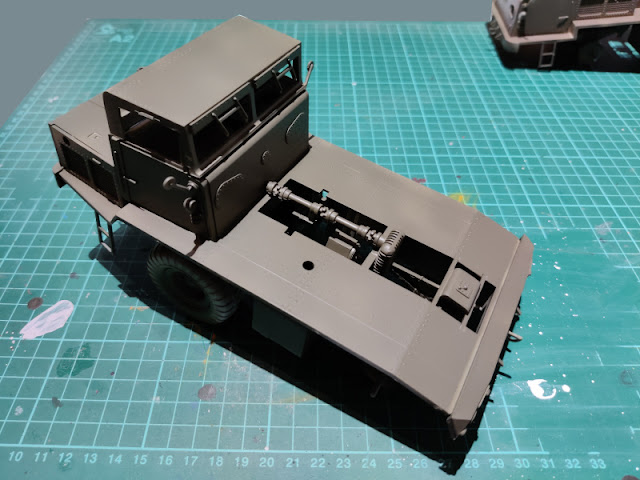
Mastodon

30.12.20

Decalation

A few decals

Despite all my grumbling I still used a few decals with this complex. The tow trucks got a String "U.S. ARMY M533" to their extreme ends, their doors and roofs got five-pointed stars. To the sides of the cannon's carriage I used similar String-based decals but the left one I cut into two because I just couldn't bring myself to fight a long decal over a bunch of molded-on bumps. For a change the decals behaved.

Decals on the tow vehicles


Decals on the tow vehicles


Cannon's decals


Cannon's decals


23.12.20

A cautionary tale

Striped bumpers

Let's be very clear about this: I've always liked using the caution stripes in numerous places (ever since I was involved in making Doom pwads), in my opinion they've been most at home in scifi weapons platforms, such as Battle- and OmniMechs. They weren't that prevalent in real world warmachines, which wasn't really surprising, these being large and high-contrast-y decorations practically screaming "BEWARE OF THIS THING HERE!". And all this is why I was a bit surprised to find these stripes in the decal sheet, but I filed that under "test stuff" and as something that wouldn't have been done that way in fighting conditions. In any case I wanted to paint them instead of getting frustrated and sweary with the spaghettifying decals.

First I masked the immediate neighbourhood of the bumpers and started painting. The bottom layer was a dark grey (VMA 71268 German Grey), over which I then applied an almost full coverage of plain flat black (VMA 71057). Somehow I expected that this'd give the dark shapes a bit more realistic look than pure black.

A masked bumper, painted black

A masked bumper, painted black

Intermediate result

After giving the paint the traditional 24 hours of drying time before smashing masking tape on the fresh surfaces I started fooling with the tape. I settled with about 2,5mm strips and made some slashes and some backslashes per bumper. As my yellow I used a Medium Yellow (VMA 71002). The uneven painting was the result of a partially too thick paint that I hadn't been able to stir up enough. In this case the result looked kind of realistic to me, at least much better than a decal!

Caution-striped bumpers


16.12.20

More truck painting

Olivification, part 3

I painted the trucks excitedly, before the last layer of the replenished olive drab, I used a couple of other greens (USAF Olive Drab; one of the German Panzer greens) to cover a couple of underpainted sections. These weren't exactly what I wanted, so I toned those down with the instrucion-declared colour. The little    differences weren't something that I even wanted to undo, because I felt that even a tiny bit of life in these mostly monocoloured things was more than a good thing.

While airbrushing I also started working on the wheels (VMA 71315 Tyre Black). A number of the wheel hubs I masked off, some I didn't. I guess I had some kind of a thought process behind this, I just couldn't remember it while writing this.

Painted green vehicles

Truck painting progress

Truck painting progress

Wheels being painted

I also blasted a bit of some desert-ish, light brown to the lower halves of the cannon and the vehicles. I didn't concentrate on that work much at this point, the plan here was just to test out the colour in preparation for the actual weathering session(s).

Some desert dust on the cannon


9.12.20

Olivifying the vehicles

The most boring paintjob ever?

As I've complained a few times, this flat olive green scheme wasn't the most exciting thing to paint. Even though I wasn't going to follow the instructions to the last detail, I didn't feel like doing a random US Army camo scheme from the sixties, either.

Then again, a three-tone NATO pattern wouldn't have been too far off, unless my memory failed again. Maybe the safest option was to keep it in boring monocolour, but tone down the designer's bright, large and clean steel / aluminium surfaces.

Green

I started by painting the wheel hubs first. The first in line were the tow truck front wheels and the spare wheel hub that were still unattached. What I didn't take pics of were the cabin roofs that I painted separately from the outside and the inside.

Renkaan kumit pohjamaalattuna ja keskiöt oikeasti maalattuna

The bottoms of the vehicles were pretty simple to paint, the strange angles and of course the rear wheels were blocking the paintflow from certain angles, so I had to paint this way and that way sometimes. My goal was to get some kind of variety inside the flatness somehow. I decided not to strive for perfection on this first painting run, but to instead fix up any issues later on. Right now I wanted a good enough general coverage.

Ajokin 1 pohja ensimmäisen maalikerroksen kanssa

Ajokin 2 pohja ensimmäisen maalikerroksen kanssa

Top sides

After letting the previous paintjobs to air-dry overnight, I switched to the side where the sun was supposed to shine occasionally. Earlier I had already painted small parts of the front vehicle, so wouldn't have to fight those right now.

Vetoajoneuvot pohjamaalattuna

While working on the more visible parts of the vehicles I was starting to run low on paint, so I concentrated even more on the general coverage than I had planned to, with the cost of the opacity. With its more broken forms the first vehicle showed the results of this choice more clearly than the second one, which ended up looking somewhat better.

Vetoajoneuvo 1 vihreäksi maalattuna

Vetoajoneuvo 2 vihreäksi maalattuna

Vetoajoneuvot ensimmäisen vihreän maalikerroksen kanssa

This last photo showed where my painting process ended when I ran out of paint. I had to take an intedetermined break because I didn't go by the office during the corona season that often (Hobby Point, my royal provider, was located pretty near), and I wasn't in such a rush that I had felt the need to order paints to be delivered home, either. Ordering almost always had the funny habit of leading to the infamous "oh, I need those too" effect...

You, esteemed reader, have hopefully not noticed a thing, thanks to my post buffer.

2.12.20

Builds done, minimen in their activities

A dude test

Now that I had the construction phase wrapped up, I set up the scaled-down dudes on and around the built pieces to show what kind of monstrous vehicles we were talking about here. I guessed that the pics had shown that especially the cannon was enormous, but I felt that the humans brought an essential amount of real-life scale to drive the point home.

Especially the nuclear shells were of a noticeable size.

Gun commander posing next to two nuclear shells

Unpainted crew on the atomic cannon

Tow trucks and the atomic cannon ready to fire

A nuke shell to be loaded