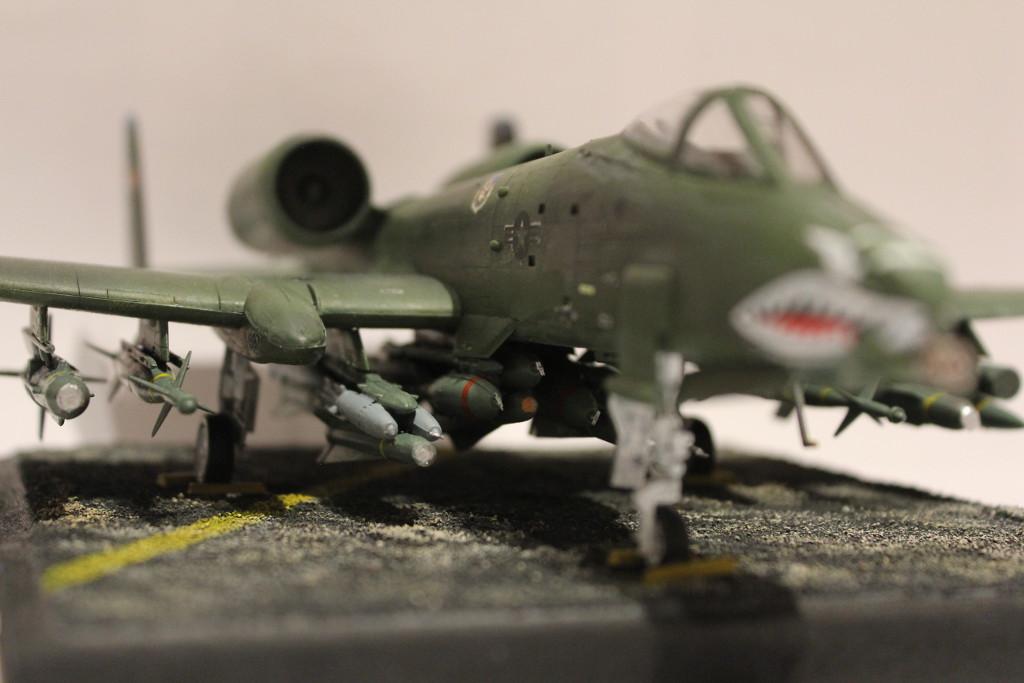
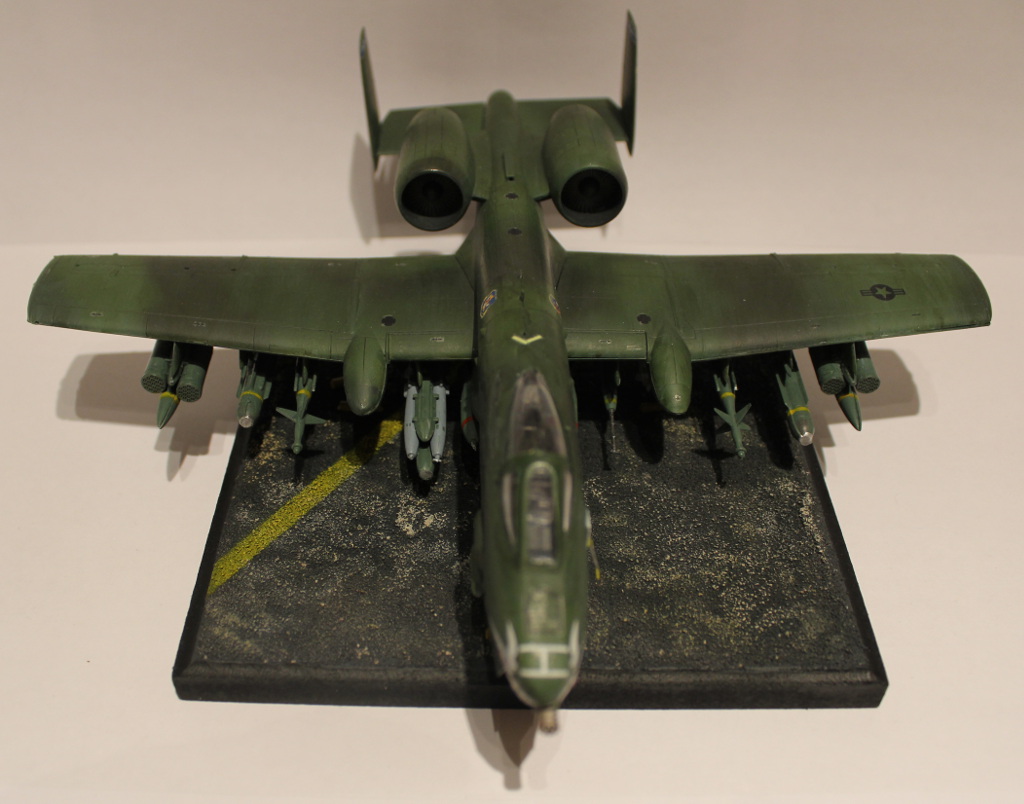
The base
If the Hog wasn't going to stand on its feet on its own, I'd glue them on the ground. There were no compromises to be done regarding my vision. Not that I had planned on making a base for this one when I started the project, but then again, this was definitely the one I approached most seriously of all the four jets in this series.
An idea
Someone suggested ages ago that a part of a runway could be a good background idea. To me it sounded good immediately. So I guess I had processed that on the background, even though I hadn't even got the airframe built at that point, let alone noticed that my assault plane was going to end up as a tailsitter.
If I remembered correctly, I had one MDF piece left. I'd apply a thinned-down white glue on it and then sprinkle a decent amount of Woodland Scenics' Ballast. That would, in my imagination, end up with a very cool-looking surface that could then be airbrushed with some very dark grey.
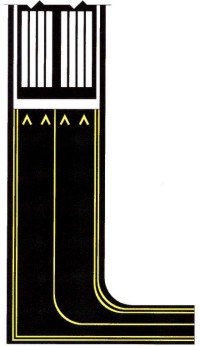
For some reason white runway markings didn't sound or feel appropriate for the theme, so I'd do them in yellow. Or I'd make both, whatever google's image search would show me with the nicest of looks. I was also pondering on the painting order: should I paint the (full and dashed) lines first or the basecoat? At this point I decided to go with the natural approach: lines would be painted on the asphalt. If that was ok for the airport folks around the world, it would be ok for the 'mumblings as well. Doing things this way it wouldn't be a big issue if all the markings weren't perfectly painted in shape, as a certain kind of roughness would bring some nice realistic mood.
While browsing around for references and I suddendly realized that if my plane was to be parked, it would require chocks for its wheels. Maybe scratchbuilding a couple (4-6) chocks wouldn't be too much to ask from my very limited skills...
Some references
I spent an unhealthy amount of time searching with various parameters for anything related to the topic. It's not that I haven't seen my fair share of runway and taxiway markings from airplanes with my own poor eyes, but I wouldn't do anything like this with just my gut feeling. *cough*
Trying something out
Hah, I actually had two MDF plates in the storage. The first one was way too small and the other one, at first glance, looked a bit too large even. But trying it out it was ok after all.
Before I started fooling around with glue I checked for a good position for the plane and marked the wheel positions on the base. These I'd leave clear to make gluing the model on that much easier. Next I covered the edges with painter's tape to prevent accidental overgluing.
The surface texture
I thinned the white glue a bit with water and spread it pretty thinly around the baseplate. I did my best to keep the wheel's places clear. The less crap there was going to be between the base and the plastic wheels, the more confident I could be in it staying put.
As soon as the base looked good enough I sprinkled a very healthy amount of Woodland Scenics' light gray Ballast, the same I used on the Imperial T-65's
test flight. My goal was to get as smooth a surface as I possibly could with this thin layer of glue, with a decent texture to it. But it wouldn't be a project-ruiner even if it didn't look like something from a daydream of a German engineer, I'd be pretty happy with a "forgotten corner of a parking place" too.
I left the stuff to set over the night. When checking on it the next evening I noticed that just like me, the base plate was suffering from male-pattern baldness, so I applied some glue to the offending regions and dumped more Ballast on the setup. Again, it was left alone overnight.
The results of the second iteration were decent. My airfield's surface wasn't looking like a billiards table, but who said that the Warthogs operated only from the perfectly maintained airports and not, for example, also from airfields that weren't in active use anymore that were left much to their own devices? Crappiness fit my theme very nicely.
Painting
There wasn't much to say about my Wednesday's early evening painting session. I begun by airbrushing Vallejo's primer (Surface Primer, Grey) and then over that, from all directions, some very dark grey (VMA 71052 German Grey). On the GG I sprayed some black grey (VMA 71056) from various angles, directions and in uneven patterns. This way I got some more colour variety on the base's fake asphalt.
Why didn't I use that black grey as my main colour now? Because I had very little of it left anymore and I didn't think it'd been enough to cover the whole base. And it wouldn't have, as covering the grey primer ate quite a sick amount of paint, thanks to the shapes done with glue and Ballast.
I started the Thursday's session by taping the shape of a taxiway's center line in a hopefully recognizeable form. Instead of a straight line following the edges of the baseplate I felt that a line off-center in an odd angle would look better. I guess I was looking for some sort of a dynamic look.
Based on this quick test it looked nice. Then I used long bits of painter's tape to protect the baseplate, just in case. Next I loaded my airbrush with a huge overdose of yellow (VMA 71002 Medium Yellow) and got to work.
During my earlier brush-painting sessions this yellow hadn't given me the impression that this paint was thick enough but oddly thin. I was a bit concerned while painting the first pass, as the yellow paint just seemed to sink somewhere and it didn't look like it made a proper, noticeable impression on the dark grey surface. But after relentlessly going over and over something started to stick.
In the end I used all the paint I had loaded, lesser amounts wouldn't have been enough to cover the area properly and any more would've been a waste. I was afraid that thanks to the thinness and the amount I sprayed on something (a lot of it, actually) would've leaked past the masking tape, spread uncontrollably and therefore ruined the whole setup. So I shot plain air for a while after I had ran out of paint in order to help the paint dry a bit faster. As soon as I had cleaned up my Badger I tore off the tapes to both prevent them getting stuck and to see the results.

It ended up looking pretty! Again the unevenness of the painting was only a good thing, helping me achieve some sort of pseudorealism. Now I was thinking that I should maybe paint the edges of the baseplate with a different colour, maybe flat black. But then I googled around a bit and with some playing with RGB codes of the paints I had used, the colour calculator suggested something of the olive green variety. I decided to sleep on it.
 |
| Just checking something out |
 |
| A night-hog? |
Finally I tried the combination of the plane and the base in some very awful lighting conditions. It did work.
We still weren't completely done yet. I was thinking that if I used a bit of sand pigment (I have a few sorts available) I could get some more mood and feeling on the ground. As if you saw much of it under the beast of a jet, anyway. Oh, and the chocks, I still had to make them.
The chocks
I was just plain lazy with these buggers. I cut off a semiflat piece of a sprue and cut it in six equal-lenght bits. Then I put them in a column on a piece of tape and painted them with Dunkelgelb (VMA 71025 Dark Yellow). Later I applied some earlier-used medium yellow on them. The idea was to keep them bright, but still distinctly different from the taxiway's center line.
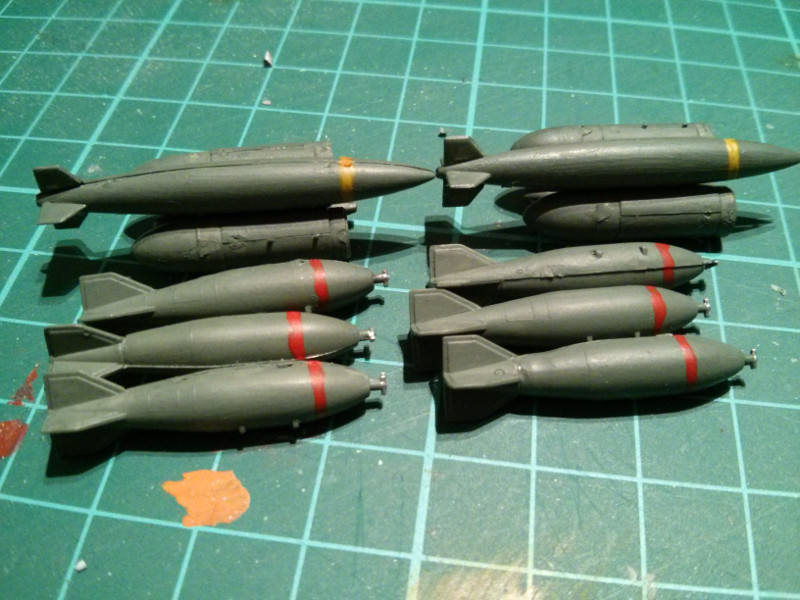
The last photo ended up containing a funny bomb in an anachronic way, as the bombs were in the limelight last week. I worked on these two last phases pretty much intermittently, as I occasionally got frustrated with the bombloads and pylons. To say the least.
Weathering
As I finally had some time I applied some plain sand (Sand) from the Tamiya Weathering Master palette (
ITEM87079). I concentrated that more on the worst lumps of asphalt and used less on the flatter surfaces, trying to simulate the scenario of wind piling some sand on uneven surfaces. Maybe it worked, maybe I ruined the whole thing. After I was done with that I painted the baseplate's edges with black (VMA 71075 Black). The lightish green that was suggested would've, in my opinion, distracted the viewer's eyes, pulling them to the baseplate's edges and away from the important: the A-10A.
The assembly phase
I really couldn't tell much about gluing the plane on the baseplate. I just applied some white glue on the target areas and then pressed the plane on. Then I positioned the whole setup so that the tail was supported so that the model couldn't tilt backwards. As a random thought I put a peg onto the ladder to provide some actual counterweight. It was enough, I was certain, but just in case I attached my masking tape roll on the plane, just in case. I would've been pretty pissed off, had that model tipped backwards after all, while I wasn't watching.
After a couple of hours I took the chocks and glued them in place too. The main landing gear proved surprisingly difficult, thanks to the amount of stuff hanging from the wings. But with tweezers everything worked like a legless man's Tropak.
Confusing. There it was, finished. If I was to do anything to it anymore, I might fine-tune the sand pigmenting. We'll see.


