Mastodon

25.8.20

00001010

 Round (dec) numbers

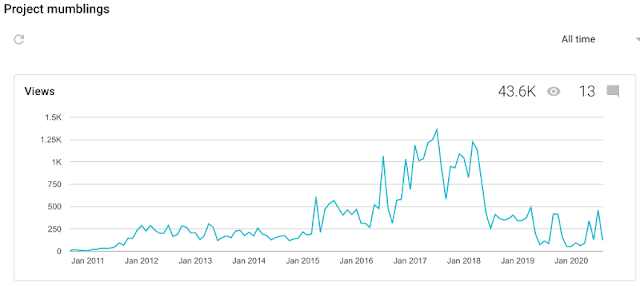
Oh my. We were now standing with ten full years of utter nonsense behind us, which was also known as the 'Mumblings. If we were looking at this just by the amount of years, next year I could, for a short while, declare that I was exactly four times older than my blog. What a shocking thought that was.

Project Mumblings viewer stats over ten years

Apparently someone still reads this, or looked at the pictures if nothing else. Cool, if someone has found this stuff interesting enough to check!

Leveling up slowly

Just for the fun of it, and I guess going the cliché way of using this sort of a milestone for this kind of stuff, I took a look at what the ten years ago built models looked like. First, a Sturmpanzer IV, aka Project III/10:

Sturmpanzer IV (2010)

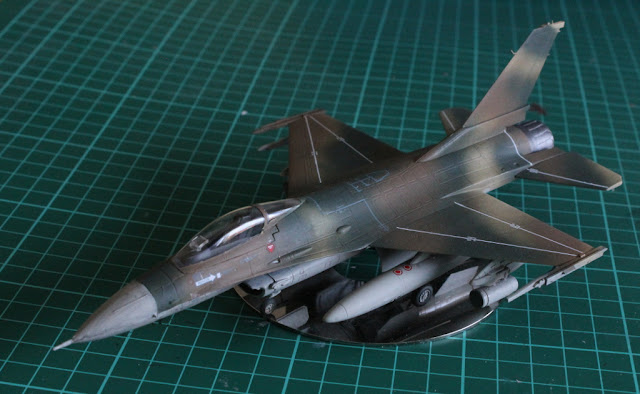
Fast-forwarding five years forward, an F-16A, aka Project IV/15:

F-16A (2015)

Another five years brought us to the latest finished model, the Su-27, aka Project I/20:

Su-27 (2020)

If there was something that could be quickly said, my photography hasn't improved that much, if at all. Maybe I should've bought the light tent instead of thinking that I should consider one... But on a bright side, I thought that my airbrushing had gotten somewhat better since those first few models.

Last 365 days' achievements

I did get something done during this last year, even if I've been doing everything at a pretty calm pace. The Königstiger I was pondering about a full year ago has obviously not gotten to the desk yet, but maybe its time was soon. As soon as I found the Wehrmacht decals I had put in a good safe place, in order not to misplace and lose them.

Finished models

So, this year I finally wrapped up the woefully time consuming update of Shu Ondiv, the Flanker and a couple of Lego sets (Slave I and Saturn V). These last years have indeed been really slow, or I've been much more careful and concentrated on what I've done and that's why everything's been so slow.

Projects in progress

I had just started with the M 65 Atomic Annie, that has been suffering from the Covid-19 situation, the summer in general and my little technical problems. It was on a good roll and whenever I could work on it, it had been nice to work with. So far, at least.

The rest

For the last year's anniversary post I wrote a couple of silly lines in Python and that was so exciting, for a change, that I ended up coding more. I started with a traditional nonsense generator (the MAD magazine had these "write your own Indiana Jones movie script" and similar), but that got out of hand very quickly. Based on some sort of a whim I started making a Doom story generator.

Of course this started its life as test.py, the script was insane and unmaintainable, as it started out as a set of random tests and grew from there. A couple of weeks ago I started redoing it more properly, in my opinion much better structured and more sense-making.
19.8.20

Primebrushing

Handcrafting

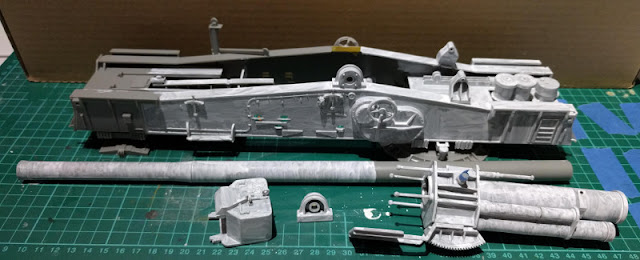
While my airbrush was being taken care of by professionals I still wanted to get things forward. I used a normal paintbrush to apply the white primer onto the so far assembled modules.

I started from the business end of the cannon, the various pieces that were going to be all around the barrel and the carriage itself. As before, my primer may have seen its best days already, but I didn't think of buying a fresh one (nor a bottle of Olive Drab), while I was in a hobby store already.

This was why I had never called myself smart.

The first couple of evenings

Honestly, I had forgotten how slow - and in this case ugly - business priming models was! In the photo below one could see the results of two sessions of brushing around. I had protected all the contact points and moving parts as well as possible, as if I was working with the airbrush.

Partially primed cannon parts

As a task this was somehow unmotivating, so progress was painfully slow. Another reason for this slowness was that the real life ate lots of time while the nice weather on the summer evenings, for some reason.

12.8.20

A (forced) technical break

Servicing the airbrush

Lost

During the spring/summer I changed my Badger's "ultra fine" bits (tip, spray regulator and needle) to "fine", as I had once again managed to lose the tip and there weren't any spares available. At all. Not that there were countless fine ones, either, but as the storage balance said 1 instead of 0, I had little space to ponder on where to head. Also, in my use cases the ultrafineness was a tertiary level detail, because I wasn't a freehand artist nor an artist of any other sort for that matter.

Stuck

As soon as I had gotten the atomic cannon project to a state where the first subcomponents were paintable, I finally assembled my airbrush with the new bits. Apparently I had cleaned it awfully badly the previous time, because the trigger didn't budge when pressed.

After a bit of grunting, pressing, pushing and applying cleaning products I got the trigger to move again. Wisened up from a previous mess-making moment I didn't yet load the paint pot with paint, but tested just blasting air. Nope, it didn't seem correct. Next I squirted a small amount of airbrush cleaner into the paint pot, cupped my other hand over the paint container and tried again.

The liquid came out both from the actual exit point but also from the open mouth of the paint pot. Paintslposion averted. At this point my skills and also time for searching and trying out stuff was running thin, so I decided to visit my royal supplier with the device and ask some stupid questions. As it happened, I was going to go to visit the office in a couple of days from that moment, so I had a pretty good luck with the timing.

In service

At the time of me writing this the airbrush was either being serviced and cleaned, or waiting for its turn, so I was kind of waiting for an sms telling me everything was now ok or a call giving me somewhat more bothersome news. In any case I wasn't going to go to the office for the third time since mid-March in a few weeks yet, so the pickup was going to have to wait for the second half of August or early September, even.

5.8.20

Cannon's tail end and some other small things

The breech

Most likely this cannon worked a bit differently from the ones I was used to, so if my comments have gone slightly off, apologies.

As far as I know, guns that get loaded from the rear end needed a breech, so I assumed this device also had one of those. At least there was a massive steel block in a correct place.

The breech

It was pretty impressive already and at this point it was still missing meters of barrel. The block in the end could be moved back and forth, the four rods didn't block its movement at all.

The tail end of the gun

Testing the inclinator

As I had gotten this far, I wanted to check if the inclination adjustment mechanism worked or not. I glued the righthand axle onto the carriage and held the left one on by hand.

Testing the transport mode

After the first couple of spins that felt weirdly contactless the barrel started rising upwards. In the second photo it was at the maximum angle.

Trying out the elevation mechanism

Carriage, decorated

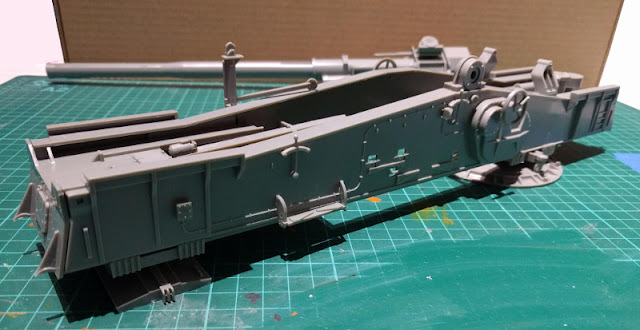
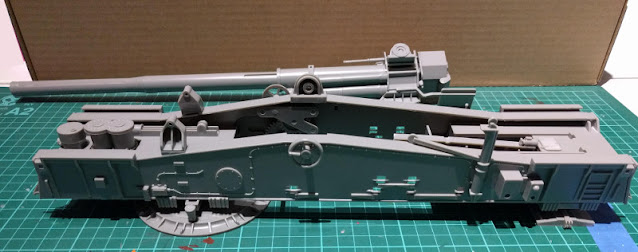
The instructions had recommended gluing the gun axle holders on, but as I said, I had ignored that, for it was obvious that I had to paint this monster in chunks. Maybe I should've started before any building, but I hadn't had too goo experiences with that approach. At this point I glued on adjusters, wheels, support pieces and whatnot until I ran out of them. The foldable mesh/grid walkways I left for a later date.

Carriage details

Carriage details

LOS-firing

To check, yet again, that the bits were aligned, I set the cannon's barrel to the transport mode and as ready as I could imagine it could be. Maybe that was more or less the state where a new grenade was loaded in. Or perhaps some fool had thought of using this gun for some very direct firing. This was a nicely playable model.

Playing as if this could do direct firing