Mastodon

26.2.20

Camouflage patterns

Choosing the colour scheme

The Flanker was going to be a blueish one, as I had already done something else with the MiG-29 (green-yellow).

Belly up

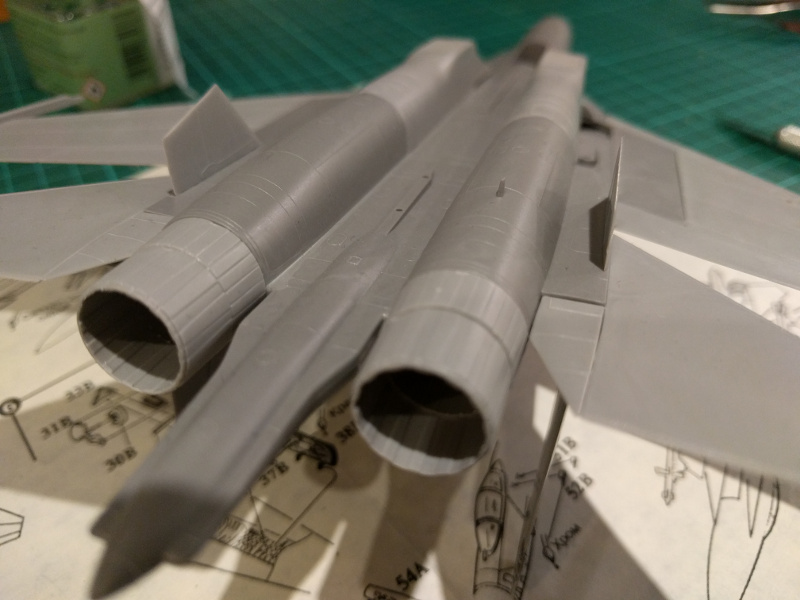
Before I started painting I taped the engine exhaust nozzles off to be safe. At this point that was all the covering up I needed, for the more essential stuff was going to happen on the other side, where the potential to ruin other things was much considerable.


On the belly side the only colour was going to be a blueish one. I had excitedly gone to my loyal provider to get a couple of airbrusheable paints for this project alone, now I was going to get to try the first one out. Each of the three bottles had markings (AMT, AN etc) before their names that were totally unknown to me and outside my limited area of expertise in aviation. After a quick search I found out that these were what the Soviets used when the Germans had their RLM codes.

Back to business. I was starting painting the bottom of the plane and everything attached to it. I chose a grey-blue paint for the job (VMA 71318 AMT-7 Greyish Blue).

The painting process was pleasant, quick and easy. I didn't notice shooting paint onto the plane at too short a distance, so I believed I managed to avoid the puddling that's been plaguing my projects on occasion. In the nature, with my plain and awful eyes the blue was of a much nicer shade than what my old phone camera captured, under the led lights.


A reference for the camo pattern

Before getting any further with anything I did a load of image searches for blue camouflage paintjobs on Flankers. Surprisingly many of the results depicted digicamo that could've worked in the context and I know I'd had fun doing that, but I just wanted to freehand it now. The pic below showed a bit of inspiration, not an example I'd slavishly follow. I doubt anyone who's ever made the mistake of reading 'Mumblings got surprised or shocked about this decision.

[LÄHDE]

Basecoating the topside

I had really liked the bottom's blue-grey coating, so I decided to use it as the basecoat for the camouflage on the top half of the plane. The other two paints I was going to use as the actual pattern of the camouflage. Again I protected the engine bits with masking tape before blasting the hell out of my plane.


Interestingly these photos, especially the first one, showed the shade of the paint much more accurately than the earlier photos. Now my Flanker was completely sky-blue - for a fleeting moment.

The second colour of the camouflage

To brake the shapes/form a bit I blasted some shapes with another version of blue-grey (VMA 71319 A-28M Greyish Blue). There wasn't a huge contrast between these two paints but they did have some difference at least. This second colour was a bit greener than the first one. Maybe that could've worked as a decent November-ish basecoat.


In general I hadn't and wasn't planning the pattern specifically. I wanted to break the form of the plane a bit, which in turn meant that wherever there was a longer part, I added stripe-like areas across it - when there was a longer straight bit, I added some irregular shapes along and over the edges. Now these two greyish blues didn't really give me powerful tools against the form of the vehicle, but not all camo jobs were of the high-contrast type.


The highlight colour

As mentioned, to complement the two main colours (that were to cover most of the surface) were brothers at least, a more standing-out colour was more than welcome to bring some life to the whole show. This task was delegated to a light blue (VMA 71317 All Sv. Gol Light Blue) paint.

I didn't want to do large volumes of this bright colour, I attempted instead to attack corners and longer edges that were contrary to the nature itself. Again I went without a deliberate plan, progressing with my gut feeling.


19.2.20

Canopy bits and priming

The endless pain of transparent pieces

Being of an excited mind I didn't remember what I had said the last time about the sharpness of a hobby knife. Luckily these pieces didn't have overcomplicated shapes on them.


At least I had the decency to check the instructions, just in case, before taking the glue out. My transparent sprue had four pieces: two canopy pieces, a bit for the targeting reticle and something that looked like a part of a landing gear light, but that didn't seem to have a place in the instructions.

I glued the targeting thing onto the dashboard. Maybe it got installed correctly, I hoped it did.


As usual I applied white glue on all the edges of the canopy pieces to glue them tightly both to the airframe and especially each other. I had this silly idea in my head that if I filled all the gaps with this goo they'd get airtight enough to keep my painstakingly handpainted cockpit details safe from the upcoming airbrush attack.


Priming I

The Flanker's priming was started from the upper half of the plane for I thought it might be the more complicated half, due to the limited amount of  handholds on the bottom. I was beginning to wonder if my primer had seen too many cycles around Sol already as it has been a bit more flakey during painting in the few last projects. I guess I also got too close to the target areas while painting as there was some puddling on one of the tail wings. That was something I could maybe sand and repaint later on.


Priming II

Spoiler: when priming the bottom of the plane I got somewhat enthusiastic and started painting the engine exhaust nozzles metallic (VMA 71065 Steel). I had no idea how but apparently I managed to knock the other nozzle clean off at some point. Damn.


12.2.20

Flanker main assembly 3/3

Not much was missing

Thanks to my timings the third and last proper building session was left with a couple of silly pieces left to install. First of them was the second main landing gear bay door, that didn't want to settle in as nicely as its friend on the other side, even with some gentle violence.

To the both lower outer corners of the engine air intakes I installed strakes that had somehow escaped my eyes in all the photos and 3d models I've ever encountered. Not that I had known to pay attention to such details, which seems to have emerged as the carrying theme of this project.


Thanks to the closed hatches all that remained was the installation of the pylons for the missiles. Of those I got six to glue on, with an interesting layout: two in a column into the middle of the belly of the plane, two under the engines themselves and a final pair under the wings.

Wikipedia was talking about ten hardpoints / pylons, from this model either the inner or outer underwing pylons were missing, but I really couldn't say, which ones. Both wingtips were supposed to be of the  missile-carrying variety, so from my point of view I was missing only two separately installable pieces but as I only had no missiles to put on those even if I had them, it  mattered little.

To my amateur eyes all six pylons looked identical, even though they should be, technically, somewhat different. That's because the typical armament of the plane consisted of R-27 and R-73 missiles, which were mounted on AKU-470 / APU-470 and APU-73 pylons respectively - but as a quick glance at the kit's sprues told me quickly, all the missiles were the same model but with different tips. So that didn't matter much, either. More about this stuff next time.


5.2.20

Flanker main assembly 2/2

Changes of mind on the assembly line

The most significant remaining pieces that affected the look and character of the plane were the tail wings (for the more aviation-minded people, vertical stabilizers) and I believe I got them installed pretty much straight. If I didn't, my eyes had been off again.


To the other side of the plane, fascinatingly onto the outer sides of the engines, I installed a couple of strakes (yes, I found their name from wikipedia's F-16 article), just like the vanes in the bottom of the F-16 a few years ago. The engines were impressive indeed.


As I've been talking about I had spent an amount of time planning how to step by step at this point. All that was thrown straight into /dev/null as I sliced the excess plastic bits off the landing gear bay doors and glued both the nose and right side doors permanently shut.

Of course I had pre-fitted them before cutting off the first fragment of plastic, no worries! The left side door I left for the next session as I didn't want to start rushing and ruining things.


On the top side I did little after the double tail wings, besides installing the air brake in place, in the closed mode. I guess I could've done it all open or partly open, but those ideas have always felt a bit goofy to me with a pilotless plane - but this has been, as always, my own mental problem.

A couple of pitot-tubes or somethings like them were added behind the pilot's place on to the sides. Maybe this time they'd also stay in place while painting.

This was, by the way, one of the main reasons I don't enjoy building these fantastic flying machines that much, not nearly as much as tanks: I'm not into them enough to bother to learn all the fine details, all the weird little bits and pieces that these contain, or whatever the hell this funky little knob is this time. I mean, in my ignorance I might leave off a vital piece of equipment :D