Mastodon
Showing posts with label Smêr. Show all posts

27.7.16

Finished: IV/16

A last-minute change of mind

My project assistant had already been picking decals and their places, when suddendly she decided that we wouldn't use them after all. All the same to me, the artist (and owner and payer) decides. To finish the project up I glued on the three missing canopy pieces (to my question "a straight or a bubble canopy" I was of course immediately answered "bubble!"). The Spitfire was finished as soon as the glue cured.

Supermarine Spitfire mk V C

The result was, as expected, pretty colourful. Just like the Challenger it would've been easy to conceal in an autumny forest. We'll see if my assistant has interest for a third model. Time will tell. Sooner or later, time will tell.


20.7.16

Another very custom paintjob

I unleashed my Project assistant as soon as the model was ready to be painted. The chosen palette was familiar from the previous one: red/blue/green/orange, except that this time she asked to get some kind of a metal shade (VMA 71064 Chrome). On the first session she painted the bottom and some of the sides. Then, only one and half months she finished with the rest. Luckily we were in no hurry at all.

Early May


Late June


The resultset

The sweet mix of chrome and the other shades made this plane quite unorthodox. While looking at the bottom you could expect it to be the plane of half-red baron or something equally weird. But as I have said before and will keep saying, the main thing was that the artist herself was content with her doings.


13.7.16

Puttying, filing and priming

Canyon filling

First things first, I applied a hefty amount of Tamiya's putty to fill all these insane megagaps of the plane. This is one of the main reasons I've always found plane models slightly annoying: if something goes a bit off while combining subassemblies even if the subassemblies themselves align properly, everything's ruined. That's something I really don't appreciate.

After the grey goo had cured for almost 24 hours, that being the next early evening when I had some time to fool around, I sanded most of the excess garbage off. Still, I didn' take too strict an approach. The best result would've been achieved, I assume, if I had sanded most of the greyness away, but then I'd also lost at least 90% of the still remaining surface details. I decided that a decent surface for painting was most important in this model.


I had to fake the remaining parts of the landing gear bay doors with putty because the kit pieces didn't cover enough

The sad greyness of the air farces

I wrapped up my part in the painting of this plane by priming it. Just in case I also sprayed some Vallejo Grey Surface Primer inside the plane, just in case the artist herself wanted to give her personal touch to the cockpit, too. The next phase, in any case, was not going to be in my hands.


6.7.16

Building gently

I was completely sure that I had taken a photo or two of the cockpit pieces before I glued them inside the airframe. Still, I just couldn't find them, so I guess I hadn't taken the photos after all. The cockpit, as I had said in the previous post, was pretty weird-looking. It consisted of two plates: an instrument panel + something that looked like it was supposed to be the silhouette of the pedals that got an aiming cylinder glued on it and then a massive bar that was supposed to be the joystick - and a rear plate where the pilot's seat was glued on. There was no floor on this plane.


The wing assembly was traditional: a large lower piece that got the left and right upper halves glued on. These bits didn't align too nicely but they settled after a bit of fighting. Taping the key parts shut was essential, as they tried to grin quite a lot everywhere.

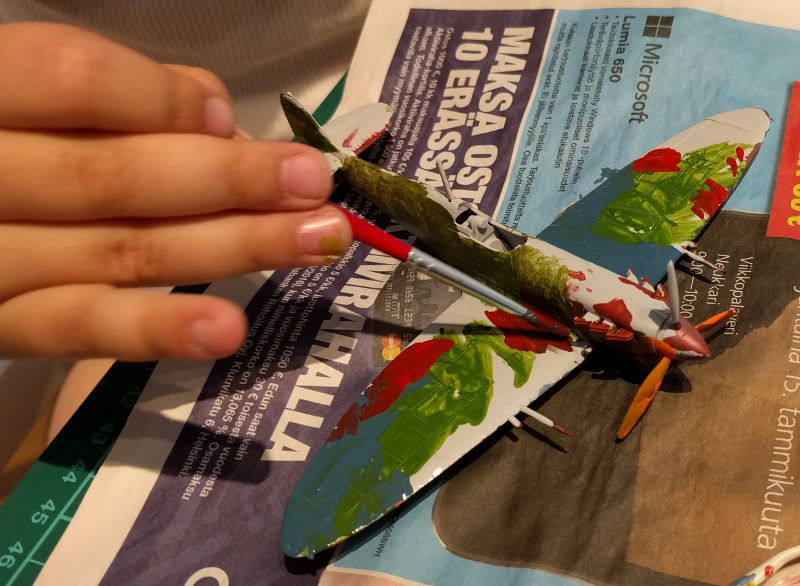
There was supposed to be a brick-sized piece in the inner front of the cooler, with a sort of a grille-texture on it. But the brick was enormous and the opening on the wing required a huge amount of cleaning up and carving. I sliced off thin, thin slivers off the brick, dry-fitting it after almost ever one, but still I managed to ruin it and threw it away. Maybe this model would survive that. Interestingly the wingtips had two options, either the one she chose and what you can see in the pic below, which was larger and rounder (the one I also thought looked more Spitfire-like) or the noticeably shorter and tighter-arced one.

All in all the pieces were ridiculously thin and were bending in strange ways. I didn't dare to cut off the sprue-edges too close but left them to be filed off later. I just had the feeling that the tiniest of badly made cuts would've left the wings with insane gashes that would've been a pain to conceal.


The pointier and longer spinner was chosen out of the two alternatives. To my eyes the exhaust pipes somehow looked way too large, but maybe I'm just confusing them with the Messerschmitt 109's in my mind. Also, the mighty bar that supported the antenna cable didn't look like it fit in too well, but I trusted that the glue would hold it well enough.


Then I glued on the gun's tubes, the wheels in their wells and the landing gear plates to protect whatever they could cover before I joined the wings and the airframe. When I had done that I just sat there staring with wide eyes at the insane canyon between the airframe and the upper wing halves. I'd really need to putty this one up before I got to prime anything.


29.6.16

Project IV/16

Subcontracting project II

My Project Assistant had been asking for her own plane model (to paint and play with, of course) for quite a long while, thanks to five consecutive planes I've done. From the Model Expo 2016 she bought, with her own money, a Spitfire made (or packeted) by Směr.


The scale was the familiar 1:72, its variant was apparently 5c and the box art I assumed to be a representation of the Australian version. Not that it mattered to me, the paintjob would be Something Completely Different in any case.

Bits

All the pieces were spread over six sprues and looked like they'd require quite a bit of cleaning up. In my hands the plastic felt pretty flimsy, I just hoped it wouldn't get totally ruined while being cut off the sprues already... I was a bit concerned in advance. There were an amount of optional pieces, at least I could see at a glance two spinners, air scoops for the engine and canopies.


Decals

The decal sheet had a good amount of markings, for both RAF and (according to the instructions) RAAF, so I had guessed correctly, it was Australian. Oh and the Chech roundels on the lower right corner. And the cheese-eating surrendermonkeys had their roundels there as well, I'd go mad with the choices. Most likely I'd let the owner choose which markings she wanted, if she wanted any of them on her plane.


Guidelines

I'm pretty sure that the instructions for this plane were the shortest I'd ever seen, at least based on my (unreliable) memory. There were more decal-laying and painting pages than construction pages. Looking at the pics the cockpit interior looked very weird, even if you remembered that this was representing something designed by Brits.