Mastodon
Showing posts with label Pondering. Show all posts

31.5.23

Jagdpanzering 25-26

Weathering session 1

Now that I had noticed that my paintbrush set was missing a brush that would work great for blending oil paints, so I needed one. Or a couple. On one Tuesday on my way home from the office I popped by the nearest shopping paradise and after asking from the personell I found two fitting makeup brushes from Normal. The other one was round-tipped and the other a flat and a bit stiffer.

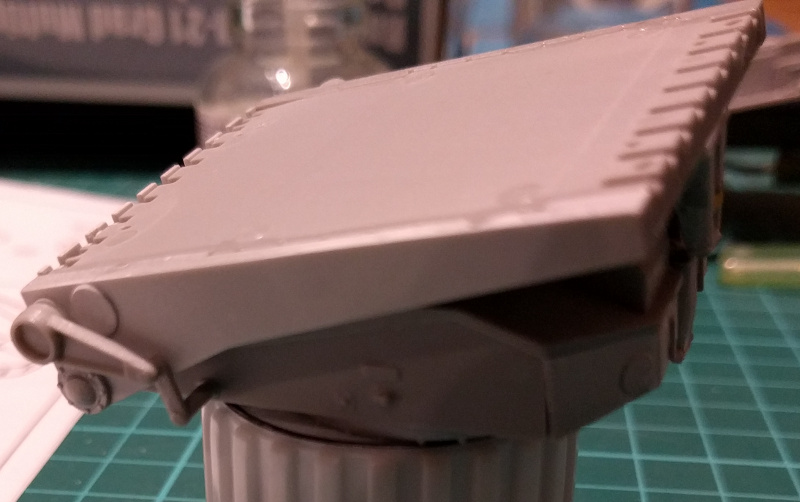
Before any more complex operations I repainted the wooden bits of the engineer tools with the wood-coloured paint. I didn't thin it down or anything, just repainted the worst-looking parts.

They were better now. I'd try out the mahogany-wood layers again on the next Panzer.

25: Buff and Light Mud

From somewhere I had gotten into my mind to try colour modulation, so I applied some light (ABT035  Buff) dots around the upper third of the model. This was a pretty light-coloured paint, and besides the Light Grey it was the only one from the Lights & Shadows set I hadn't tried out yet.

The paint application was done with a toothpick to keep the dots small. I started from the top of the barrel and the front of the tank. Then I blended them with my new brush, and when I was content, I proceeded to the next area.


After this colour modulation test I got to to the weathering part. I picked the light mud (ABT215) from the weather set and thinned it down very scientifically "a bit". I didn't want to use the paint direclty as thick as it was in the tube, but I didn't want to turn it into a wash, either.

I spread my paint around the running gear, lower hull, and wherever mud would've flown while spinning in the great outdoors. Blending this I used the rightmost brush seen in the first photo.


After drying from Thursday to Sunday the result was neat and did look like dried mud. Without side-by-side before/after photos I could't tell you what was the end result of my colour moduulation session. It didn't seem to have ruined anything, which was from the better side of the potential results.


Especially in the lower hull I liked how the dry mud looked like at this point. I had left the guiding teeth undone on puprose and that looked a bit funny at this point.


26: Wet Mud

After all these years I really couldn't tell if I had come up with it myself (unlikely) or did I learn from somewhere that when working with mud-sand weathering the bottom-most layer should be your lightest and most dry layer of filth. Then you'd just build on top of that always smaller and fresher-looking layers. I thought that was pretty evident in the springtime when looking at buses and cars: the old dry crap covered the most, while the freshly splashed puddle-mud had a smaller coverage.

On this same line of pseudoart mimicing real world, I thinned down some dark mud (ABT130) and added random splotches around the running gear and the lower hell. In addition I added some marks on the rear deck and on top of the casemate, by the hatches, to represent the muddy boots of the crew.


After choosing the fresher mud areas I spread and blended the mess into something less obvious.

The lower glacis plate's right corner looked like it needed to be softened up later on. If that didn't dry too much... For the sake of science I allowed it to dry for a longer time.


This last photo maybe showed that I finally remembered to paint the jack's handle with the Wood paint. Somehow I had left it Mahogany for a long time. Now it stood out a  it less, but how'd you tell apart a light wooden colour from dark yellow anyway?

These wooden handles did not spark joy in me, but I felt they were still maybe the best wooden bits I had done. Perhaps I could add a brown acrylic wash on them later on? Had I been smart I would've scratched some lines into themt to add some woodgrain texture and that'd help in the washing stage.

With the layers of crap the tank had become quite dirty-looking. Now it was the time to put the oil paints away for a bit. Next I wanted to test how the pigments and Abteilung's thinner worked together instead of Vallejo's pigment binder. So yet another new thing to be tried on in this project.

2.9.20

It came back home!

Badger badger badger...

It didn't take many days from the dropoff until I got the sms informing me that the servicing was done. Within a couple of days I took a quick early evening drive to fetch it and ask some stupid questions about the process. My airbrush had indeed been dirty, but I had also at some point managed to install the tip into a wrong place, which had definitely not helped with the issues. Luckily I had not broken a thing, so I gained some scratches on the device and a "you silly fool" moment for myself. The time & materiel costs were less than 50€ and the amount of time and effort, not to mention madness, they saved were worth much more. All in all, a great deal from my viewpoint.

Airbrush after service

Now I needed to get some time to return to the priming, in addition to everything else. If I had enough time for everything, that is.

1.1.20

Hm, so what next?

Queue status, Q1/'20

Right. It was, according to the calendar, the first day of 2020, the workbench was empty, the 'mumblings TODO pile was a mess and the maker on vacation somewhere else. Last year's project saldo was an appalling two finished models from start to finish and some other badly documented themes.

I was thinking very hard what I wanted to do next, when I got back to the table. My two last models had been fliers, so a ground-based model would be good for my mind. Also the stencils I bought a bit over three years ago were still screaming for their first utilization. The stash had at least three Panzers, especially the Königstiger w/ interior was really, really interesting.


Of course there was the Atomic Annie with her movers, the sheer amusement factor of it was really cool. My main issue was that the Revell's matchbox-sized Tiger with infantry -kit was the only one that didn't look like a long project. Right now I felt like something quick and with a potentially funny, even playful paintjob.

13.6.18

Session XXI

Slogans

I abused translit.ru - that my former colleague Sergei used often for his writings - and wrote the characters down on a post-it note for copying. The main problem ended up being "which five work-related things am I going to use here, anyway?". In the end I did choose those pretty easily, hopefully not regretting my final choice later on, which'd cause annyoing repainting.

АРТЕР
ИМС
АРЦ
БЛУЕПРИНТ
ЯФ


Department for Agitation and Propaganda

With the slogan-like texts ready I grabbed my tiniest paintbrush and the white VMA paint and started pondering which word would go into which turret. I thought that I'd decorate just the turrets, nothing else, so they'd be on the main turret, the gun turrets and the LMG ones. As the tank was for obvious reasons going with the project name "Arter", that was going to go to the main turret. The rest of the words/turrets combos kinda made sense to me. Of course someone who knows more about things (numbers, actually) could raise a bit of a hell about what's important and what isn't, but with my software developer's goggles this is how they got distributed :)

ARTER

Onto the left side of the main turret I painted Arter, the name of my previous workplace that they changed to last spring. The whole APTEP-silliness started with a stylized name-logo where the R's looked more like P's. And when you remembered, that the cyrillic 'R' is 'P', we got plenty of bad humour out of that.

Painting the chars on the turret was slightly bothersome, thanks to the weird antenna monstrosity. I guess it ended up being readable.


IMS

The frontmost gun turret got the word/name IMS, as I worked a bit longer on that one (maybe a year), when I worked there. My original idea was to paint the words on one side only, but I ended up doing most of them on both sides. With the short words, because the fit in a reasonable manner.


BLUEPRINT

Blueprint, html5-editor, process editor, a beloved child has many names. The main reason for me to use it here is that it was and still is quite a central tool in both products. That word was damn long and my handwriting wasn't that small, it didn't fit tolerably on that tiny turret-bucket twice.


QF

QF or Qualitas Fennica didn't have any direct connection to my own everyday work, but as it was pretty important company-wise, I thought it'd make sense in this theme.


ARC

Architect, ARC, whatever people called it in speech and writing, was the other service I worked on for a bunch of years. That's why it got the place on the other gun turret, but ended up in the rear end of the tank.


All together now, comrades

Now I'm humbly apologizing the helpdesk gang, but I didn't come up with a way to mix helldesk in to this circus. I did spend an amount of time doing helpdesking too, so it'd fit in as well.


21.3.18

Session XV

The final construction post

This is the last post about the building part, trust me. I think I'll keep the same naming up until this is all done.

Side armour plates

To begin the end of this, I started by cutting off the left side's armour skirt pieces and cleaning them up from excess crap. Then I simply glued them on to the support structure, starting from the front.

No major problems occurred, other than that the armour skirts didn't just reach the deck armour at all. I did complain earlier that there were fitting issues between the deck and the tub. Here those just glared at you, as the top attatchment points of the plates didn't hit. Looking a bit further away (image 2) it didn't look too bad, but still.


The other half of the tank went just as quickly, with the same issues. I'd have to use a full session at least to putty and whoknowhowelse to fix these random things. That was going to be a post on its own, I didn't want to mix that stuff here this time.


The cable roll

My last missing piece was the cable roll, that was going to be installed to the left side of the turret cluster. I just superglued one end of the thread to the core and left it hanging. My idea was that I'd paint the roll separately and only after that and the tank were painted, I'd roll up the thread, superglue a bit near the end, cut the excess away and then glue the setup on the deck. There was enough thread for a couple of these, based on a very quick test.

The point of doing this in this order was that it wouldn't matter if and when the thread got painted on, as the ruined part of it would be hidden in the center of the roll. And the outer side would be weathered just like everthing else. As the thread's colour was just fine in my opinion, I wasn't going to paint it at all.


Schedule mumblings

At this point, when all the actual building was done and the hours locked in, I thought I'd ponder a bit on the numbers. So, I had 14 * 45 mins + this post's fifteen minutes (amazingly quick, I know!) clocked. That totaled in at 645 mins, that then turned into a slightly prettier form: 10h 45min.

Interesting, I'd say, especially as a number of earlier projects, where I've been marking down my hours (in a different way, but still) have been completely finished with these numbers. Those have all had a pretty small percentage spent on the actual building out of the whole project.

Where did all this time go, then? As we all know, a context switch is an expensive operation, and this is what has been going on a lot: 15 times starting up + doing something + wrapping up. So there's been a lot of repetition and sort of "extra" time. But a big reason for my suboptimal time usage was that my hobbying environment has changed quite a lot from what they were, say, a year ago. These 45min sessions have not been exactly full of 100% concentration, but that's life for you :)

I guess that if all my modeling projects were done in an NTP environment, they could be compared plausibly, but the real world has never behaved that way. Different models, makers and who knew what other variables were in play, all those have affected the time spent in each stage in curiously varied ways. I really wasn't going to build a dozen different versions of the same model just to get some data on this, so... yeah, this was a long build while others haven't been :p

25.8.17

School age (FI)

A neutral 7

If this silly blog was a human being (and a Finnish one), it'd started school last week. But as it's not, it didn't, and these weird what-ifs about time don't have any better function except to provide "oh my, how time flies" kind of mutterings in us older people.

What kind of silly nonsense could I combine with number seven and what kind of ha-ha-ha-so-funny almost-jokes I could've conjured up? Well, our good friend Wikipedia contained a load of stuff, like the seven colours of the rainbow, the layers of the OSI model, the Snow White's dwarves and so on. Maybe this latest year has been, fittinly, quite Sundayish in its laziness, especially the last part of it. I can already tell that the next one won't start too hecticly, thanks to us moving to a new apartment/house in about a month. I guess it was time, as the last move was over five and half years ago...

This year I decided to spare you the stats and related mumblings, mostly because I realized that the birthday of the blog was tomorrow and had to type up something. Let's take a look at the numbers next year, because those aren't fun after the date anymore.

1.2.17

Sub-assembling

Progress

To begin the assembly I glued the cabin into the framework. It settled in pretty decently. I chose to leave the front grille off still so that I could paint the engine compartment somehow nicely. The best result would've been achieved by painting these separately as well but that would've led to the glue-paint mess and I really didn't want any of that if I could avoid it.

While the cabin's gluing was curing I assembled the exhaust pipes and then glued these rather complicated setups into the framework. Those holes I had to drill ages ago were very well positioned and of the perfect diameter so I didn't get any more grey hairs while installing.


Then I proceeded to the spare wheel rack. The instructions told to use a bunch of PE stiprs to hold the wheel in place. That didn't appeal to me as I wanted to keep the wheel off for a good while still. So I used a couple so that I could slip the wheel in and out without a fight. The rack itself was neat.


A tactical choice

I decided to build the next few main subassemblies separately again instead of blindly following the instructions. Again I'd first assemble them, then prime them and basecoat them all separately. Only then would I put them in their places and attack the truck with some sort of a camo. I was thinking of checking how the Ukraine-invading Green Men looked like. Or I'd just paint some kind of sand-coloured bands to break the form a bit.

Following these guidelines I had just made pu I left the wheel rack on its own and continued on the next piece. Not that I could tell you what the function of this one was, but I can tell that it had boxes on it. This'd be located just behind the wheel rack, below the rocket tubes in the transport mode.


After the mysterious box setup I finally got to start working on the final missing main component: the M-21 Field Rocket System. I had been waiting for this for a long time, a long time, as this was going to be the crown of the whole model.

The base of the launcher, the system that controls the traversing and elevation of the launch tubes was fascinating. It had plenty of space to adjust the position for the pieces, but as you can see in the first photo below, the elbow joint locked the launcher's vertical angle when it was glued together. I was boring and left the elevation at its lowest setting, so it would look ok in the transport mode as well as in a firing position.


Some plumbage

With my experiences so far I was somewhat scared of how long I'd spend working on the 40-tube launcher. Cleverly the launcher started being formed with three 8-tube rows, with each tube getting a rocket's tail end glued in. Of course I could've left some of them open for a partial load, but I went with a full loadout so that it wouldn't run out of rockets that quickly. A fully armed and operational vehicle, just the way I've always liked them.


Then, on top of the triplet built earlier I built another almost identical 8-tube row, the only difference were the missing top attachment points. After that, to hold the packet together from the sides I built two 4-tube rows (or columns in this case?). I was honestly surprised by the sheer weight of this tube setup as it was actually a bit on the heavy side.


As soon as the glue had cured I attached the launcher's tubes onto the elevator mechanism and then added the last missing decorative and supporting pieces around the tube pack. During the next evening I built the last missing parts, which included the traversal and elevation controls and the PG-1M panoramic telescope that's used to aim the thing. Now I was a bit disappointed that there was no K-1 collimator for those who are into dioramas... That piece could've pushed me over the edge.


That was it, I think. Next I could start priming this monstrosity for real.