Mastodon

27.3.24

No oil into the trash can!

There it was, basics were painted, so now it was time to drop all the oil paints and thinners onto the palette.

Panel lines and shadows

My sepia wash was always a bit too thick - or my paintbrush was a bit large. Or my wash would flow better if I actually did the satin/gloss varnishing before, as recommended. I aimed the was into all of the lines, grooves and shadowed places and didn't even think of just slathering the oil wash all around and then remove the excesses. Being this small the mini was a bit difficult to work with sometimes.

As usual, I left the thinner-powered cleanup for the next evening. I purposefully left the ejection port area of the AC/10 a bit crappier than what I might usually have gone for.

That being done I left it to dry for a couple of days, so that the shadows got properly set before my grass green test. If I had to redo the panel lines again, I would do it in the final stages with the other fixes.

My triplet of supposed UAC logos I might still poke by painting the triangle light grey (Stonewall...) to cover up the rubbish results with the masking. If that got done before any other oil work, the result should be tolerable.

Testing the greenery

Looking a few months back, Santa's colleagues brought among other things four Abteilung tubes ([ABT220 Dark Brick Red, ABT260 Oxide Patina, ABT090 Industrial Earth, ABT094 Green Grass]) and the brightish green felt like a good fit on my green parts, if I only knew how to use it properly. Maybe it would work a bit like the buff I used in the previous 'Mechs but more adjusted for the underlying colour. The UrbanMech didn't have a medium laser, so I didn't need to go insane trying to implement a jewel effect with oils at this point in life.

Following my previous methods I poked a few dots of green paint, then blended it around with the round-tipped blending brush. Perhaps it left a gentle green layer, I just couldn't tell quickly with my eyes and without setting some before/after pics next to each other.


Apparently I didn't ruin my earlier washing with this green operation, so I didn't see any need for a second sepia wash round. It was a tiny victory, but a victory nonetheless.

20.3.24

Fine-tuning the trash can's paintjob

Tweakage

Right. First I had to fix the lower legs and the head, because their cold colour didn't work together with the other, warm tones. The cold grey was also a step or two lighter than what I looked for, so I started by squirting some cold grey on my palette stand-in. To that I mixed two drops of German Grey and two drops of red (VMA 71003 Red RLM23). This looked more like what I was looking for already on the old jam jar's lid, so I tried it out on one of the knees right next to a green area. The difference between these two greys on the mini wasn't huge, but the effect on the mini, when comparing two slightly different knees with their surroundings was incredible.

The last time I was pondering a bit if the boots/feet ought to have been toned towards green to follow the sprite's look a bit more, but I didn't want to make this too complicated for myself. So I decided to use the same customized grey on both the legs and the head.

While those were drying I took some black (VMA 71057 Black) to paint the viewports, the bottom of the AC/10 and the lenses of different lasers. After that I highlighted the various valves, vents and whatnots with German Grey to highlight them a bit before the upcoming oil washes.

Highlighting greens

Just to try something out I mixed the soviet-style 3B green with a couple of drops of brighter green (VGA 72730 Goblin Green) and did a stronger edge-based highlighting on the upper, more sun-kissed green surfaces of the mini. Just like I highlighted the Archer's red armour panels with Ferrari Red, but here the effect could've been a bit stronger, even.

The next evening I continued with my highlighting activities with slightly stronger (brighter) colours. First I fixed what mis- or underpainted bits, then painted thin lines along the various edge with yellow ochre.

To emphasize the greens I did similar thin lines on the edges and upper ends of the panels. This time I didn't mix up paints but used the Goblin Green straight from the bottle.

Skin and metal fixes

On the skinny parts I repainted the biggest gaps that I saw with the Vallejo's wood colour, then did some yellow ochre highlights on the upper edges of the panels. Or wherever the light was supposed to mostly hit.

Lastly I fixed a couple of the metallic bits (the nozzles of the Jump Jets, for example) and as a simple detail I painted the cockpit hatch hinge with German Grey. Maybe the dark grey bits could benefit from a similar edge highlighting as the rest of the parts, a cold grey with a drop of red might be just the thing. Skipping the German Grey from that would keep it bright enough, but hopefully not too bright.

Grey boots and the helmet

Again I mixed a new wonder paint: a random squirtful of German Grey got two drops of RLM red mixed in. That ended up being a bit too red, so I added a bit of Stonewall Grey (VGA 72749) into it. Using this mixture I painted some highlights using my bestest of skills (*snicker*).

Perhaps that did something good for the mini. I used this same paint to highlight the german grey bits too, to get their details a bit more visible.

Uniqueness

To avoid this one to suffer the same fate as my previous one (the mine-clearing T-34/76), I decided to add insignia right now, before washes or weatherings. As the paintjob's inspiration came from Doom and some kind of a unit was to be conjured up, I felt it was obvious: Union Aerospace Corporation. That fit the corporate world of BattleTech like a berserk punch into someone's spleen.

These four samples told me what I needed, I had enough freedom for the insignia. I thought I'd implement this with tiny triangle-shaped masking tape pieces and two grey circles. Depending on my feeling at the moment, I'd either do them with one shade or like the blue one in the bottom, using two greys. Attempting to paint the UAC characters wasn't something I thought I could do in this scale, so the corporate logo had to be enough.

For the masking I just cut a tiny triangle-shaped piece off a slice of masking tape. This triangle was about three times too large, so I only used the tip of it. The tiny piece got pressed on a visible place on the top left leg. I decided to try to do smaller ones in the shins, so I cut two tiny triangles from the edges of the original one. There was some cautious optimism here, despite me knowing that my skills at painting freehand circles with paintbrushes were at absolute zero.

In my hubris I thought for a moment if I should paint them in different greys, so I started with cold grey. As the first circle became a shapeless blob I just did a couple of dots next to each other, positioning them over the three masks.

After removing the masking tape pieces I had no cause for celebration, but that was to be expected. I was still disappoinged with my inability to paint these simple, tiny things: especially the top left leg's main one was foul. On the shins the left one was a bit more tolerable. Still, a crappy idea and I shouldn't have tried this in a tiny mini and scale.

Maybe the Urbie could be saved with some oils. The mini wasn't going to be stared at at these distances, the painting mistakes didn't glare at me when looking at the mini in person, but they did stand out shamefully in the closeups.

13.3.24

Painting a trash can

Priming

Like I've done a bunch of times in a row now, I primed the miniature with red primer VSP 70624 Pure Red). This time I didn't feel like setting up the airbrush, so I did this by hand.


For this projectful of posts I decided to tone down the "a pic from the front, another from the rear" photosets in each of the steps by gimping together a set of photos from the same step. This should make the posts a bit better contained and reduce the "I've seen this same pic with tiny changes six times already" effect I've had on occasion,

Choosing a theme

Originally I was a bit lost with what I would actually want to do with this Urbie, it wasn't going to join my Jade Falcon Cluster, and it also didn't have a clear suggestion in the box like last year's Archer. I also hadn't thought of what kind of a theme my yet-to-be-founded Merc unit, so undone work didn't really help here. Somehow the UrbanMech didn't lure me to paint it as a Kell Hound nor some other well-known Merc outfit.

Then I saw once again a pic that some more active social media users had been sharing pretty happily earlier, and that one struck a chord immediately:

(c) Eldoniusrex

Being a bit simple, I didn't want to make a green-grey unit like in the pic above, instead I wanted to celebrate the original Doomguy by keeping his bare arms in the show somehow.


Combat overalls

Thanks to the cats sleeping over my primary paint store, I chose from my dynamic level 1 cache a few bottles of paint. Of course I had no perfect green paint for this, so I had to mix up a new one to get where I wanted to go. To begin with I squirted some Soviet green (VMA 71281 3B Russian Green), and added two droplets of yellow ochre (VMA 71033). This I brushed on the overalls, and in my excitement a bit over the helmet as well.

As you could tell, it was a pretty dark shade of green. For some reason I tried to do some sort of a wet blending here, so I mixed in another drop of yellow and painted smaller surfaces set off upwards inside the first green layer. My idea was to leave the darkest layer as shadows. Finally I realized I had repeated this to get five consecutively brighter layers, leaving me quite a bit of a different shade than where I started from. Here's a couple of pics for those super interested in the progress of the layer-painting approach:


Yes, indeed, the mini was darker than the VGA-coloured corporate space marine. I planned using a bit more of a bright green as highlight when the basic painting was all done.

Bare arms and the sixpack window

Our Doomsday hero had bare upper arms and a pretty strange window in his shirt to show off his wounded abdominal muscles, so that's what I tried to imitate. Luckily the UrbanMech had four armour panels in a very convenient place in the middle of the Center Torso, so this worked nicely despite the Urbie doing a bit of a torso twist.

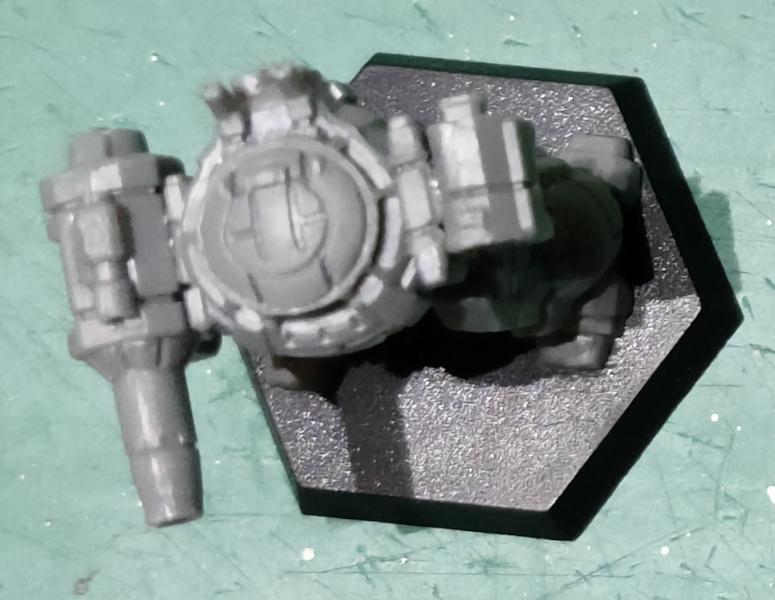
This trashcan had no actual arms, obviously, so I decided that I was just going to paint some bits in the gun pods attached the Upper Arm Actuators to get some kind of a skin theme going on. To start this I used a very generically named wood (VMA 71077 Wood) to block out the bare skin patches for later paintings. These I intended to highlight somehow, as soon as I had the areas defined first.

Now the downside of the red primer at this stage was that it made my mini look pretty damn weird. A red-yellow-green piece looked like a handful of fruit-flavoured candy, just much more foul-tasting.

Combat boots and the helmet

I thought that my cold grey (VGA 72750 Cold Grey) was just perfectly dark for this stuff, but nope, it most definitely was not. I had painted the legs from the knees down, and the head cupola to decide whether my colour-blocking worked or not.

The business part of the armament, those being the Autocannon (AC/10) and the flashlight's (SLas) tubes and related bits, the antennae, and the knee joints I painted with German Grey (VMA 71052 German Grey). Yeah, I was pleased with this method of marking metallic pieces without using metallic paints.


At this point the warm yellows and greens worked together just nicely, but the aptly named cold grey didn't match with them at all. I had to start reading about colour theory, or something, to find a recipe for a warmer grey to this miniature. Most likely a drop of (dark) red would take me far, but that had to be tested.

Towards the next step

In any case the basic paintjob was going to be as it was. Mostly I wanted to see if my idea made any sense or was it just an ugly mishmash. If we ignored the colour temperatures, I was happy with this scheme. Of course I had many opportunities for ruining it, but I didn't want to worry about that yet.

Setting up the scheme and blocking the colour surfaces took me about two hours in total, next I was going to fine-tune things. Would I get that done in two hours as well? I'd tell you the next time.

6.3.24

Project I/24

A trash can

I had those three untouched Salvage boxes from the Clan kickstarter, I now was flitting between the UrbanMech and the Mongrel/Grendel A. This time the UrbanMech won, because it could be done straight out of the box.

That's all that was to it. When I had the time, I'd clean up whatever bothered me and then the thing would get primed as always. It might get gently customized by adding whip-antennas.