Mastodon
Showing posts with label Italeri. Show all posts

14.5.13

Completed: project III/12

Final mumblings

At long last this NZ TD is completed. What were my finishing touches? I applied from my Tamiya Weathering Master set some "mud" pigment to the lower parts of the model, then to the general middle and top hull some "sand" and finally, mostly all around an amount of "dry sand". Somehow I felt this was a better approach than washing the whole model with black or brown.
This project took quite a long while if you look at the calendar. Counting the hours worked brings us to a much lighter workload in the end, even though I can't pull a decent number to give a decent estimate, even. If we agree that it was more than nine and less than twenty four hours in total, I guess we're more or less there. Maybe I should actually check how long I exactly work on a model (or a couple of them), to have a clue, just to see how it goes.
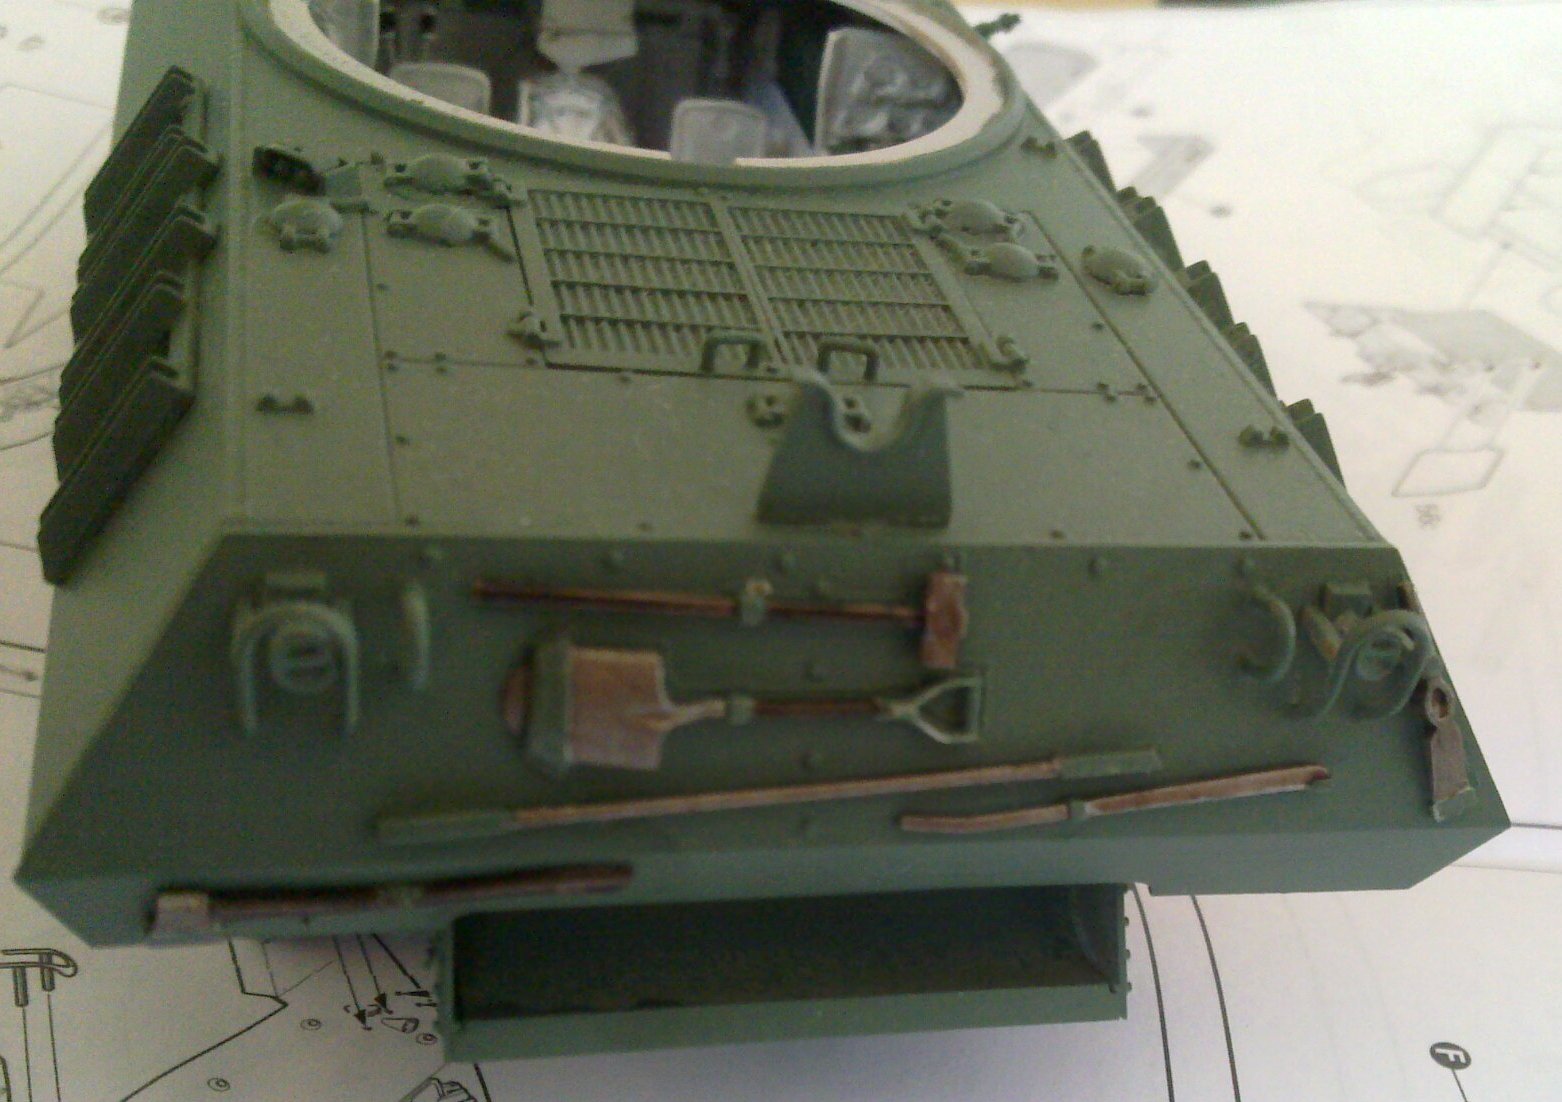
Final pics

Here's a set of pics, from various angles and various settings. The background is, again, instead of cardboard boxes and my workspace,  a Battletech map. Complaints and feedback are always welcome, I just refuse to promise or guarantee any sort of change in my ways of working ;)


10.5.13

Some more tinkering

Washing and rope tricks

The hectic week has set its own boulders on my path, either slowing me down or even stopping me. Mostly I've just applied some washes and hung those jerry cans to the back of the turret. What do you mean it's not a good place for fuel? I never said it's a smart place but that's where the crew set them up. You can't blame me for that!


What else is missing?

I tried to apply some muddy goo splashes on the lower hull, but maybe the deck, the turret and the front could use a bit of some crap applied on them. In addition to those, I believe that the sides could benefit from a bit of sand-like pigmentation. After these things I can't recall noticing any real things missing, so maybe this project is finally getting finished.

26.4.13

Markings

The last couple of short evenings I've painted markings to the Achilles. I was inspired by (if I didn't remember to mention it the last time) from a Bison Decals sheet, among other places. The example unit was said to be from the 32 Battery, 7th Anti Tank Regiment. Naturally extrapolating from that the turret got a marking saying C2 and the thing in the rear got a number 96 to company a twig. From another source that I already forgot, gave me the idea to paint the British roundel on the deck.


Oh my no, it's not done yet. At least the engine hatches need some black wash and who knows what else I need to remember...

19.4.13

Random stuff to be carried around

Jerry cans

I wasted some time painting the random fuel containers and boxes. Instead of using the same green as for the tank I decided to go with Tamiya's XF-70 (Dark Green 2 (IJN)) just to get some variety. Now I just need to come up with a good, even remotely sense-making place for them. While I was painting these I also attacked the odd things in the racks. The change isn't a huge one but it's noticeable and I feel it makes the tank a bit less boring.


Nationality

Of course this vehicle has to belong somewhere and as +Sam Lockton suggested ages ago, during the earlier stages of the project, I could make it a New Zealand unit. "Sure, why not?" I thought, it's going to be a green beast in any case. The biggest difference would most likely be the unit markings and national insignia, if any.
 It feels like that what I need to do is a bit of freehanding based on what I saw on some photos and Bison

Decals sets. At least I don't need to go and paint tiny Kiwi-birds anywhere, which is always nice. Then again, I have been painting tiny Jade Falcons in models and miniatures before so of course I'd done this one as well. My biggest issue will most likely be the RAF's "shoot here" ringlets on the rear deck...

11.4.13

Almost there again

The steps done two evenings ago and yesterday afternoon: fixed the tools, did the tracks and filled those weird racks on the sides. Quick and easy? For a change, yes, even though knowing my history something else could've been expected...

Tools

The tools that got installed on the rear plate got a simple, basic treatment. I painted the wooden handles with Vallejo's Charred Brown, the metallic surfaces with Vallejo's Oily Steel. Any parts that looked like they were a part of the tank (holders and such) got the same Vallejo's Panzer Olive Green as the rest of the tank. After all that had dried I applied a wash of Citadel's Devlan Mud. To finish all this with a huge surprise I glued all the pieces to their places.


Odd things

Those racks on the sides got a set of random-looking whatevers in them. Again I wanted to avoid excess symmetry and loaded the left side rack with much more pieces than the other one. I don't really know what they're supposed to be but I guess they're mostly an extra protection against shaped charges and grenades, in addition to the slightly sloped armor.


Tracks

Both rubberband tracks got an ugly mix of diluted brown (the same aforementioned Charred Brown) and orange-ish (Vallejo's Bloody Red & Bad Moon Yellow) mix with a heavy hand on both sides of the tracks. Then I left them hanging and drying overnight. Next morning I drybrushed them heavily with Tamiya's Flat Aluminium so all the wearable parts would look like it.
While looking at the end result I was thinking that my coctail could've been a lot more orange, after all.

Almost ready

I worked the connected tracks to the pretty tight space they had and glued the idler wheel in its place. The same goes for both sides, obviously. I guess this project will be finished soon, even though it has taken a ridiculous amount of time. Luckily I haven't been in a rush.


The model looks a lot better with the turret on. At this point I can still fix some cockups and then all I have left is the barrel of the machine gun (I forgot it again), insignia and such and then some dirtification.


18.3.13

The second round of greenification

Paintpaintpaint

As I threatened, I applied a second coat of green on the tank to cover up some splotchy areas. There are some tiny patches that require manual touching up because they were in a shade, but that's not a noticeable problem. In general nothing spectacular or mentionable happened. I painted a bit and that's all.

More crap to join the chaos

The machine gun that was just hanging around the last time is now properly attached and it points a bit off, so that all the pieces wouldn't be facing at multipliers of 90º all the time. After that was done I decided that the lower hull is in good enough condition to get the road wheels (and those weird cradles they're connected in) installed. Finally.


At this point I started wondering what should I do next.  Maybe the tools could be painted and attached to the rear hull and I guess there are some tiny things to fiddle around with. Though at some point I also have to add the rusty, dirty coating on the tracks. To accomplish that I'll be using mr L's proven method.

13.3.13

Greenify!

Progress

Finally I found the time and energy to pick up my airbrush and applied some green on the tank. At long last. To my great surprise the painter's tape I had applied on the openings on the hull and the turret hadn't failed in any place! This is a real shocker, I tell you.


But...

Of course there are some places that need to be fixed later because some patches ended up looking a bit off. The main point is that it could've been so much worse.

5.3.13

Whoopsis, I completely forgot...

Oh, bugger

Just a few moments ago I started eagerly preparing my tank pieces for airbrushing. Then, as I was turning the turret around in my hands, I noticed something I was going to fix last week: the side panels of the turret didn't attach perfectly and the rear corners would require some filling.
What can you do, other than apply the putty and leave the damn thing to cure. I really didn't want to paint anything this evening, anyway.


That mg is just lying there at the moment

27.2.13

A fool in the turret

cont.

It's pretty obvious that the turret has been my #1 priority for the last couple of weeks. That's because it's just about the last incomplete subset of the model. There won't be much stuff on the inner walls of the turret, only a couple of machine pistols for close defence, a spare aiming device (I guess that's what it is), a couple of containers and an empty wheel. For a while I was thinking if I should fill the wheel somehow, but as I didn't have a good idea what I could use, I left it empty.
All the pieces got a couple of layers of green paint applied manually at this point. The externals will be airbrushed whenever I get to it.


Turret assembly

When I had finished the two triple sets of grenades in their racks, or at least I get them to look acceptable at this point, I started assembling the turret at long last. To keep my exits covered, this obviously meant that I only built the front- and rear parts and left the sides open. This was mostly because the side panels weren't even complete at this point, so it didn't make any sense to attach them (just look at those insane holes in the photos).


I had somehow imagined that those huge gaps in the insides of the armor panels left by the injectors would've been placed so smartly that the equipment would've hidden them at least half-decently. Oh my, no! There was little stuff to be attached anywhere and all of it was located somewhere else, maybe to underline the ugliness of the mould. Because my benevolent guess was (again) so wrong and I didn't want to leave my machine looking like a teenager's cheeks, I dug out my Tamiya putty and set to work. After a couple of extra layers of paint the result started looking a bit better. Yay.

Test fitting

Of course I had to try and see if my vehicle was going to look like anything acceptable. Yes, it is going to do that. These photos show you that I (once again) changed my mind about the handles. After all I used the kit handles on the hatches of the engine compartment, the driver's and the radio operator's exits. Those customized handles I tried to use didn't really work as I wanted them to. Shockingly the plastic monsters of this kit looked better.


19.2.13

Turreting

Slowly as usual

This week's achievements have been astonishingly few, thanks to the real world pushing my time usage on an interrupt vector a bunch of times. It happens sometimes and there's nothing to it. Anyway, I got the end part of the gun built and attached on the turret ring. Nothing more, nothing less.
One weird thing was tha the instructions pointed at a part 18E twice (in the E sprue the part #18 is the lower rear part of the turret) and in this pic that part should've been a pistol-handle like piece, attached slightly above the wheel. Didn't find anything like it anywhere on any of the sprues. I'm not entirely sure how to fix this thing. Bugger.


A new change to the build order

While I was looking at the instructions I decided that I have to change my approach regarding the next steps in this build. I'll assemble the turret with its toys while manually painting things as they come along. Whenever the turret's completed I'll apply the green paintjob on the whole outer surface of the vehicle. I was going to do it a bit differently in my origianl plan but as it'd be so damn difficult to detail the insides of the turret after its assembly, I must adapt.

12.2.13

The final form can almost be seen!

I got busy

The "let's get stuff done"-bug bit me pretty nicely, so I've been working just about every day on this monster. When I got the hull halves in a good shape, just a few options remained. First: build those custom handles I mentioned a couple of weeks ago, second: assemble the hull. As usual, I didn't remember to dig out my wires, so the handles are still missing in action. I'll get them done one of these days, I promise.


The road wheel cradles

When the hull was in an "almost complete" state, where it was only missing the tools, I turned my eager fingers towards the wheel setup. First things first, I assembled the drive sprockets and glued them in their places, my plan was to leave the idler wheels off until I was ready to attach the tracks. So the next task was to build the weird cradles that house the road wheels.

I think I'll leave them off and paint them separately, so I can attach them on the already painted hull. While I'm at it I could messify these pieces and the lower hull a bit more nicely than if they were all attached. If the whole setup is built they overshadow each other bothersomely while weathering.

Close the tub and get going

Why keep wondering and pondering when everything's just about done - as far as they're supposed to be at this point? After a bit of dry-fitting I slammed the deck on the bottom and let it cure overnight. I know these last pics are foul, I took them in a bit of a rush, I apologise. Though they are work-in-progress photos, so I do reserve the right to share some suboptimal pics at this point. The final pics are going to get a bit more attention from me, rest assured :)


Like so. Of course I have to apply another coat of primer all around, but that's something I knew when I started the whole project. In any case I think I'll attack the turret next and take care of the painting in the end, when everything else's done. Someone may have noticed that all the tools - shovels, sledgehammers and whatnot - are missing, yes, I will attach them when the hull is painted, not a moment earlier. Otherwise the british green might not get applied nicely enough.

7.2.13

Working on the rear and top hull

Business as usual

These last few sessions I've been working on mostly the same things as before. My order of assemblage is pretty random and depends mostly on what I intend to paint next. The latest additions have been concentrated on the rear and top hull parts, yesterday I slapped a couple of hatches on the top hull.
Both the driver's and the radio operator's hatches are still missing their handles because I felt that the cast pieces were way too large in comparison to everything else. I'll try to hunt down my thinnest metal wire, in case I could use that to make some sweet, custom handles. And of course, if I find something else that needs handles I'll customize them as well to maintain a unified style.
Otherwise I believe this'll be a straightforward OOB build because if I start fooling around it'll take even longer. And I would really, really love to complete at least a couple of projects this year ;)


Did I ruin something?

My plan is to leave all the hatches closed so I won't get too stressed with the interior of this vehicle. For some reason the rear hull causes some confusion, anyway. So far all the pieces had gone where they ought to go and without any fighting. But when I started installing the fuel tanks nothing worked. The bottoms didn't go as deep as they were supposed nor did they align properly - the rear wings were grimacing by millimeters! What to do? I mengelefied the pieces until they fit and I got my weird box assembled, because the interior parts aren't as important as the tightness of the exterior hull itself.


Now I'm just pondering in my mind if I should paint this weird box at all or should I apply a quick layer. If I just left them like this, mostly primed but with some bare plastic visible, it'd haunt me. Oh, and you could maybe even see these things from the bottom if you had a really (un)lucky angle!
I guess I have my answer.

31.1.13

Ammo racks

Hey, there were extra parts...

This week's achievements are small but enormous. I made a mess on the floors, so they wouldn't look freshly painted, which suits a filthy warmachine a bit better. At some point I messed  up a bit with the ammo tubes but despite that fact I had decided that I wouldn't try to dump all 32 tubes into the racks as the instructions suggest. Why so? Because I feel it makes the whole model look a bit less staged when everything's not full and perfectly set up.

Trickiness

From some depths of my memory banks  I recalled reading that pieces of tape make good seatbelts for pilots, for example. I applied the idea to my project a bit. Meaning: I cut pieces of masking tape and then split them lenghtwise to make them fit the scale a bit better (judging by the look, not empiric facts). Then I slapped them over the ammo things somehow and gave them a quick Devlan Mud wash to make them less eye-searingly bright. Now they're supposed to be cargo straps truckers use to tie down their loads and whatnot. Of course I didn't even think of scratchbuilding any kinds of lock pieces or anything.


It doesn't look half bad to me, at least.

23.1.13

Back to the paints

Important things first

The real world has again slowed my differend projects (3+) and their advancement. But what can you do, hobbies aren't always on top of the priority queues. Anyway, I grabbed myself gently by the neck and airbrushed the inside pieces I assembled last year. After that I googled a bit to check if there were any colour photos of the Achilles and its insides for reference. This way I might be able to finish with something that at least resembles something real...


The result of careful research

It looks like the radio and that other box should be greenish. Let's see if I could get to paint them a bit later today, even. Of  course that depends solely on the demands of the universe that (rather surprisingly) doesn't revolve around me.

28.11.12

Inside job

The basics

Unsurprisingly I've kept on building where I left the last time. That translates to the workstations of the driver and the radio operator (or that's what I assume it is), as far as I dared at this point. Both chairs I left off so I'd have the space to airbrush a new layer of primer and then a white-ish indoor paint. At this point I can still poke around painting details (such as the radio, dials, handles and some random wear and tear), then I'll glue the seats on and the next noticeable parts. When I'm done with that I'll get to jam the next main part in and keep on adding the smaller details. Shouldn't take long before the insides are as complete as they're going to be.


This'll be cramped

Fill the whole damn hulk with explosive items!

22.11.12

Interior decorating

Starting with the furniture

This time I decided that I'll assemble most of the passenger compartment before applying the white paintjob on the insides and the contents. After that I'll add the rest, such as the ammo racks + shells and other essentials. So once again we get to wait in suspense: did I come up with a good plan for assembly-painting  of this model or is this going to suck like a swampful of quicksand. Mostly the problems with paintjobs are my own and no one else pays any attention to them, but if I know that something's wrong... it bugs me quite a bit.

Wheels and friends

Somehow I didn't feel like working at all with the drive sprockets, idlers and road wheels, I happily decided to postpone that part of the project for another month or year, even. This tank will be painted from its core outwards and beyond. Not that the hull's going to be complicated or anything: it's going to be dark green, independent of who reigns over the passengers.

15.11.12

Primed and so not ready

Grabbing myself from ne neck like the infamous baron von Münchhausen I dug out my painting tools yesterday. The compressor, the airbrush and my grey primer (Vallejo 73.601). After two rounds and about 24h of drying time the situation is: the pieces are just about primed. Maybe my inspiration and "yeah, let's get this thing done!" feeling strikes soon. I've just got so many things going on at the same time, it felt a bit difficult to begin another one.

Issues

I think I've made some mistakes with my primer, either I've thinned it down too little or something's dried a bit in the container. The problem presents itself by clogging up the airbrush (or it just spits annoyingly). Perhaps I should've followed the trick with pantyhose: use a piece to filter the paint while adding it to the container of the airbrush. As if I remembered that and bought a pair of those for future use... I'm not going to run anywhere to buy a set of ultracheap pantyhose at nine in the evening...


Hull and stuff

Random sprues, part n

Of course the darkest option is the classic and maybe even the likely one. I just don't know how to do this stuff. But it doesn't matter, I wouldn't be the only one;)

1.11.12

Project III/12 - M-10 Achilles

New tracks to be explored

I'm known to be a huge fan of German war machines. This is a fact that anyone can verify by checking the post history, for example. If I stop to ponder for a moment, in the early days of my modeling days I did build a Soviet Polikarpov plane and a bunch of years ago a T-34/85 tank. Other than those I can't at least remember stepping away from the paths of Wehrmacht, as long as we're talking about models based on the real world.

To be more exact I think this is the first time I jump to the western Allies. Oh, the weird things I end up doing. The packet offers two options: the British empire or the Polish people. Right now I feel like playing with the islanders but I've got the time to change my mind a few times about that. Not that it matters horribly much: both the patterns the schematics suggest are dark green.

How boring.

Getting my hands dirty

So let's open the box and observe the wondrous contents! Of course everything was packed in plastic bags so before anything else I made a ton of garbage.


The box and a pretty reflection

The instructions and some bagged goods
Achilles' box contained almost a dozen sprues, two hull pieces, a silly piece of string and astonishingly narrow rubber band tracks. I don't have any doubts of this: I'll get a good amount of time wasted on this, especially as the interor seems to be nicely detailed. Perhaps I'll come up with a decent and sensemaking order of assembling and painting all this.

Somehow I dare to doubt it, anyway ;)


Parts in open air