Mastodon
Showing posts with label 3d printing. Show all posts

14.8.24

Panzer IV and the third party tracks

Articulated third-party individual link tracks

The title may have spoiled the decision already, but I wasn't going to bother with the kit's own link & length tracks at all. My first tracked model ever (Revell's 1:72 StuG III with a Saukopf) had those and I didn't like them one bit. Either I got traumatized by them or maybe I was just an unforgiving person.

Panzerwerk Design

Some time earlier I encountered Panzermeister36's review of a bunch of 3d printed tracks in YT and based on that I ended up looking at two different companies. Wasting time with the customs didn't really entice me so I thought I'd prefer the EU inner market and order something from the Polish Panzerwerk design, if I could figure out which of the track types (1-8) was correct enough. My other options were T-Rex studios and Tankcraft, the latter used to have the Adam Mann -consulted tracks but all of that had disappeared from their webshop. I guess they didn't want money.

Of course I had been thinking about this for ages, and during easter '24 I finally pulled my shopping pants on and dragged myself to the online store.  Then, for a good handful of days the site only returned a HTTP503 error and the console logs weren't too useful. When complaining about this out loud the store got back online the next day or the day after that in the middle of all of my back-and-forthing.

Only in the checkout stage it was said that the only payment method was paypal, which I was a bit allergic to and avoided whenever possible. So I left the almost neighbours hanging and checked my second option (spoiler: I didn't choose them but went with this set here), which I documented in the next chapter for the sake of completeness of this story.


My calendar in the Spring absolutely horrendous, so on the Monday when the courier was supposedly delivering my order the window was "during the evening" and on that single day we couldn't guarantee that someone would be home to accept it. So I accepted the shittier option of "I'll get this from a nearby fuel station instead of you carrying it to my door like I've paid you to" and another day's delay because why would these companies work in a reasonable and sane manner?

The funniest thing was that there was someone home all evening that day, but we didn't know that when the decision had to be done :D


T-Rex Studios

These people also had some Type 3a tracks available, so I took a closer look. The price was lower and the webshop also appeared to work.

So, sixy 'murican monies for the bits and S&H, plus customs and VAT. This would be tolerable. But when I got to the payment stage the only option was, again, paypal.

If I really had to use paypal, I'd at least then skip the customs part if I could. This was the only reason I rechecked the Panzerwerk store and would you look at that,  now it worked. Otherwise I'd ordered the T-Rex tracks without any additional grumbling.


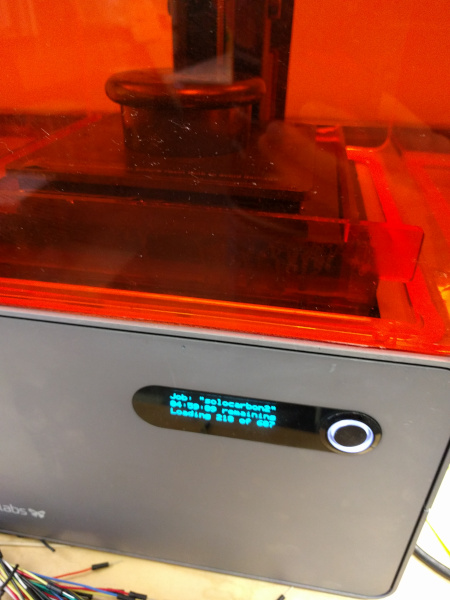
Resin tracks in action

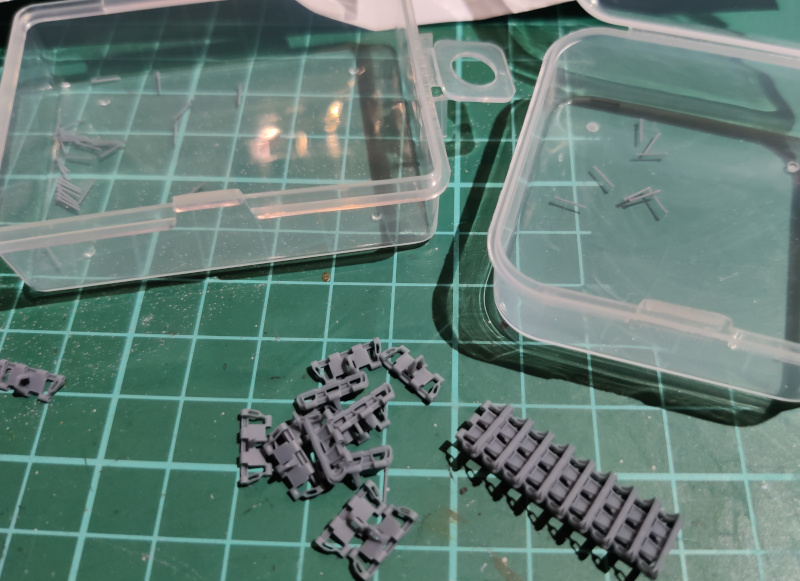
On a Tuesday evening I fetched my packet from a fuel station that doubled as a courier's client's pickup point. The box contained very simple instructions and three ziplog bags full of pieces: the track links and both A and B pins to connect the links together.


The track assembly operation

Those A and B pins were just about the thickness of a cat's whisker, and using those with these (comparably) sausage fingers of mine was interesting to say the least. I assembled my track one link at a time by holding the two attachable links tightly between my fingers, then inserting the pins one by one and immediately pressing them in with my flat-tip tweezers until they made their tiny "prip" sound.


You all knew I had to try the track out as soon as I had a short lenght completed to see how it wrapped around the drive sprocket. It fit like it was made for this.

Supposedly I had an excess of track links so in addition to the driving tracks I could maybe make some track armour from these.


Getting the right side track built took three evening sessions from me. Some of the time went to fiddling around, pondering, and finding out the way to work on this thing. And let's be honest, playing dry-fitting and testing took some time too. After the slow start I found a good method and the throughput got noticeably improved with time.

Thanks to that the left track progressed and completed much more rapidly, as I now knew how this worked. And I also had the feeling for the pieces.

While working on this I also made a short bit to be hanged in the front. Of course I didn't dry-fit enough at this point so I accidentally built it a link too long. I still had a bunch of links and pins so no panic, but I still paranoidly hoarded two pairs of A/B pairs to connect the actual tracks in the end.


19.9.18

Finished: Project IX/17

Off with the nonsense

After it was bathed and the liquid remains had evaporated the model was ready to be cleaned up. Because the resin was soft the support structure could just be simply and quickly cut away with sidecutters and any remaining excesses could just be scratched off just like that. I was a bit worried of squeezing the carbonite slab with too much force and causing it to bend or something. But my fears were vain, it wasn't that soft.


Sunbathing

For the rest of the day I left Solo into a tube lined with UV LEDs. A few hours were supposedly enough, but we left him there over the weekend to harden up.


Done!

I took the piece home as a surprise and said that I was going to paint it to look like it was in the movies, but Han Solo was snatched off my hands with words "Don't touch it!". I guess I'd paint any potential second attempt, then. There he remained, on the bookshelf, next to his older self, in front of a bunch of uncle Zahn's books.


12.9.18

Project IX/17

The Empire strikes back

My significant other was wondering why my first idea when playing with a 3d printer wasn't the obvious one, Han Solo in carbonite. I guess we just had different priorities in life :p

Again I bothered my colleague Nathan, during the last months of 2017 and we played with the Formlabs resin printer. Somehow I always managed to start these things in the afternoon so that the printers were left alone overnight.


Friday. Morning.

As soon as I got to work I brewed a cup of coffee and started chiseling the printout off the printer's printing plate. Let me tell you, it was turning my few remaining hairs even greyer, beating the softish resin lump off with a spatula. I shouldn't have worried that much as the violently treated piece was just the footprint of the support structure. For some curious reason the printing program (or was it the slicer?) wanted to set the actual model slanted at an angle.

First thing after detaching it the piece had to be bathed in spirits, twice. The first time it was submerged to the first tank for a good while and then removed to dry up a bit. Then it was submerged into another one for a bit again. One of those bathes was longer-lasting than the other one, but while writing this I just couldn't remember how it went. All I can say the other one was 15 mins and the other one a bit less. Maybe.


While inhaling the ethanol fumes I was admiring the details. Especially captain Solo's hands were amazing.


22.8.18

Finished: Project VIII/17


Sienar Fleet Systems

TIE/sa Bomber

To be honest, I cannot recall ever seeing this TIE/sa marking anywhere else but the wpedia, everyone else has always talked about the TIE/B or TIE Bomber. All the same to me, now I've used this marking as well.

I took a bunch of photos from different angles and as usual, applied them below. The next day I brought the model back to the office and proudly presented it around. Confusingly few people recognized it, but as the hit percentage wasn't a flat zero, I couldn't complain much.

With a very little coercing I ended up promising to show the Bomber and a couple of "real" models one Friday afternoon at the Tinkering Club. Their response was somehow staggering in its positivity.


15.8.18

A sickeningly quick proto-paintjob

My first thoughts had been to clean up the model and so on. But then I thought, why bother being fancy with a prototype? Especially, as I didn't have a clue of how this material would behave with the paints or anything.

Primed

White Vallejo sufrace primer, what else could I say or describe? Same, same. I just sprayed it on and enjoyed the whiteness.

Airbrushed greyness

Just for simplicity I started by blasting Vallejo's USAF Medium Grey all around (VMA 71120) and then dusted it a bit with the USAF Dark Grey (VMA 71123) for some hopefully subtle variety. Then I  attacked the solar panels with a bit of some of a much darker grey to make them stand out more.


The paintbrush approach

Later I thought that maybe I should do the most visible surfaces again, with a thicker layer of paint. In this case losing even some of the model's surface scruffiness would only be a good thing. To protect the command pod's viewports I applied a bit of masking tape before blasting it with a dark grey, just like what I did with the solar panels. These pics below are from the "just before removing the masks and actually taking the paintbrush in hand" phase.


One final round for the detailings

To wrap this one up I applied some Citadel's black wash (Nuln oil) on the viewport transparisteel bits and the solar panels. The double sticks in the rear parts of the pods I painted red (VMA 71085 Ferrari Red) and then I used some plain black with a piece of a sponge to mostly-drybrush and dab at the port of the missile/rocket launcher and its details that always have made me think of exhaust redirection vents.

As soon as the paints had dried I applied some semiglossy varnish on the black-washed pieces (Vallejo 70522 Satin Varnish) because that one looked more natural than the wet-looking gloss varnish. In this case the result wasn't optimal, as I think that my varnish had gone beyond its best before date already. Some of the photos still showed the effect, which was good enough for a proto model.