Mastodon

30.4.12

Pics: Model Expo 2012

Here they are again: a pile of photos taken at the IPMS Finland stand in Model Expo 2012. A couple of photos were so awful that tehy only  gave headaches to people so some models are missing. I'm sorry about that, it's not intentional. Somehow I had started in the middle of the airplane section so that's going to be the alpha and the omega of this photo set.

Let's see what blogger does to these 68 images this time... Maybe all of them work just nicely, maybe three quarters of them disappear when I press the "publish" button. We'll find out soon enough.

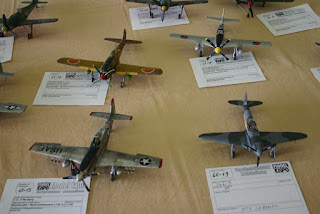
Airplanes

Image 1

Image 2: Never seen these in the Expo before

Image 3

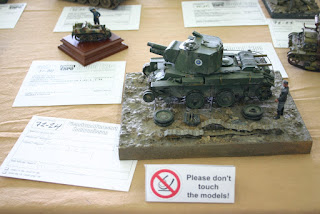
Ground-based warmachines

Image 4

Image 5

Image 6

Image 7: A captured Soviet  "Mail train" w/ contents

Image 8

Image 9: A Wehrmacht locomotive

Image 10

Image 11

Image 12

Image 13

Diorama-like things

Image 14: Through the walls!

Image 15: Heavy artillery ++

Image 16

Image 17: A FlaK post

Image 18: "A normal day in Tokyo"

Image 19: Last stand in Las Vegas

Figures

Image 20: A fraction of the figures

Navy stuff

Image 21

Image 22: Kursk

Lego!

Image 23

Image 24

Image 25

Misc

Image 26

Image 27: A paper plane

Cars

Image 28

Image 29

At this point a few two-wheelers

Image 30

And more cars

Image 31

Image 32

Image 33

Image 34

Image 35

Image 36

Image 37

Image 38

Image 39

Image 40

Back to the skies

Image 41

Image 42

Image 43

Image 44: Another rare model

Image 45

Image 46

Image 47

Image 48

Image 49

Image 50

Image 51

Image 52

Image 53

Image 54

Image 55

Image 56

Image 57: Some Italian camouflage

Image 58

Image 59

Image 60

Image 61

Image 62

Image 63

Other known flying objects

Image 64

Image 65

Image 66

Image 67: This camo is somewhat disturbing

An additional bonus from the next stand

Image 68: Steve

25.4.12

Calmly onwards

I'll be continuing in the mood of my previous post. In plain english that means: small knick-knack has been added on the sides. The left side was a bit lighter than the right one so not much needed to go there at this point, before the painting phase. In case you noticed the headlight on the left front fender, it's pretty neatly detailed: it even has the power cable modeled in! Awesome. Not that I mind fooling around with metal wire and other materials, I just enjoy the fact that the kit offers plenty (or all) of the important things of the actual vehicle out of the box. At least that makes it a bit more likely that nothing's forgotten by accident.


And the infamous kitchen's sink?

The roof of this kitty was full of stuff, doors and items. I haven't attach any the periscopes because it wouldn't make any sense to glue in some transparent pieces before painting everything, I'd just ruin the transparency. That binocular periscope wasn't built by the time I took the pic because I hadn't felt like it. It's an insane thing in the end, this roof.

Almost ridiculous details

The Nahverteidigungswaffe is nicely detailed, too, even though at first glance one might think that there's just a hole to the fighting compartment.Wrong. This optional piece had a nicely detailed close defense weapon on the inside of the fighting compartment but the outside has an open, projectileless barrel.
If you takea closer look at the photo above, that top-middle piece has an individual wingnut on each of those protrudings. Luckily only six of them were needed at this stage.

It's completely sick and insane, I say. Sick, but somehow awesome.

I mean, look at those bastards!

18.4.12

A progress report

Today's post is supposed to be short and to the point. Honestly.
My latest iterations with the model have been mostly targeted at the rear of the tank. I've done what I can to make sure that the essentials are in their places so that the model can be painted comfily and with ease.
The rear deck
In practice that means that all the racks and other fixed parts are attached but the moveables, such as tools, boxes and such aren't glued anywhere. Had I glued all the sledgehammers, jacks and whatnots in their holders they'd cast shadows that just make airbrushing anything a bit more bothersome. Fixing those shadowed out areas can easily cause overpainting and puddling.

More cool details
As a slightly confusing speciality the Dragon people offered a couple of pieces to the engine department, that might never get to be seen anywhere. But the pieces were there so of course I used them! That'll cause a bit of head-scratching while painting but that's a small price if it looks good.
Who the hell sees these through small holes and the grille?

The engine room's air vents got a couple of photo-etch grilles available, and I dropped them on eagerly. These puppies didn't cause swearing or annoyance, very much unlike the p-e parts of the 20FlaK38, but then again, they were just dropped on. Nothing needed to be bent, twisted or fought with.

The tools I mentioned earlier play an important part with the fighting compartment's outer sides. As you can see in the picture below, I didn't attach more than the bare essentials on the side. See that round-ish thing between those two racks in the middle? That's for the cable to be wrapped around. It's going to look good unless I break it in anger at a later point...

Now this is where it's at, there'll be some more to see the next time.

11.4.12

More big kitties!

As is Proper and Correct, building German warmachines just keeps going on and on. I don't know about you people but I'm not bored in the least ;) This time the one queuing to the front lines is my last summer's kit from Gijón's Capua Hobby's. It's a Dragon Models 1:35 scale set SdKfz 173 Ausf. G1 Early Production. Among friends it's better known as

Jagdpanther

Let's begin with the traditional unboxing and oohing and aahing at the contents, so no one gets confused about the order of business. This cover art of course sets the poor modeler's mind thinking of awesomness and success. It's pointless to waste time daydreaming  for the end result won't look like the plans in one's mind anyway ;)

Some cover art

The building blocks

To the point: the box is pretty big and when you open it you notice that it's packed full. There are almost twenty sprues, a couple of which won't be much used because the pieces belong to a normal Panther kit. Judging by the 'chin' gun mantlet I'd say it's an Ausf G. In addition to the photo-eched motor vent covers there's even a bit of metal tow cables! I've never encountered those before.This kit's tracks are made of individual links instead of the licquorice carpet type.

A newly opened box
Contents spread around
The backside of the box promises all things wonderful and tells what kind of awesoments the busy people at Dragon have achieved this time. At this point I have to say that I can't complain about the quality one bit :) While I was being happy about the "one-piece gun barrel" I suddendly remembered that I do have an unused aluminium barrel in one of the bits boxes!

Unused aftermarket parts

When I was building my Jagdtiger I ordered both the Friul metal tracks and a metallic gun. In addition to the gun barrel its bag had a resin shield, saukopf and a muzzle brake.For some strange reason I skipped these pieces back in the day and left them collecting dust. Maybe the reason was those resin pieces and the fact that they're worked on differently and I still haven't tried.
I still remember (believe it or not) that the bag said that it was for a Jagdpanther and that had confused me a bit. Maybe it'd fit in this set? Then again, the kit does have a single-piece gun barrel to represent the 88PaK, do I even need it anymore? Or would the metal thing be better looking? Would the plastic frame support it and the extra weight? Graah!
Waiting for some dremeling

To work

I left my random thoughts brewing on their own and started working on the model in the order the instructions tell me to. As usual, the big cat's feet were the top priority at this point. Unlike with the tigers, the eight middle road wheels were nice, quick and easy to assemble. The drive sprockets didn't cause any confusion but the idler wheels were pretty funny looking. They were equally quickly built anyway and I didn't have the common sense to get concerned yet.

Zum Teufel!

Immediately at the second phase I stopped to stare at the setup. What on Earth is going on in here? Usually the road wheels are just plugged in on these knee-like pieces and that's it. These parts had long rods in the ends. This damn thing has the double torsion bar suspension (it's a very curious idea) modeled! Some madman had made a youtube-video that explains it for us non-mechanics:  "Panther Suspension".


In any case, this late afternoon went with this thing. Well, not just that but a couple other usual first pieces went in, such as the blocks where the drive sprockets go, the random greebl on the hull sides and such. As my last item I attached those wideners and put them under pressure. Tomorrow I'll continue with the rear hull and the engine's fans, if I have the time.

That's it folks, I'll talk more next time. Hopefully I get to post without swearing a lot. But we'll cross that bridge when we cross it.

5.4.12

A week's break

Now that I got the previous model built and this week has only four workdays before a long four-day travel weekend, I didn't really feel like starting a new model. Yeah, I'm a lazy bastard, I admit that openly.

Because I don't have any other actionful and exciting topics going on, I shall return momentarily to the paint set I bought for my Finnish King Tiger. This won't be a review or anything like that, don't worry.

Finnish paints

Simply to save myself from unnecessary trouble I invested into Lifecolor's Finnish WWII Army Camouflage Set [Limited Edition] . This way I got all the necessary paints without wasting ages in a shop or the net and ending up with hasty and potentially very unlucky "Damnit already, I'll take that one now!" decisions. Those never work.
Exciting design!

Facts and just facts

The front cover of the box declares that someone called Jukka Purhonen is responsible for the historical research and - I guess - the Correctness and Properness of the colours. I don't mind, if that makes someone happy and encourages them to buy something. To me and maybe some others who take these things a bit more calmly are content with the knowledge that the finnish army's camo pattern was green/light gray/brown.

For example, I couldn't care less what someone somewhere says about one individual tank's paint scheme - in the best case basing his (or her) opinion on black and white photos. From the fourties. Not that the colour photos from those years are much more reliable... So screw the research and I'm sorry to say, mr Purhonen, but this is just your opinion on this topic.

Personally, I could've used any semirandom paint from Vallejo, for example, using a type of moss green, a chocolate brown and a light sand paint. Any of the available greens and so on. Based on the feeling it'd been an equally finnish scheme.
I'm afraid I always complain about these same things: there's space for interpretation, nothing was always made 1:1 the same way, sunlight, weather and time do funny things to previously pristine paintjobs. Not to mention the war that was going on. In any case, I don't think that the ultimate truth even exists. Not unless someone invents a time machine and uses it to the most important cause imaginable: taking perfect reference pictures 8)

The innards of the set

If you remember to open the box, you'll find six containers of paint. Field grey, blue grey and russian green I didn't get to use this time for some reason, but I can comment on the other three I used. And I will.

So this was the first time I encountered Lifecolor products, at least I don't think I've ever seen them anywhere around here. Of course I had to thin them a bit for the airbrush and obviously I had to utilize the trial and error -approach because I wasn't quite sure of how these things would behave. In the end they were fine, they covered well and the colours themselves seemed very neat.

Despite my earlier bitching I'm not dissatisfied or unhappy with the set. The colours are just fine to my eyes, they look as they should, they're nice to use and in general they work like you'd expect. Even if I'm not trying to review this product, I'm in a way reviewing it anyway. How odd.
Anyway, I'm quite happy to give it a +1 and a "thumbs up" 8)

Oh my, there's some art on the inside. I'm surprised!

Some final thoughts

The back cover of the box kindly has a short explanation of how which colour should generally be used. The Soviet (Russian) green is - surprisingly - good for Isorla or more commonly known as captured enemy equipment. The grey/green/brown that I used goes in the three-tone scheme, field grey to older heavy equipment and the last, blue grey in conjunction with white is used in winter camo.
That's pretty nice, you don't have to wonder too much with the paints and what to use it for.

Oh well, usually you know what you're doing, but maybe if you ponder about those things while checking your stored paints and find this set without a clue of what to build next :p