Mastodon

24.4.17

Model Expo 2017

Helsinki Model Expo 2017

The yearly model expo (and a bunch of others bundled together) were held last weekend. This time my visit was shorter than usual, thanks to my then three days old Project Assistant Candidate. The Project Assistant herself was pretty eager to see her own stuff so my personal "I want to see this" round ended up being a bit of a "running through" kind of a thing.

IPMS - Finland

My original idea was to take not just one but two models, just for the fun of it. But as the intro may have given a hint for the reason, my plans were thrown out just a few days before the Expo. Would I have dared to enter my silly builds into the competition instead of dropping them to the Display Only class seen in the end of the photoset? Why not, more variety to be wondered and laughed at.

I think I went through the tables in a funny order, but what could you do when you were constantly pulled somewhere else. The planes I've always admired and I don't think I'd ever have the guts to take my own along these others.


That B17G was enormous. With a model like this the mirror bases was even handier than usual, I thought. Sadly I didn't get to (wasn't allowed to) peek through the windows. I mean, sometimes people do pretty mad inside conversions.


I found this Bf-109E "Black 12" in Lapland diorama pretty. The description talked about a bird, which I didn't find even in the photo.


"Naval Port"


Comic book action! I missed the description, but I'd guess that this was an implemented panel from the comic.


This autumny mine clearing dio was the Project Assistant's favourite.


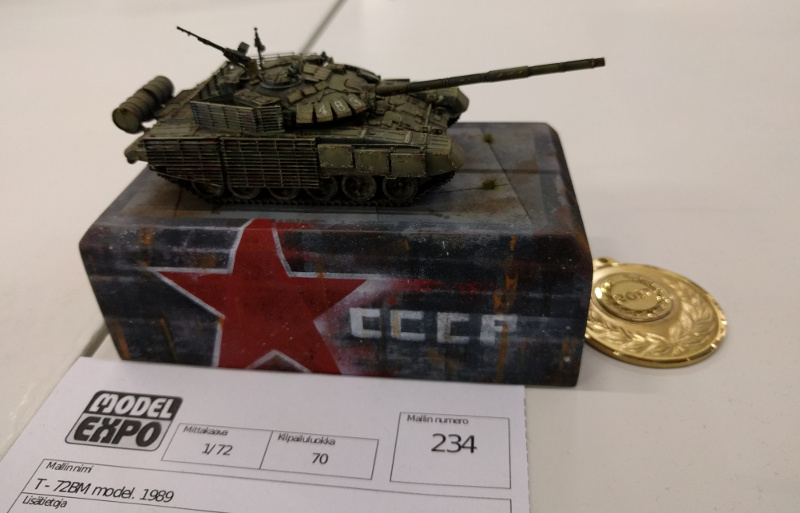
This tank has always been fugly but it did turn into a very nice-looking model.


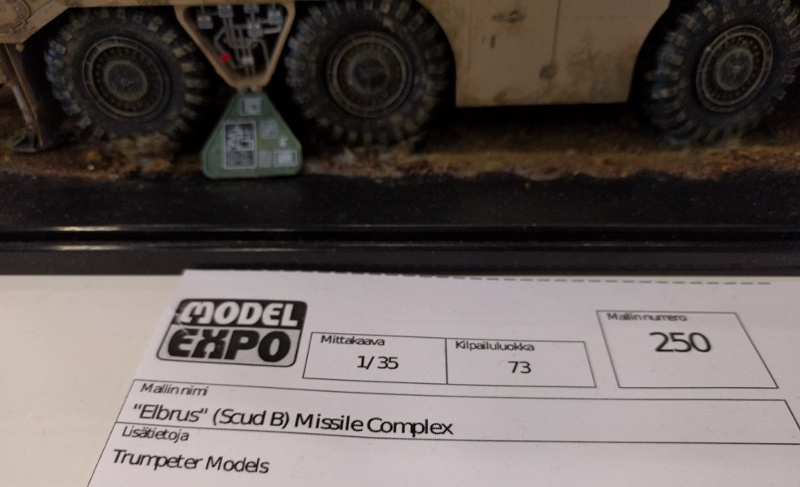
The next two photos: some Finnish Navy and Army equipment from the '80s: a missile boat ("Kotka"), a T-72, a BMP-1 and something I thought to be a Pasi (XA-180) but then I saw the turret and got lost with the ugliness.


The next four (well, three proper ones actually) photos: some equipment of the Finnish Navy and Army from the '60s


The Display Only category


Heh, a familiar-looking construct. It's always nice to see V-2 in other patterns than just the black/white squares.


Palikkatakomo

Of course I tried to go through the Lego department. At this point the Assistant was getting more tired of my apparent slowness and I had to rush. Honestly, I'd stayed to stare at the GBC for a very, very long time. I thought that it was very nice of them to have the modules named so clearly.


I wasn't allowed to stop to take photos of the city anymore, my sincere apologies. All I can say is that it was mad, again, and I approved of it!

19.4.17

A launch pad

On some very wobbly feet

Of all the pieces in the kit the launch pad's bits were in the worst shape of them all. I spent noticeably more time on cleaning them up than assembling them toghether. Take the adjustable legs, for example: getting them and their foot pads together was a tiny act of war already, especially as the installation studs were more malformed than a dozen quasimodos. Still, they obeyed the blade and glue - to some extent.

Then I got to the next moment of pain and suffering, as the legs were supposed to have some sort of a notch where the deflector plate was supposed to sit on. Pffft.


I allowed the gluing of the plate and the legs to cure for a good while so that they'd remain attached together while I rotated the entity but so that they'd still be somehow articulateable for me to adjust any bad angles. So I glued this setup to the ring that can be seen in the next photo, again with horrendous swearing and fighting. The studs were awful and they just didn't want to cooperate with me at all. After these gluings had been curing for a good while again I attached the missing diagonal beams. Horrendous stuff, I tell you, horrendous.


On top of this construction I was supposed to install another, separate setup. This second ring got some weird upwards-bent things, some adjustment/control bits for them and some decorative bits. I really didn't have a clue what they were, specifically, as they weren't described anywhere. For that reason I also wasn't sure if I had "cleaned" them up properly, as the pictures in the instructions were more like guidelines, really. And the bits were molded pretty questionably, as I had already complained.


Finally three extra bits were glued on the top ring, bits that I guessed to have something to do with the rocket engine's ignition. I just installed them on in random angles for variety, based on my gut feeling and artistic eye (hehehe). Also, as you can see in the last photos, another protruding weirdly shaped piece was added. Because I didn't have a clue of what it was supposed to be - and if it was actually meant to be that weirdly shaped - I didn't do any corrective actions. Just to avoid making it wrong by accident.


12.4.17

Greetings from Peenemünde

Missile building

The Backup Guidance System Container

I sat down one Wednesday evening to work on this weird weapon. The first thing I did was getting confused, as the cockpit tube was to be built out of a couple of unmarked and obscure pieces. There was just a single dimple for the joystick on the baseplate that was the only clear and unmistakeable thing. Then I was on my own and just glued the poor backup's seat on the plate next to the control stick, hoping that nothing would be protruding in awful ways while sealing the missile's body. After a moment watching glue set I glued the two discs on the plate, choosing the positions by my gut feeling.


The frame

I cleaned the frame halves like mad and I still wasn't sure if they'd fit together properly and cleanly enough. After some dry-fitting and recleaning rounds I decided that it was good and glued the halves together - not forgetting the emergency backup guidance system's workspace.

The results surprised me very positively as the setup worked prettily and even the cockpit fit in like a glove. The rocket engine's end wasn't quite as pretty but I let it be, trusting that the model makers had had a plan and had known what they were doing.


Wing-like bits

The wings... the thrice-cursed wings. Or whatever they were supposed to be called, I felt they were more like the fletching of an arrow. No matter what, they were in a league of their own. One looked and felt millimeters shorter than the other one. And getting them positioned, aligned with the frame and tilted at decent angles, it was awful. The final look gave me strong '50s scifi vibes.


To the rear end, behind the nozzle of the rocket motor I installed four steering vanes, which looked a few times too large for this scale. Still, I didn't start filing them down but I thought I may have to do that later on, before priming. Or maybe they wouldn't look too bad when looking from a distance and being painted and all. Hmm.


Oh well, I got my missile built, it was just waiting for the vacuformed canopy as I hadn't painted the pilot's death trap yet. That was all that was missing anymore. Next time I could do any modeling I'd at least start working on the launching scaffold. Whenever that was going to be...

Last minute update: I painted the human container and the bits that'd be covered by the canopy later on with dark grey (VMA 71052 German Grey) and the seat brown (VMA 71077 Wood).

5.4.17

Project V/17

EMW A9 - Amerikarakete

Yes, this model was clearly on the kraut's Wunderwaffe line and pretty far out there to begin with. I mean, a radio controlled missile with a living pilot with a joystick as a backup. What the hell was going on in their minds, if anything at all?

Without further ado, let's go through the next project's bits as traditions dictate. First the one-page wonder: the assembly instructions. Rather amusingly the missile itself was a hundred times simpler than its launch thingamagick. There wasn't much to wonder about the painting guide, either. Some of the details like the red corners on the wings were mentioned in the assembly instructions instead of the painting part, but that sort of stuff happens everywhere. I've just found it a bit curious.


Then the pieces in their sprues, they were just about as shocking. Some of the smaller bits looked like they had more flash than material on the actual piece! That wasn't an issue, as this was a just for the fun of it -kind of a project. I didn't pay much attention to the decals, I noticed a couple of Balkenkreuz and two-piece swastikas for those who want to lose their minds with decals. We'd see the future of those much later, but as a constant reader I would not bother holding my breath.