Mastodon

21.2.18

Session XIII

The main turret

After the tracks were done I finally got to work on the main turret. The construction order in the instructions was again somewhat curious, first I was to build the shell of the turret, then to proceed to assembling the gun itself.

There were a good amount of details in the gun itself, especially if one was to build the model with (at least) the main turret's hatches open. Or, if one felt brave enough, to paint the insides and keep the turret off the tank itself. I really didn't think I'd go for that, so most likely this was just going to be just my own sick ponderings (if someone reading this got inspired, goody).

The tank's main gun (a 76.2mm M27/32 (3" according to the converter)) looked fun and was a multiphase build. Technically that (and many other things in T-35) it was a bad idea, I've understood, but then again, many tank weapons were suboptimal during the early war years. I guess they got something broken with that gun in real life, but according to wikipedia the gun was replaced with a slightly better gun.


Workspacelessness

Now I couldn't remember if any of the tanks I'd built so far had a turret's details modeled this far. A typical turret had a couple of foldable bench-plates at best and that's been it. Here we had a proper-looking support structure and all :o These aforementioned beams were a pain in the donkey, as getting the top ring, the baseplate and these things aligned and cured properly wasn't that quick and easy. Some light and gentle swearing was required. In the end it all was just pretty good and I was quite content with it.


Turret assemblage

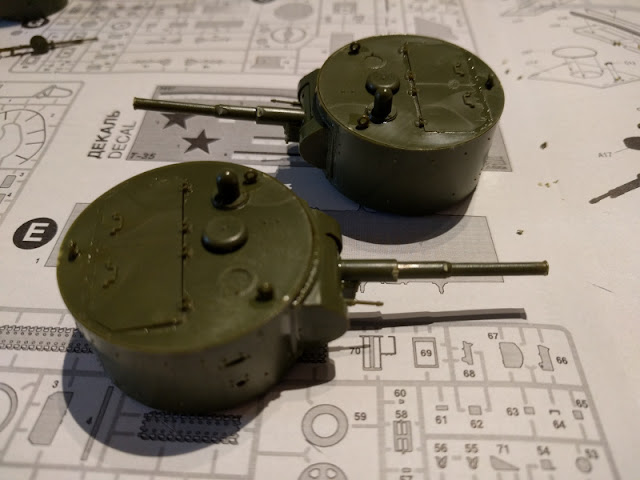
Gluing the heavyish gun-containing turret part onto the previous subassembly was hair-greying. Because of the mass differences I didn't even consider building it updright and then doing it upside down was still a bit complicated, as the baseplate was still heavy enough to bring some exta torsion to the show. Still, even this ended up being just fine.

The last "Emma" LMG was installed into this turret, of course. I wanted to glue it at a bit of an angle, to prevent all the spikes of this hedgehog from pointing into the same direction. Some gentle variety, you know?


All in all this was damn time consuming, as my three quarters were done and I felt like I had gotten nothing done. When packing stuff up I tried out the turret and then saw that hey, there was visible progress again.


7.2.18

Session XII

The pleasant rattle of the caterpillar tracks

When I returned back to my table I could take a step back and return to the track building parts I had skipped earlier. I wasn't really excited about this as they consisted of a bunch of long and short strips, and those have always been somewhat inconvenient to assemble. The instructions always have come with a "use so-and-so many bits and it'll be good" count and that has never been exact but they've always been "not close enough". So, having no better idea, I followed to guidelines and prepared a suggested amount of pieces per track.


The first track (for the left side) got assembled rather painlessly, even if I had to remove one individual link from the front end, because why in the Empire would the instructions and the reality agree on anything? Not that it was perfect even with that one extra link removed, there still was a bit of slack, but that was most likely because of the shaped top piece being slightly imperfectly set.


Next track went much quicker, which has always been the case: the first one taught me how the next one was to be done. This time I got the track aligned properly and as I had dropped off that one link before assembling, it was just the right size. Hooray!


Joining the main hull parts

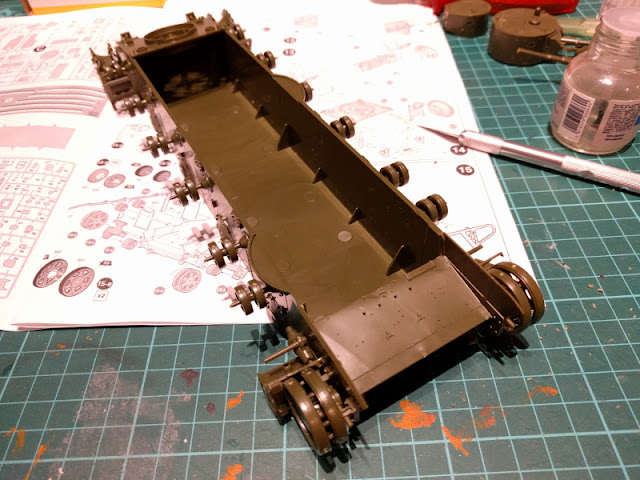
I allowed the monstrosity to rest on its tracks for a bit, meanwhile I cleaned up the driver's vertical armour plate for installation. No matter how much I dry-fitted the armoured deck plate on the bottom hull, it didn't end up well-aligned at all, especially the rear of the tank. There'd be fixing later on, in the photo you could see the liquid glue bottle as a quick "hold it down, will ya?" solution. Again I left the side cutters and my hobby knife in the photo for scale.


24.1.18

Session XI

The bogie factory wraps it up

All that my octet of bogies was missing was a pair of pieces per component. The smaller and potentially less easily distinguishable was the bit that locked the bogie on the the axle. Then the second one, pretty clearly, was that cabin roof piece that was, I guessed, protecting the springs from pinecones falling from the trees or something like that.


After a pretty short glue-curing break I decided to install the whole set onto the lower hull at once. The first ones per side felt a bit flimsy, but as soon as all eight were on, the monster felt much more stable. I left it standing on its paws to get all the pieces to cure in a nicely straight and even position.


On the takeover lane

At this point the instructions were urging me to install the tracks, but as the roadwheelery was still curing, I didn't think it made any sense. So I jumped to the next implementable step, which happened to be the main turret's gun and its friends.

Hunting the pieces down took ages again, but at least these were much less cleanup-intensive than the previous bits. During my final session minutes I got some howitzer's read end pieces done and both turret seat setups. The ergonomy of said seats looked terrifying, but perhaps the crews weren't expected to survive long enough to develop any back issues.


10.1.18

Session X

Hell is pieces

I finally got to a new page of the instructions and for the first step I was told to preassemble eight components 16-A, which happened to be the road wheel unit. A bit like those things (VVSS bogies) on an M4 Sherman, among other tanks.

Fifteen minutes later I had got half of the bogie pieces and all the springs cut off and somehow cleaned up.


After the next generous fifteen minutes I had gotten all the pieces I needed now done and ready to be installed. At this point I was already in the "well, I have to quit and pack up in a few minutes" mood, see my ~45min session time.


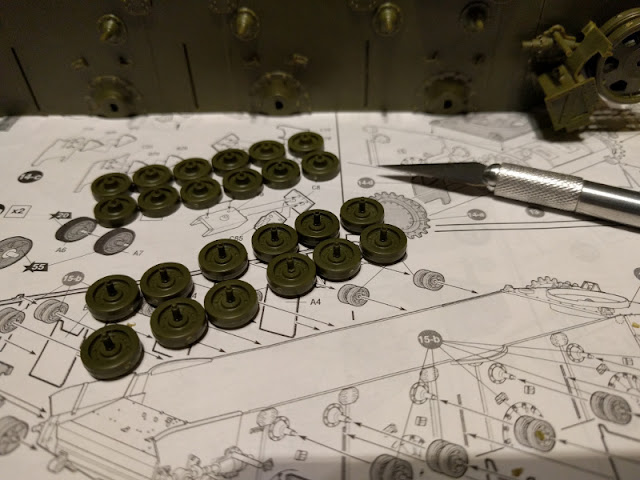
Still, I began my expectedly short actual building stint to see what I could achieve. I started with the quickest and most easily mass-produced bits, the road wheels (x16).


Next I rapidly glued all the springs into the bogies and after those I installed the central bits. According to the instructions the springs should've connected with a loud snap - but no, I heard nothing, needed no special force as they settled in peacefully for me.


So, I managed surprisingly far in a bit more than ten minutes, when I finally got to begin the assembling. I did try some dry-fitting of the outside bit of the bogies, but I didn't feel like fighting with them in a rush and less than optimal amount of care.


Painting all this would be joyful... However long it takes to get there.

27.12.17

Session IX

The fascinating world of wheels

I was going to admit it openly, when building tracked vehicles, the road wheels with their cousins had always been the most !motivated phase. Not that they've ever taken that long or been that slow-progressing, but some how assembling dozens of rollers, wheels, sprockets and such have just been kind of boring and, yes, repetitive phase. Just like the description said.

Nothing was missing next to the idler wheels, but like I mentioned the last time, the boxes next to the drive sprockets were missing some rollers and I fixed that as soon as I noticed my mistake. I did that by applying a bit of liquid cement to the joints of the box, then applied some firm but gentle pressure to crack one edge ajar. Then I glued and installed the missing bits and resealed the boxes. Nothing broke and I was on the map again.


The monster of a tank wanted as many as twelve return rollers to support the track on its way back. Because they were resting on pretty flimsy axles, I had to be quick yet careful while installing them.


After the return rollers I got to install those weird outwards-poking plates. Maybe I was looking at this vehicle with the wrong kind of glasses on, but considering the servicing, especially on the field, those sounded like one of the most stupid ideas. I could just imagine the amount of crap those'd collect while the tank was rolling in mud and who knows what else. But then again, how many tanks have I designed? And how many of those have gone into production, not to mention active use?

Exactly.


Then I got to glue a pretty amusing-looking setup to hold all the previous bits in place. Had this been a Kraut wagon, it'd been used to hang some Schürzen, but as this was a Soviet crawler...


I tried to take a couple of photos with something for scale, but my angles were somewhat suboptimal. The coin photo was a bit silly, as I didn't feel like going for a search for a one euro coin. Oh well, at least I got to play around a bit.


13.12.17

Session VIII

More weird bits

The same theme of weird and plenty of preparation -requiring bits kept going strong. How heavily mushroom-based was the diet of the designer(s)?


The structure that was assembled behind (or to be exact, in front of) the drive sprocket looked mostly like that dissidents were fed into it. Or maybe they should be called the Enemies of the People, like they said back in the day.


Anyone better informed than me about these monstrosities might laugh while looking at the following pics, unlike me when I returned back to my workstation. Those boxes indeed were meant to contain rollers, but did I do that or did I just roll around blindly? Yeah, one could guess.


29.11.17

Session VII

In the powered end

There wasn't much to say about this session. I built stuff for the drive sprockets and those V-shaped whatchamacallems, most of the time disappeared while cleaning the bits, dry-fittings and such fun activities.


Well, I did build some subassemblies for the next session, but I decided to omit them from this post. It was about all those logical chunks, see?

15.11.17

Session VI

Working on the lower hull

These funny winglets, that got installed with all their appendages into the front of the hull looked like they would be used to somehow adjust the tension of the tracks, maybe. At this point of the construction process I really couldn't tell whether or not this was the end where the return roller went or was it for the drive sprocket. Based on my "the Soviets always had the drive sprockets in the back"-kind of gut feeling I would've put my money on the first option.

Either I was going too fast or those bits that were installed at ~45° were mismarked either in the instructions or the sprues. Not that it was a big issue as I noticed it while dry-fitting, but it made me wonder. At least I thought that I had been careful with the numbers and the pieces.


While dry-fitting the upper front glacis plate and especially while gluing it on I got very iffy with the way it all looked. As if the whole front had been pressed in way too deep into the tub. Weird Soviet design, that wasn't for mere mortals to understand.


Then the rear upper glacis plate got a couple of small-looking hatches whose nature I wasn't 100% certain of. For any sort of maintenance they looked damn unergonomic, for escape hatches way too small and inconvenient. But just like I said a moment before, you couldn't always understand all these grand ideas.


1.11.17

Session V

On the sun deck

Rather obviously I continued building and installing the boxes that belonged by the foot of the main turret. Only one of them (bottom in the photo below), curiously, got an additional rod for something mysterious.


After that I got to finish up the Emma turrets, which meant that I just glued on the roof plates with the lifting rings. The annoyingly downwards-bending front bits would've given me grey hairs if I wasn't already well along the way... Thanks to the shapes it was close that I didn't get to make a "congrats, your mg ammo just cooked off" scene in the finest BattleTech spirit.


Engineering tools

It may very well be that I'm going to rue this moment in the future. I glued all the deck decorations on already, weeks or most likely months before the first drop of paint touches this model.

Well, I had to try that approach at some point, anyway, right? Maybe it wouldn't be as awful as I remember / think. Speaking of awful, that spare track piece holder you can see in the center-top? It required a surprising amount of violence to settle in, I was somewhat concerned while pressing it in place. But still it survived, amazing as it may be.

Otherwise there was a calm amount of crap to be installed. Two shovels, an axe, a couple of confusingly short tow cables and a weird metallic piece for something even weirder. Somehow I would've thought that this kind of a monstrous tank (and keeping the Soviet mentality in mind) they'd thrown in a blacksmithful of junk. There'd been more than enough space at least.


18.10.17

Session IV

Turrets!

As soon as all the juice straws were all built, I got to assemble the turrets and then install the guns into them. Either I had been cleaning the pieces a bit too enthusiastically, or their fitting was less tight than I had expected. For a moment I was afraid that I couldn't get them hold together without a fight!


Ultimately they did fit. On the tops of the gun turrets I added a few hoops for lifting the thing on and off the tank itself, some cellar door -like hatches and the cover for the air vent. I don't think I have commented on the quality of the pieces so far in this series of posts, but they've been pretty damn nice.


Of course I just had to try the four turrets out as soon as possible. I'd loved to have them all pointing at the same direction (broadsiding would've looked so very cool), but of course it wasn't possible. At this point I started pondering on the painting and I decided that I wouldn't install them anytime soon - at least the MG turrets should be traversable thanks to some locking pieces, even though I doubted that a bit - because otherwise I'd just shoot myself figuratively in the foot.


As my last-last act of the evening's session I glued together one of the weird boxes that was destined to be installed to the side of the main turret's riser. Those triangular supports you could see in the instructions just didn't have the time to be included this time.