Mapping my needs, again
I was looking at the paintjobs suggested in the instruction sheet and I compared the RLM colours it used to my own collection. There was not a single shade that I owned yet, and I thought I did have a couple at least. I asked google for a list of VMA paints and RLM paints and how they compare, then wrote down a few codes.Vallejo does offer a handy sixteen-bottle set of RLM paints (but I didn't think that Hobby Point had those in their shelves), and I didn't think I was ever going to be that kind of a Luftwaffe-modeler, anyway... Though I have to admit that a number of Luftwaffe '46 Wunderwaffe units have always intrigued me in some way ;) Or maybe I should say that the Wunderwaffe have been close to my heart, regardless of which branch of Wehrmacht they belonged to or whatever their what if percentage was.
Heading home by the shop
One day I just left the office with a bit greater rush than usual and popped by my royal supplier. Sadly they had run out of black-green, so I took the next one (VMA german green). I decided that it was close enough.Off to paint
Before I started, I checked out the instruction sheet and its markings. To save my nerves (and time) I wrote in the instructions next to the silly codes (a black triangle with a number 11 inside, for example) a plaintext comment on what I was going to use, such as lgrey or gviolet. Maybe I would've remembered what I wanted and where, but as I knew how hollow my head is, I thought that playing it safe wasn't going to be harmful.Priming white
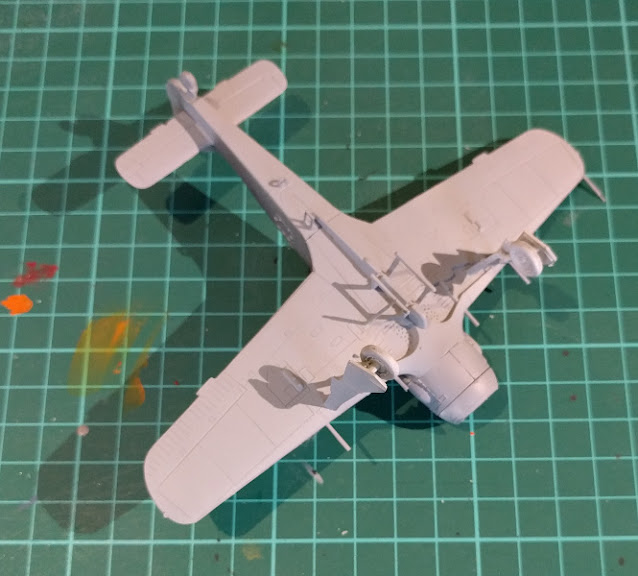
For a change I decided to prime the model white. That Vallejo's Grey Surface Primer I've been using has been a bit weird lately. Afterwards I realized that I had forgotten to prime the drop tank. This happens quite a lot.The pattern
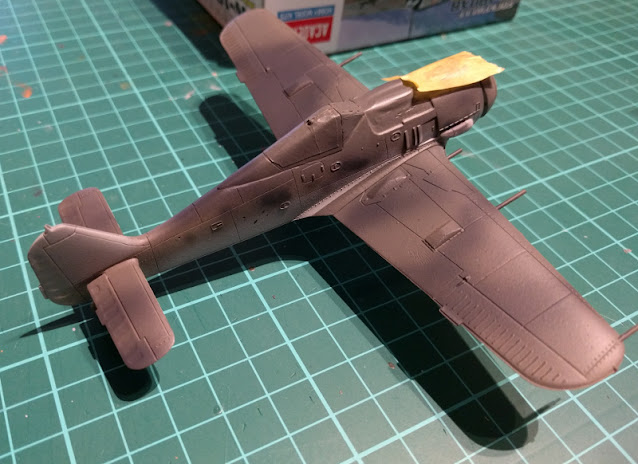
For my plans I decided that the two patterns in the instructions could be mostly used as a source of inspiration. I started the painting phase by painting the bottom. Both the bottom areas and the lower sides I painted grey (VMA 71406 Pale Blue Grey ~= RLM 76), as well as the tail wing. This time I remembered to shoot the wings from straight ahead, behind and from the sides. This time the wing edges shouldn't end up having some silly imperfectly covered parts.A bit later I flipped the model around and painted just about everything from the top with the darker grey (VMA 71054 Dark Grey Blue ~= RLM 74). Over that I airbrushed a hopefully form-breaking pattern with grey violet (VMA 71128 Grey Violet ~= RLM 75). I hoped it'd look like something tolerable when it was dry. In general I would've liked a tightly edged splinter pattern much more than this dynamic freehand pattern. But that's just me and my taste and preference.
Looking at the photos it looked like the lower sides would need a bit of touching up with the lighter grey, now I oversprayed especially while doing the tail parts. Otherwise it did look ok to me. Of course it was still missing the mottling and I had a couple of approaches in my mind for that. I guess I'd redo the trick I had read about once, where you'd spray through holes in a piece of cardstock, for example. This way the dots would be soft-edged. Another option was to abuse an old toothbrush, but I didn't think I was going for that.
Round 2
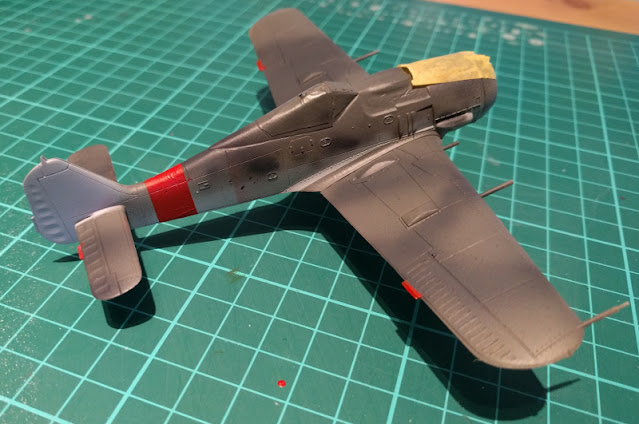
The next time I masked the surroundings of the landing gear wells and painted the insides with a lightish green (VMA 71044 Light Grey Green ~= RLM 02). After that I airbrushed the spinner-propeller setup with dark green (VMA 71020 German Green (close enough to RLM 70)).Only after those steps I started fixing the issues of the first round of camo painting. I redid the lower sides with the lighter grey mentioned before, now using a piece of cardstock to help with the horizon line. This way I got a clear but not too sharp-edged line. The method for mottling I had thought of didn't really work out, thanks to my badly thought out mask setup.
Now that the rear was good enough for me, I could finally mask the area for the red band. In the same session I also masked off the lips in the ailerons and tailerons, then airbrushed them all with red (VMA 71085 Ferrari Red).
Of course I realized it while I was already painting, that I had, after all, forgotten the tail wing's mask. I'd have to do that manually when I was in the paintbrush phase of the project, like working on the metallic pieces and such.
Touching up
Had the A-subtype Butcher Bird the easily noticeable Messerschmitt- or D-model -like exhaust pipe ends, I'd painted them black at this point and left them with a semiglossy varnish to pretend I had a seminew engine in my hands. In this scale you couldn't see the exhaust pipes that were behind the gills, so I didn't even think of microadjusting them at all. Their existence could be told from the weathering, if at all.The armament
Supported by common sense and a gentle "I'll double check this just in case" googling I painted the visible parts of the cannons in the wings with Gun Metal Grey (VMC 70863), as well as the visible parts of the machine guns in the nose. I did consider drilling or carving up the barrel tips just a bit, but I didn't think they'd survive it, so I let them be. Instead I dabbed a tiny drop of black on each barrel. Especially the result on the MG 17 machine guns was amazing, even if I said so myself.The wheels and the landing gear
As almost always, I painted the rubber parts of the wheels with black grey (VMA 71056 Black Grey). I had also reversed my decision of using the green replacement paint I had picked up for the propeller blades, so I repainted that part again with black grey as well. That felt like a better replacement for black green than german green.The hubs of the main wheels and the top of the spinner I painted black (VMA 71057 Black), even though the instructions suggested painting the hubs white. The tail wheel's hub I left as it was, light grey. Both the shock absorbers on the landing gear struts I painted metallic (VMC 70865 Oily Steel), as required.
That pylon and the tip of the downwards-pointing stick I painted with oily steel as well. The hanger itself I painted with gunmetal, just like the gun parts. I guess I could've used the same shade on all but I felt like using a couple of different shades just to make things look a bit different from each other.
Miniweathering
As I was now done with the big issues, I decided to spend a few minutes with some gentle weathering. I wasn't going to do anything grand or complicated. I drybrushed some black to the grooves in front of the nose's machine guns. Then I drybrushed some kind of a "this sounds good"-kind of a dark smudge on the sides from the gills backwards, for exhaust stains.Then I drybrushed some gunmetal grey here and there on the wings and the sides of the plane. Mostly I touched up on the panel edges, bumps and especially the areas on the wing's bases where people'd walk the most. I tried to keep the effect decently light.
After these tiny but important steps I finally remembered to glue on the propeller part to the airframe. The piece holding the propeller's shaft didn't quite fit into the hole in the nose, so I had to carve it a bit to get things to attach properly.
Washing up
All the light grey surfaces I washed with Vallejo's wash (VMW for grey & dark vehicles), the green landing gear wells I washed with the green one (VMW for green vehicles), just as the camouflaged bits. I decided they were more green than grey.All the metallic bits got their own treatment. I just applied a bit of my ancient Citadel's brown (Devlan Mud that I think I should throw away). Perhaps I could've skipped this phase, but now it's done. If I get second thoughts it'd be quick to repaint them, there weren't that many metallic parts.


No comments:
Post a Comment