Mastodon

26.12.18

First paint drops

Judging by my calendar it's been quite a few months since the last time I got to paint anything. At least I've had some variety in my doings and some of it has been good, too.

Primary

At this point in the project I took the bare minimum surface area to work on, that being the dudes in their seats and the cockpit itself. Then again, as German as a language is full of exceptions and exceptions to those, I also primed the propeller and the spinner already. I just love contradicting myself in one single thought and sentence.


The cockpit area

To keep things pretty simple I airbrushed the cockpit floors, walls and the dashboard with dark grey (VMA 71055 (Black Grey RLM 66)) carefully. Had I bothered masking off the wings, I could have saved maybe a few minutes later on. I was somehow expecting to end up filling and sanding the joint of the airframe and wings so I didn't really mind that much. I also painted the cockpit's part on the airframe that is visible outside but under the canopy.

Finishing this step I airbrushed the guys yellowish (VMA 71246 Yellow Brown) as that seemed like a pretty decent choice for a desertish DAK coverall and would be distinct from the dark cockpit. Unless I made an utter mess of the canopy in the later stages.


Some manual work

Without any great illusions of anyone ever noticing the dashboard I still dabbed a black (VMA 71057) blobs on just about each of the lumps on the indicator board and then on a bunch of them I added some white (VMA 71001) smudges for better diallikeness. It did look like a dashboard. From a certain point of view. Finally I poked a few bits on the cockpit inner walls with yellow (VMA 71002 Medium Yellow) to mark some random lever ends and whatever they marked that way. Of course I had forgotten to fetch any of my red paints so all those I had to leave this time.


While messing around with black I painted the handle of the joystick, the radio devices (2) and the crew's boots (which with these sculpts looked like either walking shoes or that they had their coverall legs over the boots instead of tucked in). Then I prepped their goggles by painting them black as well. Maybe I'd apply something metallic to make them look more like old goggles instead of modern scifi helmet visors. In any case I wouldn't be able to make them look authentic so anything would pretty much be ok for me.

Later I applied some white highlights on the FunkGeräts to make them look a bit more like something else than black cubes in an almost black environment. I didn't go for any special authenticity or anything, just a hightlight for potential visibility.


After I was done with the crew's shoes I painted their bibs (I assume they were lifejackets in real life) with the same yellow I used before. The sculpts were whatever so I just painted instead of worrying too much, as I had made my mind already. You know, being stubborn.


Last but definitely not the least I painted the leathery flying helmets and gloves brown (VMA 71041 Tank Brown). Then I fixed some of their pant legs that hadn't gotten proper airbrush coverage with the yellowish brown.

When I was done with the dudes at this point I painted their seats with the same cockpit colour I used before (RLM 66) and plugged the seats with their owners onto the floor. If I remembered to do the red bits the next time, good, but if I missed the plane wouldn't crash and burn for it. Maybe I could take a look at the seatbelts while I could. Otherwise the next round would (hopefully) be just pure building again.

19.12.18

Reference hunting

Target locked

Ages ago I had decided that this'd be a yet another different plane. More clearly put, I had never painted a flying Deutsche Afrikakorps device (not that I had made many going on the ground, either), so why wouldn't I send my Stuka to scream over the skies of North Africa?

The plane

Somehow I remembered seeing a set of Luftflotte 2 camouflage patterns. Most of those had a splintery or splotchy pattern. Of course, in my mind's eye a simple, plain Dunkelgelb (RLM 79) with white Operational Theatre markings just looked the absolute best in this case. Based on my quick image searches I wasn't the only one, even though I was admittely in a small minority.


The Stukka [sic] would have a plain light blue (RLM 65/78) belly, as RLM has decreed without any nonsense at all.


The crew

That being said, the plane's camo pattern - or in this case the lack thereof - wasn't going to be a problem of any sort, but the tiny figures that were a surprise to me had the potential of becoming a tiny problem. Basically any sort of a Luftwaffe pilot reference would've been just ok, I guess, but I was looking for a more location-accurate sources. After a good amount of very obscure ddg'ing I had found myself on weird forums and who knows what else, but the main idea seemed to be that either they had a blue-grey coverall with a yellow vest or a dark yellow (could also have been faded olive as well) coverall with a brighter yellow vest.

A screenshot from an Afrika Korps -forum (!?)
I really wasn't sure what the original colour of the helmet had been and what time has done to it. I guess I could use these pics, depending on how well or badly the details were on the tiny dudes.


Maybe they'd be all right in the end. The helmet was pretty clear, but the coverall's colour I'd have to ponder a bit, as I wasn't sure what made the most sense. Generally it looked like that the coverall was dark (which wouldn't stand out of the dark cockpit interior) or a light one (that would stand out of the cockpit but would look awfully close to the airframe). Just by this set of thoughts I'd most likely go for a light coverall because it'd also sit better with the sandy North Africa scenario. I just didn't feel too happy about having the plane and the clothes in the (almost) same colour, for reference see the halftrack linked earlier. In this case the skin tones I had used were also awfully close to the outfit colours, so I'd need to pay attention to that while painting.

An absolute must would be the Luftwaffe rank markings on the shouldersleeves of these chaps (and before that I'd need to come up with what rank each had to begin with) and on their chests (if there was space) some sort of flying eagles and other sillinesses, figures allowing. And that's always been awesome fun! Not that anyone was ever going to see them in the completed model, but that has never, ever been a meaningful argument in my books.

The cockpit

Had I been smart (or stopped to think), I'd painted the insides of the airframe halves before joining them together. But as I wasn't, I didn't. Now I'd paint them at this point instead. Then again, I'd had to apply glue on paint, which usually fails on many levels - and I'd still had to fight the instrument panel separately. And again glue it after painting. Dunno, maybe I just have no idea of how to optimize airplane build/paint order.

On top of the basecoat I'd apply a black-grey (RLM 66) layer or two and then drybrush for some details, that one could maybe, perhaps, potentially see through the canopy. Most likely this would not be the case. While typing this post up I couldn't check the pieces, if the radio equipment &co were modeled so that they could be told apart from the rest.


I could always highlight some cables and the sides should have some levers with red and yellow ends just where the pilot would reach handily. Maybe there were some lumps on the model, but with a closed airframe poking those details with even a tiny airbrush was so-so, if it made any sense at all anymore.

Anyway, this has been the traditional 'Mumblings thinking out loud as always. Don't be confused if by (or in the middle of) the next post I've changed my mind completely, again. These things have always been pretty dynamic, I think.

12.12.18

Building a bit

Following the instructions for a sec

After unboxing and observing the contents I spent that evening's remaining hobby time by assembling the important first pieces. The bits required some cleanup, but not that much at this point.

Just a couple of tiny pieces got installed into the wings in addition to a clear piece for the landing light, that I may remember to mask up later on. But what's the point of that, since the piece covers just some unpainted plastic... pah. After the surprisingly pleasant and well-fitting wing assembly I added a couple of cockpit floor pieces and the separator between the pilot and the machinegunner. I also assembled the tiny dudes (these miniluftwaffians consisted of three pieces: torso, arms and the lower body) and started pondering on how would I paint this whole setup even half-sanely.


My second evening

After the crew I got to build the airframe itself. The tail end worked like a charm, just like the wings before, but the nose was a bit more of a complication. That piece that had the front radiator texture got some heavy damage to its pegs because I had to use a surprising amount of pressure to get the nose pressed together. Luckily a gentle amount of glue saved my cooling system.


In case you haven't noticed, it's been bothersomely difficult to take these WIP photos with a cell phone with one finger while the other hand is occupied with holding the model at a barely tolerable angle. Sorry!
The important thing was that the legendary nose shape of this model was already forming nicely. As I have been saying for many, many years, in its uglyiness this is a damn pretty plane.


Somewhat surprisingly the instrument panel settled in beautifully. Now we had actually already reached the point where the assembling had to be put on hold and the airbrush-compressor combo was to be dug out. Otherwise I would never get to paint the insides at all. Or any sort of detailing, that is, I could, of course just blast some dark grey and leave it at that, but I wasn't going to!


5.12.18

Project IV/18

Junkers Ju-87 B-2

At long, long last I started the small-scale dive bomber that I received almost two full years ago. We were talking of, as the box nicely told us, a Zvezda's snapfix kit that supposedly didn't need any glue. I wasn't going to trust that claim this time, either.

Box, the

As the photo showed, the box had gotten kicked around a bit during its trip up north, but who cared about the cardboard as long as the contents were alive? Someone had also forgotten to proofread the not-cyrillic strings, as there were certain funnies in them.


Bits

More or less a standard approach, the bits came in two sprues and there were a couple of transparent pieces for fanciness. As far as I could tell the decals looked fine, but as usual, I really didn't know if I was going to throw them on the model or into the biowaste container. I was sincerely hoping that this set was going to require somewhat less of cleaning than the T-35's pieces, but with this few pieces even that wouldn't get to become bothersome.


Paperwork

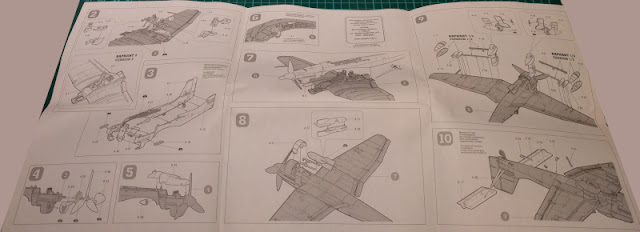
All the instructions fit in a pretty small area, didn't look complicated. Of course the reality would show how the quality of the instructions was.


28.11.18

The queue lives again

Helping a friend out

The always as notorious Lasse was moving and to make this story quite a lot shorter: I gave three models a new home. The largest was a 1:32 scale Atomic Annie (ducking Upshot-Knothole Grable may be an educative experience for those who haven't seen it yet (are there people like that?)), then the other of my Soviet favourites, a Su-27 and the final kit was a surprise to me. A Tiger Ausf E with little people. At my current rate these'll take a couple of years or more!

21.11.18

Finished: Project III/18

SdKfz 181

A sixty-ton ultrastylish machine, Panzerkampfwagen VI Ausf H or Ausf E Tiger (I), whichever way you referred to it, was Germany's questionable gift to the world, and it was the size of a small sauna cabin and for some obscure reason it's always been an extremely popular modeling subject. It definitely was a pretty thing, regardless of scale and material, right? According to Wikipedia they built something like 1347 of these legendary monstrosities.

Unit 4

As you're most likely used to, I took the basic posing pics from the cardinal and ordinal directions, but also directly from above and even below, as the kitty's belly had been modeled so nicely. I just couldn't not show it. I couldn't tell if it was because of the misaligned subcomponents or what, but especially towards the end of the set, those three images showing the left side of the tank managed to make the tank look like it was really accelerating towards its target, pedal to the metal.


Odd angles again

I didn't go and gimpify the reflections off the backgrounds. Maybe I would have to try that too, to judge wheter or not it brings something else than a pixelated mess and a bad experience.


14.11.18

At a Henschel factory in **REDACTED**

The turret

My tiger's turret started finding its shape by its deck. A couple of simple bits were installed on it (the exhaust vent, the gunner's cupola and the gunner's hatch). The sides of the turret consisted of a single complicatedly shaped piece, that was fascinating to say the least and ended up looking pretty weird on the first attempt. As soon as I attached the rear box, the curvature settled in and the top of the turret locked it properly. That lower rim was what it was and I knew that it'd take its proper shape only when the turret was locked onto the deck so I didn't bother fooling with it at all.


88KwK36

The cannon and its attaching was its own funny project! Somewhat surprisingly the solid barrel was just left floating freely into the first box, that was in turn tightly attached to the next box. And this kept the visible part of the cannon nicely and snugly in place.


It's always ridiculously complicated to take any photos of these, as the bits reflect the lights so that the cell phone camera just cannot grab a hold of anything. And no, I'm not going to take WIP images with the big camera.

The hull

Wisened up by a number of MEM sets I didn't follow the instruction's guidance of folding the hull at angles at this point. Instead I attached all the cables, cones, hatches and the radio operator's MG first. This way I had plenty of space to play with the attachment pieces as the walls were politely out of my way.


The cat's exhaust pipes were amusing. First I thought that the bits were to be bent 90° each and then connect together. Luckily I managed to revert my changes and the Auspuffröhr ended up nice. With both then done (again, the second one without stupid ideas) were then attached pretty damn tightly into the back armour and then the familiar roundish covers were sworn into place. I guess I could've left those off, but the metallic x's would've looked a bit goofy on their own.


It was a pretty pretty thing already, before the almost insane-looking road wheel setup. Just by looking at the instructions, they didn't look that bad, just a bit bothersome.


Roadwheels and tracks

I

Oh my. This was in a league of its own. I started by rolling up the cylinder for the idler wheel and then I attached it into the side plate. Next I fought the idler wheel's faceplate on that one. That was a fight indeed, as making these bits roundish wasn't too easy, as I've always complained, and then working on top of those was a bit complicated. As you could see in the photo, that the idler wasn't straight and flat anymore, after the forceful installation.


With the first important piece done I proceeded to roll up the four road wheel cylinders and to attach them to the side plate. After those I finished that up with the final road wheel's and the drive sprocket's axle cylinders. It got pretty tight in the end.


Now I had a bit of a moment, as the instructions were a bit ambiguous. I practically followed the principles of Flipism and started with the discs of the outmost roadwheels, then attach those to the faces of the innermost roadwheels and then slam the results onto the axles. That was my expected outcome, at least.


Before the final step the whole roadwheel setup looked a bit like the olympic rings and I really had to be careful with the directions of all the pieces. Otherwise they wouldn't have aligned with the attachment bits of the axles.

After about ten minutes of bending, twisting, rotating, forcing, sweating, light and gentle swearing and almost as gentle violence and such things the subassembly was secured in place. It was also a very healthy moment to call it quits for that evening. That had been awful, but luckily I was already halfway done.


II & III

Before I did anything else I attached the final wheel face on the previous setup. As you'd see in the photo, I had not had the time to add it with all the fighting with the roadwheels.

Wisened up, I built the right side in a slightly different order: first I attached all the cylinders. Then I attached the rims of the outer road wheels on the still unattached faceplates of the inner roadwheels and then fought this line of circles onto the axles. My idea was that this'd make it a bit easier as there was less stuff on the way.


I had been correct, it was easier that way. When that part was done the rest was like eating candy. Snap, snap, snap, I pressed the missing pieces on and bent the attachment pieces tightly shut. No, I'm not going to say it wasn't bothersome and complicated, but noticeably easier nonetheless.


Tiger's tracks consisted of two strips per side, both with two or four sideways-facing attachment pieces for the hull part. This way they couldn't have been installed in a wrong way or to the wrong hull piece.

My first track-part connection didn't end up looking too pretty, despite my attempts of tweaking them afterwards. The first one went how it went, the second one I tried to roll to a rounder shape with the assistance of a ball-point pen, but neither really looked better or worse than the other one.


What remained

At this point I was left with two untouched pieces and the final joining of the sides with the rest of the tiger. I followed the (again somewhat ambigous, in my honest opinion) instructions and attached the front glacis plate over the front lip of the hull, after a good long staring at the imagery. In the end that was the correct choice, luckily.

Next there was little left, I just attached the side parts to the hull and while doing that I also bent the hull into its correct, final shape. The bottom armour of the tank was the final piece, it also settled in relatively nicely, the only issues came from the corkscrew-tightened attachment parts of the roadwheel axles because they protruded quite a bit as opposed to the bent ones. Should've thought of that earlier, but again I had just followed ord... the instructions. With a bit of working and swearing it all worked out in the end.