The fine-tuning stage with fine details
After the oily weathering sessions the Archer had been sitting in a dry and hopefully dustless place for a few days. Now I only had a couple of quick, easy but for an eager person very time-consuming details left. Being an amateur and otherwise quite unskilled painter, I wasn't going to spend hours on the lenses and their jeweling effects. The same method that I used on the Assault Star was going to suit this as well.
Lenses on the Lasers
I had four pieces of Diverse Optics type 18 Medium Lasers to paint. Two of them were in the Lower Arms, according to the lore there was supposed to be a turret-like thing over the head for the remaining two but the mini looked like they were in the backside, L/R Torso. I may have called them exhaust pipes a couple of posts ago.
These four ERLas cannons I painted the exact same way as the previous lasers: a green (VGA 72732 Escorpena Green) layer on the bottom. Then I mixed in a drop of white (VMA 71270 RAL9001 White) to get a lighter green, painted the lower right sector (if we were looking at a clock, it'd be something like the 1600-1900 area). Had these been larger, I'd done a third layer but nope. Instead I added a white drop to 1700 on each.


At least they stood out nicely.
Cockpit canopy
I had chosen green as the cockpit colour for this unit some twelve years ago, so that's what I kept using. The viewports had already been painted dark grey, so I didn't need to worry about them anymore.
The base was a green (VGA 72730 Goblin Green) layer on both panes. Then I lightened my paint up a bit and added a slightly smaller area from the bottom right corners. Due to the smallness of the bits I only did three layers. Finally I painted a white dot into the top left corners. The dots could've been smaller, but such was life.

After that I painted the hex edges dark grey. Now they looked uniform and also fit in wonderfully with the caution stripes on the front edge.

I certainly wasn't going to become a shade or gradient master. If needed, I might still fix the armour edges with dark grey if the greens went annoyingly over.
The ground to stomp on
Now the hex base was the difficult one, as I hadn't decided it years or months ago. I didn't intend to do anything complicated, especially on a quick snack project.
Somehow I remembered that I had somewhere the years old Woodland Scenics stuff and when checking I found I had two bags of those (Ballast, Fine, Light Gray and Buff - the light gray was open so I used that). I covered the ground with white glue and let it cure a short moment.

On the base I sprinkled an amount of the light gray ballast and added a couple of shreds of their fake greenery (I had two types of that too: Coarse Turf, Medium Green and Foliage, Light Green). This was a generally functioning base, I have done these before.


I stopped to think if I should tint this pretty light-coloured ballast a bit? I could mix some sort of a brown oil wash, that'd bring the ground more to the earthy look, now it looked like sun-baked desert. While thinking of this option I left the mini to dry overnight.
Oiled earths
Luckily I had a six-tube weathering colours set, that was a great source. I started by making a brown wash (ABT093 Earth) and applied it just about all over the ballast ground.

Something made me think that I shouldn't leave it this way, monocoloured. The set also had two different mud colours, so I made a tiny amount of dark mud (ABT130) and dabbed it into some random spots.
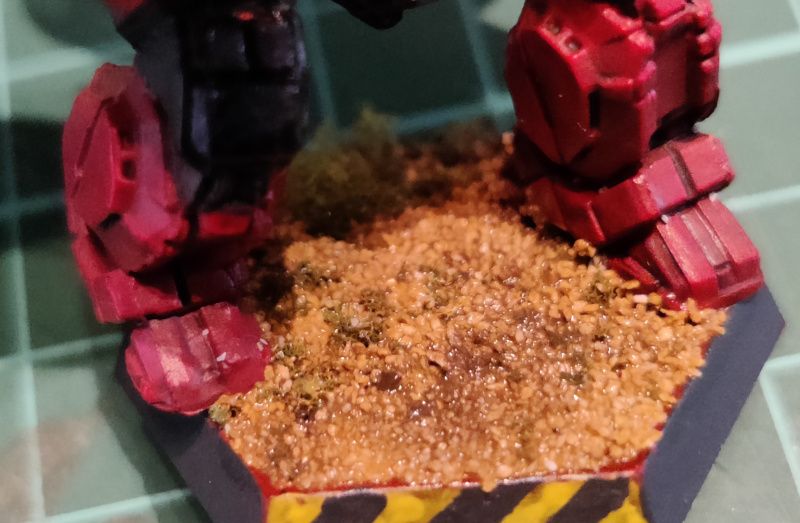
For extra variety I made a bit of light mud wash (ABT125) and dabbed that into some other spots, including the 'Mech's feet.

Now the ground wasn't uniform or boringly monocoloured. While taking these photos the paint was still wet, so the actual end result was going to be visible the next day.
In addition to the paint drying time this miniature had nothing left, unless I spotted some tiny fixable spots, and applying the gloss varnish on the lenses and viewport panels. Of those I wasn't going to write a separate post anymore, for the next week I intended to get the final photos taken and gimped.
No comments:
Post a Comment