Mastodon

4.1.17

Project I/17

Leopard 2A6M

My Project Assistant felt like she needed a new tank to paint. Naturally we went for a bit of model shopping, that wasn't quite as successful as I had hoped for. In the end we popped by the local supermarket's toy department as our last hope. I started reading out the names of the five kits. The word "Leopard" had barely escaped my lips when she had already grabbed the packet and was declaring "I want this one". Daddy's girl.


The eagle-eyes among the audience may have noticed the left edge of the box and how it carries the name logo of Krauss-Maffei Wegmann, the company that manufactures the actual big cat on tracks. I assumed that this Revell kit was properly licensed and therefore a very decent model.

Quick assembly

I didn't rush with the build but spent a few evenings on it. Most of the tiniest and flimsiest details I skipped altogether as I knew that she'd be playing with this and those would most definitely not survive such life.


Revell's idea for the tracks was itneresting: two long bits per side were to be softened up in very hot but not boiling-hot water and then quickly bent into shape. Want to guess how well that worked out? I replaced the useless pieces with a more play-durable approach: tactically opposite and offset strips of masking tape of a handy width. Of course these tracks weren't true to scale in their thickness but they settled in beautifully and they'd also survive being driven around the floors, sofas and whatnot.

First I measured good lengths of tape, dry-fitted and fine-tuned a bit. As soon as the tracks (bands?) were just the way I wanted them, I dabbed a bit of white glue onto all the contact points of the roadwheels etc so that my tracks wouldn't fall off accidentally.


Slow painting

The model was primed simply white. After this I released it to my subcontractor, who also happened to be its owner.


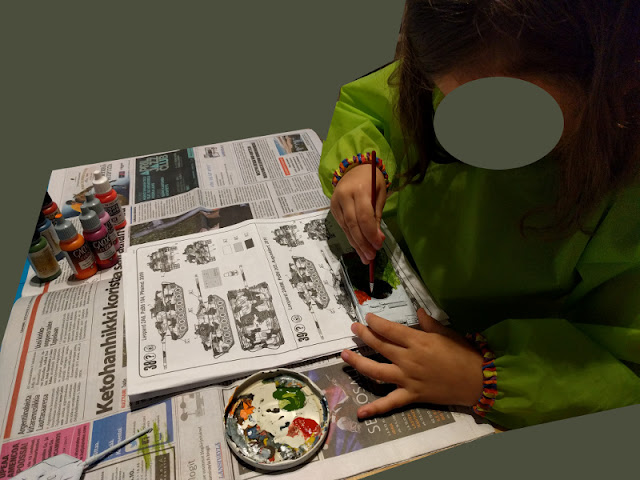
As the muses were not too reliable, the painting process was shot around the calendar and took three sessions. But there was no sense to try to force or coerce a four-year-old to do anything like this when she didn't really find it interesting enough. I just asked occasionally "would you like to paint your tank today?" Just like the delightfully positive Bob Ross said: "Painting should never be hard work. Painting should be fun."


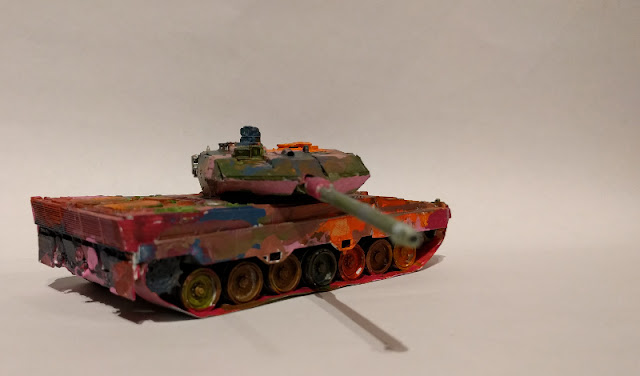
From some angles the tank looked as if the driver had gone at full speed into a patch of blueberries and kept rolling there with great happiness. The excited painter sometimes mixed all the paints together and was a bit confused when the result was brown instead of a custom rainbow. I guess it'd been fun to paint rainbows etc that easily but paints don't quite work that way. We'll be iterating this discussion a bunch of times in the coming years...

And these were the paints that were used in this, should I say unusual, painting process:

VMA 71065 Steel
VMA 71111 UK Mediterranean Blue
VMA 71094 Green Zinc Chromate
VMA 71085 Ferrari Red
VGC 72013 Squid Pink
VGC 72014 Warlord Purple
VGC 72008 Orange Fire
VMC 70733 Orange Fluorescent

All systems ready

When the artist had done with all her last touchups and modifications on the patterns at the last moment, it was done at last. I checked repeatedly if she wanted any decals to be used but the answer was consistently a stern no. To finish everything up I applied a layer of matt varnish to make it maybe a bit more durable for the playtime adventures.

I just have to quote the artist herself: "This is a fire tank. It brings fire. In the colours of the rainbow!" A rainbow-like set of more or less concentric arcs did appear on the rear deck of the tank at some point, but you wouldn't know it if I didn't tell you that. Or you couldn't tell it even then. Of course I was very pleased with the Flammpanzer idea, she indeed is daddy's girl :)




28.12.16

Finished: Project IX/16

A German-captured Soviet tank

As it is known, Germany wasn't the only participant in the WWII that was steered by a moustached somethingopath. This time the team of one of those had stolen a tank from the other one's group and then modified it a bit to look more like their own toys. In short that was the theme and motivation for this model.

Sneakily and tactically this wrap-up post ended up at the end of the year. Therefore the modeling year 2016 of the Project Mumblings blog was also wrapped up as the ninth project of the year was declared finished. So: have a nice new year and we'll most likely continue the next year just as idiotically as all the previous ones here at the Project Mumblings.

Imagery


The flash isn't my friend but at least you can see the dirtification a bit differently


The turret was turnable and you could adjust the elevation of the D-25T gun, within the physical limits of the model itself.


I did start marking down the time I used but then I forgot that, just about before the installation of the tracks. The build itself took very little time (a few hours), as the Tamiya kits have always been quick and easy. All the adjusting and painting took many times more time, as it always goes and as was to be expected.

21.12.16

Germanification

Spoils of war

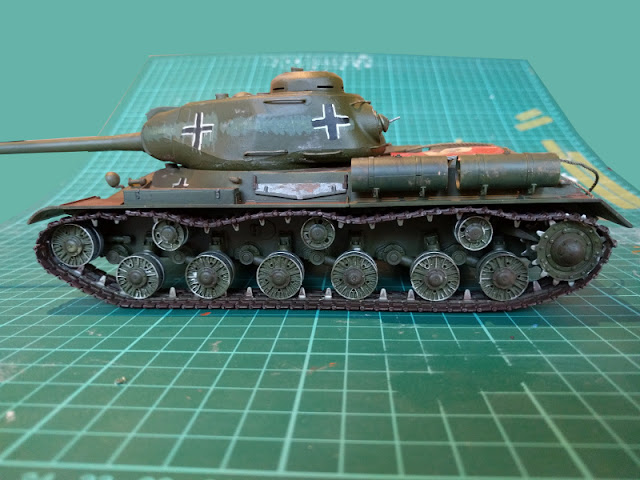
Perhaps my choice wasn't specially surprising. In short the IS-2 would be in the desperate hands of Wehrmacht. To make this apparent I used a different shade of green (VMA 71096 Panzer Olive Green) to paint over the Soviet white markings so that they'd be both covered and they'd seem to be painted quite hastily. I also tried to get some runny paint effect done here and there to make the whole cover-up look more panic-driven.


You can recognize the krauts by their markings

Of course the tank had to have some Balkenkreuz so that the other germans would recognize it as a friendly unit. Based on some googling for german-captured soviet tanks they always had much, much larger and kind of overdone block crosses and there were more of them, sometimes in weirder places than normally. That made sense, as it wouldn't be of much consolation if you had some friendly markings but the Panzerfaust-wielding Volkssturm member just couldn't see it and fired in panic.

I freehanded an amount of black plus signs both in the hull and the turret. For the placing I rotated the model in my hands in different angles and I tried to choose so that whatever the rotational angle between the turret and the hull were, you would always see clearly at least one or preferably more of the Balkenkreuz.

When the black paint had dried I took a smaller paintbrush and painted white edges to each of the pluses. I kept up the theme of hastiness and maybe even frantic sloppiness with some paint running down and general imperfection of the shapes. These weren't painted with stencils, but quickly slapped on as soon as they knew that their captured tank was useable.


What about our dear friends in the Luftwaffe?

Otherwise that was all good and nice, but you couldn't necessary tell that from the air, if (when) the Luftwaffe pilot was busy and maybe not too well informed. At that time in the history this may not have been too far from the truth (or it could be overoptimistic for the Germans, even). I decided to try making a scale model flag.

My first attempt was just misusing some tin foil from the kitchen. I had read and heard that if you painted kitchen paper with a 50:50 diluted white glue you'd get something neat. In case the tin foil approach failed I could try that one. Or I'd try the kitchen paper or tissue paper flag some other time.

This approach was simple. I tore off a decent piece of the tin foil (1) and airbrushed it with white primer. Being the lazy bastard I am I then just put a paint bottle cap in the middle of the white area to act as a mask. Then I blasted red (VMA 71085 Ferrari Red) from different angles while holding the cap in place with one hand (3).


Just as soon as the paint had dried decently I cut off the excess to get a more or less flag-shaped and proportioned piece. Then I painted a skinny swastika on it by hand.


While checking it out I noticed that this flag was way too large to be draped over the turret, so I put it to the next best and clearly visible place: on the rear deck. That pair of tow cables could be lying on top of it to keep the rag somehow in place. In the next photo the foil sheet was there just lying freely and without too much of a care in the setup, but you could tell it was quite thin.


Weathering a bit

Of course the tank was way too clean and nice. Just like the nazi rag was way too ... well ,the way it was. Something was to be done. First of all I loaded my airbrush with more or less aptly named dirt (VMA 71133 Dirt) and then sprayed that broadly and from an unusually long distance. My idea was just to get a sort of a filter over the monster, a dusty layer, if you will.


Pigments

My weathering subproject progressed the next evening as I worked on the bolt heads and some random edges with a HB pencil. To add to that I dug out my pigments (that included Vallejo pigment bottles, a Tamiya Weathering Master kit and two Tamiya Weathering Sticks - "Light Earth" and "Sand" (the third one, "Mud" I had apparently misplaced completely)).

On the muzzle brake and the regions around the ends of the exhaust pipes I used black pigment ("Carbon"). Then on some selected spots, such as the glacis plate track links and the ends of the fuel drums I used "Fresh Rust". On the hull itself I mostly used "Natural Umber", "Burnt Umber" and "Burnt Siena" powders. This time I didn't work that much on the track dirtification. My main attention was on the hull, especially the walkable areas, and the turret, the handlebars and wherever people would've been walking with their filthy boots. Oh and on top of the flag, that wasn't going to stay clean at all.


As you may have noticed I didn't plug the two extra drill holes - I poked around them with an old and dull xacto knife to get them a bit uglier and angled. Then I painted their interior surfaces with steel (VMA 71065 Steel), maybe to represent the holes made by AP ammunition, from the time this tank was still owned and operated by the Soviets.


One more time

I wasn't entirely happy with the dustiness yet, so I made more of a mess in general - I used a small brush to spread Burnt Umber here and there, quite liberally. Then I applied more Natural Umber but in smaller amounts. That was enough and looked good to me, so I then loaded my airbrush with Vallejo's Pigment Binder and applied that generously. I noticed immediately that I should've turned my compressor's output pressure down quite a bit, as now some of the pigments flew off with the blast of binder and air, even though I started spraying the liquid quite far away from the model itself. Maybe I'd do this better the next time.


14.12.16

Markings of the Red Army

Prepping

Before painting anything I finally installed the tracks. Of course it didn't end up being as straightforward as it was supposed to be, thanks to one of them being slightly offset. Everything was solved with a bit of grunting, after all.

As soon as the tracks were properly set, I glued the hull halves together. At this point I remembered that I hadn't even touched the track links that provided extra protection. I'd have to take care of those before any weathering.

While I was waiting for the gluings to set I washed the tow cables. To do this I used the just opened, a couple of years old GW/Citadel black wash (the year I bought it it was called Nuln Oil, please don't ask me what they call it today). The effect looked good.


A RED ARMY UNIT 1945

For inspiration and such I looked at the instructions and what units were shown in there. A Chech or other unit would've required roundels and I wasn't into doing those for this project. The simplest one was a tank with number 13 from the Red Army unit "88th Independent Guards Heavy Tank Brigade", which just needed a number and a couple of white lines to be painted on and around the turret.

For the effect I started by painting the numbers with my own shaking hands on both sides of the turret, all the imperfection being calculated and deliberate. The same way I painted the horizontal line so that it looked like it was painted quickly and without too much care. Lastly I painted the plus on the roof part and tried to get a couple of paint spills or splashed droplets. I guess I could've gone for a few more bits of leaking / runny paint, but I thought this would do.


It looked "right" to me. This individual didn't need bears or red stars, so I didn't freehand any (I think I'd gone the Fallout route and painted the two-headed bear of NCR, being the funny guy I am).

Detailage

In order to provide some variety to the plain, flat Soviet Green I painted the fuel drums and the engineering toolbox dark green (VMC 70979 Dark Green). For a bit I pondered if I should've painted one of the fuel drums with yet another shade of green but I then decided that weathering would make them individual enough.

Speaking of the engineering equipment, there were the shovel and the saw on the sides of the tank. Both of them got a metallic paint (VMC 70865 Oily Steel) on the metal bits and brown (VMC 70872 Chocolate Brown) handles. The metallics I'd wash with either brown or black, most likely brown.