Henschel und Sohn & Krupp: SdKfz 182
My first Panzer project in many a year in general, my first tank project ever with a modeled interior. To compensate, this wasn't my first King Tiger, not with the proto- or production turret, not in this or a smaller scale. But this definitely was my longest tank project ever and you could tell by the amount of photos taken and the number of posts typoed up. All this took almost a full year in the calendar, but I did do other things every once in a while, as always, so this wasn't quite as slow as it may have sounded like.
For some reason the tank didn't have a ridiculously large and bright Henschel sign on it, this one above was from a side of a locomotive. Its scale I had completely forgotten.
Panzerkampfwagen Tiger Ausführung B
Before anything else, I took some photos of what I had just finished. I didn't want to break anything before it was documented. The previous times I attempted to connect the upper and lower halves, something made very ugly and scary noises, a few pieces fell off and some paint got seriously scratched. That wasn't anything a modeler enjoys hearing or seeing, you might find yourself agreeing with me here.
A summarizing attempt
All in all this project took about nine months of time, 41 posts if this one was included, and 502 photos (of which 13 were reference photos), and at best or worst a couple of dozen of tabs open for who knows what sort of weird details for this build. I didn't start counting the paints and paintlike products, as I had just packed them away yesterday evening, but the volume of bottles was noticeable.
Ignoring a couple of fitting problems the Takom kit was neat, I liked building it quite a bit. My current queue is long enough for a year, easily, but at some point I'll be looking for a new tracked vehicle to be built. This kit's completely modeled interior was an intimidating aspect to begin with, but as it was also immensely interesting stuff to work on, I'd be more than happy to jump into something similar again. Sadly, I don't think not too many people besides me were going to be running for a Hummel with full interior, for example, but I'd love one.
A cool kit, with a stupidly badly fitting deck. My own suckiness at this craft prevented me from noticing and working around it in time.
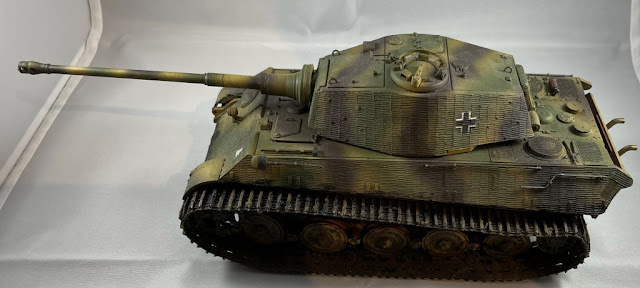
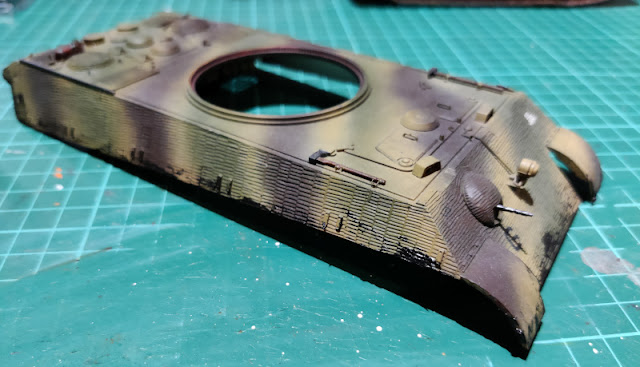
The upper hull with the turret
These photos didn't betray the silly little detail of the deck plate that contained the driver's and radio operator's hatches was removable. Technically I could've pulled it off and take a couple of photos of the cramped insides, if I managed to get the lights set properly.
So far the beast looked pretty decent.
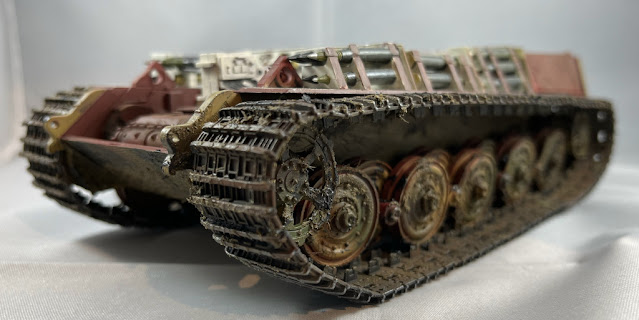
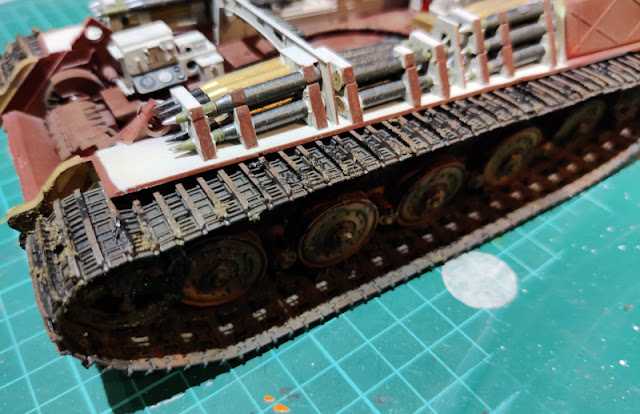
The lower hull
I had taken a ridiculous number of photos of the lower hull throughout the project. Now I took a handful more, to be shared at a slightly higher resolution.
The production turret
Just to cover everything, I took some photos of the turret alone. This was the first time this made any sense, as this was the most complex turret so far (the T-35 ones were a tiny bit simpler). I hadn't really taken photos of the turret since I got it supposedly finished.
In hindsight I could've painted the outer shell and the base of the turret together. Now the base plate was a separate Dunkelgelb block that happened to be located under dark green stripes on both sides of the turret.
The turret on the tank
To waste a bit more time before the risky attempt I dropped the turret into its place on the hull and took even more photos from various angles. Having the tank set up this way the effect was a bit strange. This gave me (again) the idea that I could still take me sidecutters and hack the setup into a "Incredible cross-sections"-book kind of a thing. But if that was my plan, I'd made it clear from the beginning instead of pretending to come up with at the last moment.
Assembled
Now that I had taken all the photos I thought I wanted, I crunched the parts together. In the rear hull the fitting issues were the worst, and I didn't dare to start using any more force than what I had already applied on the poor model. I was expecting the ammo racks and the fuel tanks to crack off, if nothing else. And I really didn't want to ruin those.
So, the photos ended up showing a slightly grimacing front glacis plate join, and a completely open rear plate. No amount of manipulation would've gotten them settle nicely in place and any gluing of such effort would've ended up looking monstrous.
If you managed to ignore the open butt-plate, this was a pretty cool-looking tank. Looking at this at this point didn't make me really wish I had actually used the mudguards and side panels, even though they'd hidden an amount of these fitting issues. A good bunch of years ago I built a King Tiger with a part of them in place only, and those installed were somehow mistreated, providing a nice effect. Perhaps I could do that to a follow-up model, I guess I couldn't be expected to use all the silly tricks in a single model / project.
Comparison kitties
Just for the fun of it I took the Panther Ausf. G (the one that ran on a single AA battery (said battery had finally released its charge, two years ago it still had enough juice to move tha model over the domestic obstacles)). Being close relatives I thought they'd be a fun couple for side-by-side shots. My fresh royal tiger just happened to be clean, while the Panther had managed to gather some dust over it.
The felines had a clear size difference. Some genious had decided, decaudes ago, that these vehicles had to be propelled with the very same engine, expecting somehow similar results. The wisdom of this wasn't too clear to me.


