Mastodon

18.10.23

Finished: Project I/23

An Assault Starful of hardware

Well, it took some time after all despite my idea of doing something quick, and I got to try new things again. Most likely the next one wasn't going to include anything totally new, or at least while I was writing this I had no real idea of what I was going to do or what could I even try.

I noticed that I was thinking of this a year ago, but I really should take a couple of comparison photos of these newest CGL 'mechs with the ones I painted last year. Each of these five I could also pose next to an IWM miniature (or a couple of them) that had been painted over a decade ago, to see how my paintings and the paintables differed.

Dire Wolf Prime #231

The people of Draconis Combine called the 100-ton Dire Wolf the Great Death (大いなる死). It was a mad unit indeed, with an LRM-10 rack on the shoulder, both arms with UAC/5, each with a pair of ER Large Lasers and a pair of Medium Pulse Lasers.


Summoner Prime #235

The freebirth little prince named the 70-ton Summoner based on some hammer-wielder from Norwegian lore, because of its weapons: lightning (ER PPC) and thunder (LB-10X) plus the LRM-15 launcher on its shoulder.


Gargoyle Prime #221

In the Assault class the 80-ton fugly Gargoyle punished the Spheroids (among many others) with a pair of LB-5X Autocannons and their underslung SRM-6 packs. It also had an ER Small Laser installed into the chest, maybe to carve some obscenities into the bunker walls of its foes. The baffled Spheroids named it after the Man-of-war ship class, most probably because of its size and the broadsides. Weird people, those.


Mad Dog Prime #222

The servants of the Dragon had given their own name to the Mad Dog, as well – for some reason they called it a Vulture (ハゲタカ) – because why not? Barely in the Heavy class this OmniMech has always been to my liking, a fantastic machine. The LRM-20 racks on the both sides of the cockpit were just a fun approach to life, the arms then housed Large and Medium Pulse Lasers, symmetrically the same set of death rays in each hand.


Hellbringer Prime #223

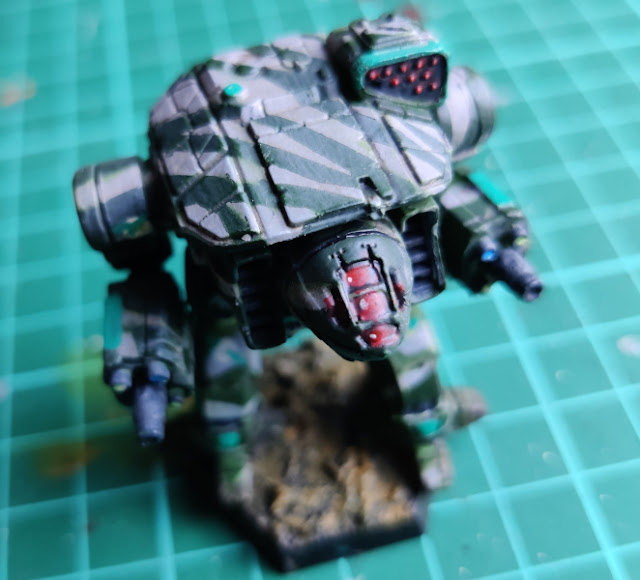
A sibling 'Mech of the Summoner, the sixty-five ton Hellbringer worked awesomely as a pair, which was most likely the reason the little prince's henchman Galen Cox decided to call it Loki. The amount of weaponry, especially in the eyes of freebirths, was indeed shocking: ER PPCs in the arms, an AMS above the cockpit, a cluster of three ER Medium Lasers in the Left Torso, a SSRM-6 launcher, four AP pods in the legs against any infantry, and to top it all a pair of Machine Guns in the Right Torso. Still there was armour and cooling fins for actual operations, just like on its sibling.


The end

These five didn't really belong into the same Star, at least in my current list of the Cluster, but based on their unit numbers they were from the Trinary Beta's Stars two and three. Of course that made no actual difference, because I was never going to play anything that serious, I was just doing all this collecting, painting and organizing just for the sheer fun of it. I may have mentioned it a bunch of times already.

Next Wednesday I should have something new going on. At this point I was thinking between two options, at this rate I'd end up tossing a coin.

11.10.23

Final detailings

Hex bases with their jade stripes

To keep things simple I painted the edges of the bases flat black. While I was playing with black I painted the barrels of each of the Autocannons as they were a bit too light in dark grey.

Earlier I had been thinking if I'd paint the lower third or even half of the front-facing hex edge with jade green, but based on a freehand attempt it didn't look as neat as I had hoped. I then painted the full edge in green instead.

With a bit of masking and a new layer of black those could be transformed into having a caution stripe, for example. I left these thoughts simmer while the second layer of the gloss varnish on the energy weapons was drying.

Metal pigmentage

This one was a pretty quick operation. I dropped some AK Interactive's Dark Steel pigment onto the palette and added thinner on it. When I had a thin enough liquid mixed up, I applied that on the metallic surfaces of mine. These photos were taken in a somewhat funny lighting conditions, and in general I felt the pigment didn't stand out as interestingly from the German Grey surface as from the Jagdpanzer's camouflage colours.


Despite my earlier ramblings I didn't use any acrylic water on the muddy bases.

4.10.23

Painting the bases and varnishing glossies

I started this session by painting the various canopy bits with new creamy white dots. This wasn't important enough to take photos of each just to show I did it, as they were going to be visible in the next photos anyway.

Disgusting browns

On the bases I painted some sort of a haphazard layer of dirty brown (VMA 71133 Dirt), and as a result this made each of the hex bases look like my 'Mechs were ankle-deep in a dog playground. Then I painted with a different emphasis some woody brown (VMA 71077 Wood) that didn't really improve the overall look much, if at all. After giving these paints a short bit to dry, I applied a wash (VMW 76513 Brown) over the bases.

They really looked disgusting, but I was going for a nasty muddiness. Maybe I could use some acrylic still water on some dots, or something, later on.

As one simple detail I finally painted the Summoner's LRM-15 launcher's tubelike bits with a rubbery paint (VMA 71315 Tire Black). Not to make them look like they were some rubber hoses, but to separate them from the camo and the other parts but not so much that they'd stand out like a Pride parade in Moscow.

Gloss varnish on the !glasses

All the canopy pieces and the energy weapon lenses got a layer of Gloss Varnish (Vallejo 70510). Each of the death ray tubes would need three layers, the canopies would be fine with one. At this point I only had time to do one layer only, as they would need to cure for a day before the next layer could be applied. Also, this was nothing that would need to be photographed every time.


These five Points were just about done now. Playing with the gloss coat would take a few days, but that wouldn't even need to be mentioned considering active project time.

All I knew I still had to do was to paint the edges of the hex bases, maybe I could paint the first edges with a jade highlight (to mark what was "forward" for the 'Mech). Maybe I could spend fifteen minutes in trying out how the dark steel pigment would look in this scale, there were quite a few non-metallic bits to experiment on.

27.9.23

Jeweling attempts

Energy weapon effects

Once again I felt like trying something new to me, this time I was going to attempt a jeweling effect on the lasers and PPCs. This wasn't too far from Shilone's engine glow, I'd just use different paints and paint onto varied sizes of targets (all tiny compared to the engine nozzle) and finally, they'd all also get gloss coated.

My colour scale

Based on my quick searches, some people who were much more excited than I was, went so far as to paint different types of beam weapons differently from each other. Meaning, normal lasers, ER lasers, pulse lasers and who knows what sort of x-pulse and microvariants each had a different style in the same weight class.

In my opinion it was more than enough if the small, medium, and large lasers and PPCs were somewhat different from each other. I just didn't see any added value of having to look at the colour to decide if the weapon was a Medium Laser, ER Medium Laser or a Medium Pulse laser (or some more modern variant).

  • Small Lases: red (VGA 72710 Bloody Red)
  • Medium Laser: green (VGA 72732 Escorpena Green)
  • Large Laser: blue (VGA 72721 Magic Blue)
  • PPC: light blue (VGC 72023 Electric Blue)

All of these got painted following the same pattern: the concave barrel end got painted with the base colour. Then I mixed a bit of creamy white and that got painted onto the lower right corner (a Camospecs video used the clock face example of sector 16:00-19:00). Finally I mixed a tiny bit of the base colour to the white and painted a single bright spot into the lower right corner (@~17:00). In some cases I managed it better than in some others, and some of the colours looked better than the others.

ER Small Laser

Only the Gargoyle had a small laser, in its Center Torso. The barrel's surface area was so sillily small that my attempt at a gradient didn't really show well, the photo here showed three layers.

While I was painting with the red that was a bit lighter than the RLM23 I went through all of the canopies on all the 'Mechs to paint a small edge into the top left corner of each panel. Doing this memory-based meant that I remembered the method wrong and the "brighter corner" effect should've been in the bottom right.

ER PPC

The PPC barrels of the Hellbringer and Summoner were larger than the lonely ER Small Laser so the progress of the paintjob showed a bit better:


One thing that I did differently from the tutorial video was that I didn't wait for the layers to dry but I painted on straight away, thinking I was doing some blending. That may have been an erroneous choice, but I could always do better with the next miniature(s).

Medium Pulse Laser, ER Medium Laser

Now I had a handful of medium-sized flashers. Dire Wolf had two in each hand, Mad Dog one per arm and Hellbringer had a cluster of three in its Left Torso. I only could choose something for the death rays of the Dire Wolf, and after a tiny bit of pondering I ended up in a mirror-symmetric setup because I didn't want the lasers to be in pairs or haphazardly mounted.

This green effect seemed to stand out nicer than the electric blue I had painted mere minutes earlier.

Large Pulse Laser, ER Large Laser

There were just two 'Mechs armed with the biggest flashlights, and being the last type I didn't even need to think were they lived.


Interestingly this, too, worked better than the electric blue of the PPCs, or maybe I had become this much better in this time.

Group photo n+1


Canopies and sensor lenses

While I was at it, and as I still had some little time left, I thought I could do a silly effect test on the canopies. As the energy weapon lenses with their tiny bright reflection dots seemed to work nicely, I wanted to see how they worked on the red panels. I tried it onto a couple at this point, and if it worked nicely I could do more easily, and if it didn't work, cleaning up would be simple.

It felt like it fit in the overall look of the Dire Wolf.

Summoner would've maybe needed a slightly stronger reflection point. I'd try that later.


Doing this effect on the tiny panes of the Gargoyle was a bit complicated even with a brand new paintbrush. What I got done felt good, especially from an angle that wasn't the one in this photo.

I also painted the couple of nose-mounted sensor suite lenses of the Mad Dog, I painted them red because it felt like a good generic lens, and fit in the theme of the canopies. The canopy reflection points didn't work here at all, they too went to the "//fixme" queue.


Hellbringer's canopy thrived here. Maybe the spot should've been made a bit more to the left, but this worked just nicely from more normal angles of viewing.


All of this was surprisingly fun to do, and I spent quite a lot less time than what I had expected to. The painting took half an hour only, as I didn't stop to wait for the layers to dry. Had I done that, I'd just conveyor belted it so that I'd done each of the base layers first, then the second ones in the same order and so on.