Mastodon

29.1.25

Blood Spirit Alpha - jewelry

A familiar effect

I had done a number of these rounds lately, so maybe it made no sense to re-explain all of the stuff with my energy weapons this time. The canopies required some thinking as I wasn't entirely sure what would work nicely against yellowish and red. Being a limited-skilled internaut, I checked a colour wheel and felt that a green with a hint of blue would be the best option here.

The most observant readers may have already spotted that the hexes got painted with the black primer. This way the supremely annoying smudges weren't there to capture my eyes and attention while doing something completely different.


Lensing and glazing

Like I said, I wasn't going to bore you with the same explanation of the same operation yet again. Who was going to reread it anyway? Below I have the photos of the jeweled, canopied and jump-jetted elements where they were done, as well as a gloss coated final shot.

Mist Lynx

The primary config of the Mist Lynx had no energy weapons, so I only needed to work on the cockpit viewports on it. This canopy was split into five tiny pieces, so perfection was not achieved today. I still managed to get some kind of an shady effect here, so maybe that was also progress of some sort.

I was most concerned about these small Jump Jets on this bouncer, but they worked out pretty nicely!


Kit Fox

Yeah, this viewportset was narrower than Beggar's Canyon, which made it problematic even with my 5/0 paintbrush and my shading attempts. As the first photo showed, the greens overflowed over and under to the Head and Center Torso. Both colours had to be fixed up afterwards.

The tools of violence managed to confuse me totally this time, as you could see from the photo. I just followed my list and as I was doing energy weapons, paid attention to the ERLLas and SPLas rows and failed to doublecheck their locations (Right Arm for both) , while the Left Arm's barrel was an LB 5-X. Somehow I really failed my perception check and didn't recognize the two sticks in the LA as lasers.

These photos showed that I cleaned up the excess greens. The viewport didn't show much unless you really knew what to look for.


A repainting session was coming up, grumble grumble. As a tiny bonus that came with that was that I could ponder if I wanted to add a yellowish lens on the sensor packet above the center pane. If there was space, that could prove to be a fun detail.
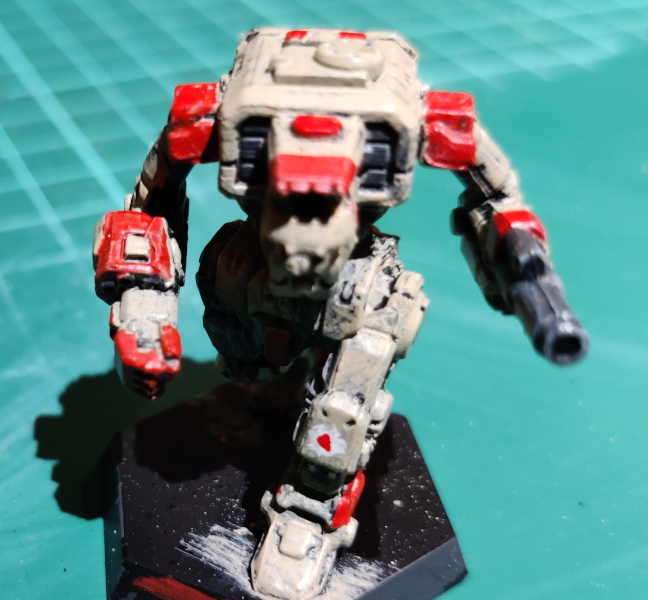
Stormcrow

This prime config was familiar from the previous project: each Arm had a large one paired with a medium, with a third medium beamer on the nose.


Ice Ferret

Just about the most impressive bi ton the Ice Ferret was the Left Arm's ER PPC. The ERSLas housed just above it was somehow a bit funnily shaped, painting it didn't feel smooth. In the end, in the photos, it looked fine, so maybe I was worried for nothing again.


Shadow Cat

These MPLas tubes on the Shadow Cat were really funnily shaped. My only actual issue with them was how fixing any overflow was a bit annoying. To counter that sillines the viewports succeeded rather nicely.


On the rear side the Jump Jet nozzles didn't get as nice an effect as I had managed before. I thought to maybe apply a thin white or whiteish wash into them before declaring the project finished. I even thought of using an oil wash, but that might be a bit overkill for two tiny droplets.

Just using a thinned down white Vallejo paint made them look better:


Gauss rifle's heat distortion effect attempt over dark grey

Roighty. This was the starting point: a pretty nicely worn dark grey barrel for the Gauss Rifle. My hypothesis was that the brown, violet and blue washes were not going to have much of an impact on this canvas. The only way to find out for sure was to try it out, and that'd inform me of what to do with the next Gauss Rifle coming my way - or what not to bother with ever again.


First step. A brown wash (Citadel: Agrax Earthshade) on most of the barrel:

Second step. A violet wash (Citadel: Druchii Violet) on a smaller area:

Third step. A blue wash (Citadel: Drakenhof Nightshade) on the last ~quarter:


After flashing it looked like this. No strong and easily noticeable effect.

In most of the approaches I've read of and seen the painter had highlighted the barrel's tip with something brightly metallic, like steel or chrome, to emphasize the clean-burned part. For a moment I considered that, even though I intended to steer clear of metallics in these. Maybe a cold grey would do the trick?


Kit Fox's unexpected plumbing renovation

On one evening I spent a moment to repaint the Kit Fox's weaponry. My first step was to redo all the openings black to cover up my mistake. The LB 5-X was done that easily.

As you may have guessed, painting the incredibly tiny Small Pulse Laser worried me the most, like you could see the tininess of the surface in the photo. That ER Large wasn't in the same scale as in all the other minis lately (that may have been one of the key cues that threw me off-track). Here in the photo below they both looked pretty fine after all.


Hexagonal edges

That last photo revealed what I had done on all of them, the hex edges got painted while waiting on something else. Now I just had to come up with a surface for them.


Heat distortion effect round 2

Curses, I could not leave the Shadow Cat's Gauss Rifle as it was. One of these WFH mornings I took a couple of minutes between my morning meetings to take a new look at the gun. On the first minibreak I painted a narrow band of Drakenhoff blue to the front part of the barrel.

After the next meeing I added a new band towards the base of the gun, using the Drukhii violet. Then, after the third morning meeting I added a band of Agrax brown.

While brewing coffee with my moka pot in the afternoon I took a quick look at it, and it did show some effect. It was pretty subtle, but that wasn't a bad thing. So now, was it worth to spend this effort on an effect that was visible at some angles and light? Of course it was!


22.1.25

Blood Spirit Alpha - chipping

Hits and scars

This time I thought I'd do some wear and damage onto both colours, unlike the last time. For the first and more superficial chips I mixed simply a white-added paint of both the sandy yellow and red. With the sandy yellow it worked very nicely, but for the red I should've used something else as the pink was not the best.

Using a tiny paintbrush I added chips and scarlike lines or scratches pretty randomly. I wanted to add noticeable wear on each one's feet, but before I got very far with this I realized that it'd easily go way overboard. At least I think I managed to keep myself in check.

For the smaller and deeper chips I mixed a drop of red into the dark grey. So far it had worked well, so I didn't see why change something that worked.

Stormcrow

Of course I managed to miss the bit in the middle of the forehead. Running out of time and a bit funny lighting was my excuse this time.


Shadow Cat


Mist Lynx


Kit Fox


Ice Ferret


None of these were really badly mistreadted. That was more than fine by me, I didn't want to take this effect into the sandblasting levels.

15.1.25

Blood Spirit Alpha - sepia attack

Pin washing

This section was going to be pretty much the same as in the previous ones: I made a thin wash with Abteilung's Sepia to enhance the panel lines and bring the tans and reds together a bit. I started with the Mediums in the back row, where it showed how my wash was a bit thinner there than the portion I applied on the front row's Light Omnis.

After the oil paint had flashed in the sauna overnight, I cleaned up the worst excesses. Then I returned them in the sauna for the thinner to evaporate. Now the key difference between the photo above and the one below was that they were taken under different lights, thanks to the other cat had reserved my usual table corner as her napping place.

After another night-day cycle inside the unheated sauna the minis were ready for the next step. I hadn't quite made up my mind on what that actually was, but my options were pretty much narrowed down to two paths.

Mist Lynx's Galaxy emblem might require a thin line of off-white along the bottom edge of the octagon, the red drop had gone too far low. In the same way the Clan emblem's droplet had too low contrast after drying, even if it stood out more while wet.


I properly liked the way the Shadow Cat's Gauss Rifle looked like now, nicely worn. While writing this I was thinking very hard if I should attempt to do the heat-distortion with the washes or not. The dark grey surface just didn't sound like a fruitful canvas.


Like I said earlier, Ice Ferret's oil wash had had a much subtler effect than most others.

Stormcrow's top torso lines would've benefited from some masking instead of pure freehanding. This was another thing that just didn't come to me while working on it.

My Kit Fox had a nicely worn look on it now, and the LB-5X had a neat aged effect, despite the mold line. This one had a bandlike window that worried me to no end. Maybe something could be saved by highlighting the sensor packet under the cap in the middle of the forehead, something like a yellowish lens that wouldn't get confused with the actual viewport.

8.1.25

Blood Spirit Alpha - detailing

Endo-steel

My default recipe got into use again. I painted all bits that I felt like they were unpainted steel, using dark grey (VMA 71055 Black Grey RLM66). This incomplete list of mine included things like the weapon barrels, all sorts of grilles, vents, nozzles, sensor pods, and various joints. Once again, all this was directed by my guts, I didn't believe in using "Part X always looks like Y" checklists.

Kit Fox


Mist Lynx


Stormcrow


Stormcrow


Shadow Cat


Drybrushing the steely highlights

As my drybrush-highlighter I used cold grey (VGA 72750). To make my process quicker, I wrote down the essential equipment like the weaponry and Jump Jets for each 'Mech on a sticky note. After the drybrushing I painted all of the viewport panels and orifices black.


Stormcrow

Here the reds felt good, as long as I cleaned up the right side's overpaintings. I could also add some steel into the ankles or knees.


Shadow Cat

On this one the biggest question mark was the Gauss Rifle. The previous one I painted on a metallic paint and I had attempted the heat-distortion effect with a number of washes (Citadel's paints, most likely dry in their bad pots after a couple of years) .

The shadow-loving kitty might benefit from a bit more pure metal in its lower legs for added variety.


Mist Lynx

Mist Lynx's right bicep needed metallifying. Also most of its upper torso surfaces needed some sandy touching up.


Ice Ferret

I noticed a pattern emerging: the legs/feet needed more steel on them. The Torso and Arms felt ok. As a funny detail I noticed from these photos was the round piece on the roof hatch. It was just like the vent cover on the turret of a Panther or Königstiger but in a smaller scale.

Kit Fox

I was pretty content with the Kit Fox, maybe it needed a bit of steel in its ankles.


This drybrushing result baffled me slightly. Before I started drybrushing I made sure practically nothing was left on the piece of paper towel when brushing on it. Still the effect was this strong on the mini.

Fixing and roundeling

I painted the Clan and Galaxy roundels badly, as my skillessness directed me. First I painted the octagonal whiteish shape for the Alpha, and a red droplet inside it. For the Clan roundel I painted dark grey circles, which I filled with a slightly orangeish circle, and made a red drop into that one. In this scale, especially on Kit Fox and Mist Lynx that was pretty difficult for someone as bad at drawing as I was.


While I was touching up here and there, I fixed especially the sands and the dark greys wherever my eyes caught something. I also added more dark grey in the legs and especially ankles. I doublechecked each five minis, so maybe nothing was forgotten.


Maybe I should've painted the hex bases at this point, but I simply ran out of time. Not that it made a difference for the end result, I just found the clean grounds much more eye-friendly.