Finally I ended up with three bombs, two of which were the small ones (almost 500kg Mk.83) and would be installed flanking a third, large (about a 1000kg Mk.84) bomb. These bombs were chosen by the look, without caring about who actually used them in real life. To signify their status as practice bombs I painted them blue (VGC 72012 Magical Blue) and glued them on the monstrous pylon.
To maintain the plane's uniform look I painted the pylon in the same dark grey as the rest of the model. Then I also fixed the earlier quick paintjob of the bombs.
Thanks to the random pics I saw online I pondered if I should attempt to paint some white smudges to represent texts. I didn't go for that, as I didn't want to ruin them and not all the photos showed them, anyway. The next afternoon I checked the paintjob for any final fixes and glued the whole setup into the middle thingie of the plane. Afterwards I washed the bombs with Citadel's nuln oil (because stupid names are cool and even then they have to be changed every couple of years) to tone the contrast down a bit. Finally I sealed this last subassembly with the matt varnish.
An extra serving of madness
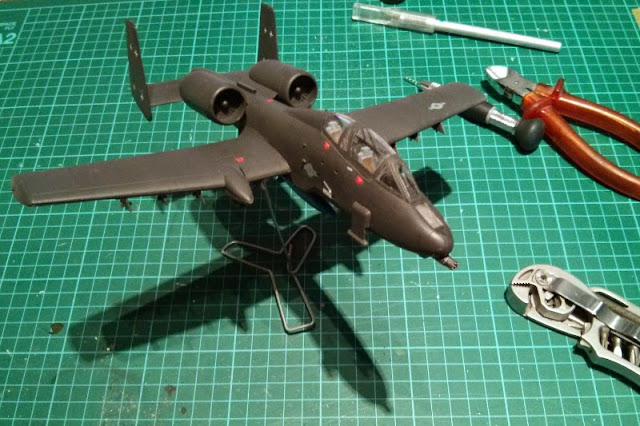
Surprise! Because the model itself looked pretty fun, leaving it lying tiltedly on its belly on some shelf sounded plain wrong. I spent some time thinking of how to set it up so that it'd look nicely dynamic, when I remembered my "Imperial X-Wing" project. For that one I bent a thick metal wire so I got just the pose I had wanted to get.This time just bending the wire to form a claw wouldn't have worked, because the mid section was already occupied by the bombs. So I drilled a hole into that rectangular area just behind the bombs. Then I enlargened the hole a bit with my old xacto knife. I tested the supportability by just inserting one end of the wire in and balancing the plane in a gentle ascending + banking position. It looked just fine.
Then I just bent the wire a bit and first made a small support-angle for the plane itself, as standing on the tip of the wire didn't sound too stable. After that I gave it a decent amount of wire for the height and then started working on the footprint. A BattleTech-inspired "two toes this way and one that way" shape was quickly done and seemed to work.
After a good amount of twisting, bending, trying out and all I painted the thing solid black (VGC 42051 Black). When the paint had cured I applied a matt varnish on it, to avoid scratches. Of course this had to be done in a few steps so that I wouldn't slam the wet freshly varnished pieces stuck on anything.


No comments:
Post a Comment