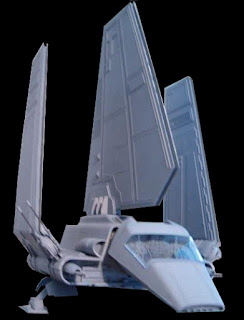
Maybe a part of the blame lies on this being an already built and painted set, just maintaining and "only" repainting it. Or it could be caused by this year being so packed with so much other stuff that things have gotten prioritized a bit unfavourably for 'Mumblings.
The renovation process ate about half a year from my calendar and I spent - this one included- an eye-watering count of 27 postfuls of text. I took 139 work in progress photos and 15 of the finished model. The actual time used I didn't dare count, because the oversimplified 26 * 0,75h = 19,5h was not what I used, for this thing that sounded so very quick, easy and simple when starting.
The final photoset
While taking photos of the smaller models I've often lamented that I didn't have a good setup for taking photos. So far simply setting up some A4s as a flat background and flooring have been a good enough of a hack, but this beautiful spacecraft build by Sienar Fleet Systems was way too large for anything like that anymore. I really should've bought one of those light tents, as I was itching to get one earlier this year.Well, no sense crying over spilt milk. I went for the just about only neutral background I could find in the house and set up the shuttle for posing. The light environment was woeful to compensate the flatness of the background, of course. All I could do was to hope that the reader forgives me my weirdly, unevenly and frantically set up backup lightning, as I didn't want to ruin my photos by using the flash at such extreme short distances, either. Afterwards I just gimped out some smudges and unnecessary seams from the background, before cropping the remains.
git diff shu_ondiv
I felt that it would be a good idea to show a side-by-side comparison of the versions 1.0 and 1.1. Of course both of them had a different background style, the photos had been taken with cameras of vastly different quality, from who knew what angles and as the icing on the cake the pics had been edited in different ways. Ondiv's original first version also wasn't properly documented and there were few photos of her, even fewer of those were even tolerable. So the comparison was going to be pretty much feeling-based.| #001 | ||
 |
 |
|
| v 1.0 | v 1.1 | |
| #002 | |
 |
 |
| v 1.0 | v 1.1 |
| #003 | |
 |
 |
| v 1.0 | v 1.1 |
| #004 | |
 |
 |
| v 1.0 | v 1.1 |
Honestly, I felt that the new version looked better than the previous one. I also thought that had I started from scratch instead of working iteratively I'd gotten a much, much better final product and I was not only referring to the jaunty angle caused by the misaligned landing gear.
So I've apparently learned and developed my skills somehow over the years. Judging that was left for the viewer, I was content to lock myself inside my own bubble.


No comments:
Post a Comment