A coat of satin
For convenience I spread out my varnishing operation (Vallejo Satin Varnish) in three parts to make the handling of the model that much easier. I started with the cockpit module, the main wing and the bulkier part of the upper airframe. On the second round I worked on the rotating wings and the front and back parts of the hull. The last round saw me working on the hatches and the remaining of the frame itself.
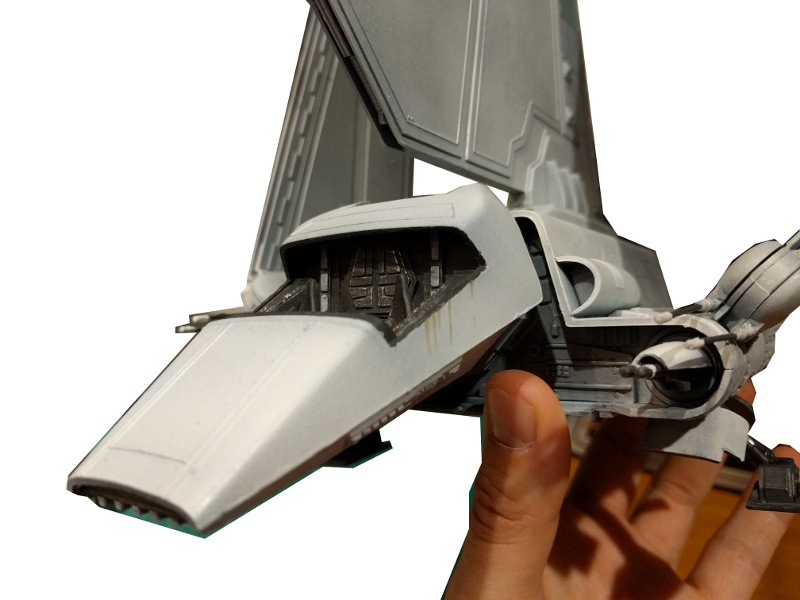
My intention with this semiglossy layer was to give a bit of a metallic shine to my shuttle. A glossy one would have, as is known, made it look all wet and that would've been fitting if I had wanted to make a heavily rain-weathered and also a based model. This effect wasn't too well noticeable in the photos, the shimmer was so subtle.
Thrusters: [offline]
Last week I had been thinking of the engines and how they should behave. I decided to make them look like they were shut down, cold - diverging from just about all the Lambda-class shuttles I have ever seen anywhere, physical or renders.For the base of the engine thruster ports I applied the same dark grey so familiar from everywhere else on this shuttle. Over that I drybrushed somewhat harshly and with a randomish pattern some rubbery black (VMA 71315 Tyre Black)


For the top layer I went with a very obscure pattern of flat black. I expected the effect to work, with the black having a couple of other dark strangely patterned layers. At least I hoped a viewer wouldn't see the thrusters either too flat or too bumpy.

Wrapping up
While working with the black I applied tiny dots for each of the laser cannons. From the darker front/rear hull pieces and the bottom I chose some cables, pipes or panels that I wanted to highlight with red (VGC 72011 Gory Red) and black (Tyre Black), for variety.


No comments:
Post a Comment