The last assemblies
In this happy stage of the build process I just had the turret and the tracks left, of these the turret was more interesting a subject. Anyone who's ever built tanks might agree with me and if they didn't, then they disagreed. For each their own.
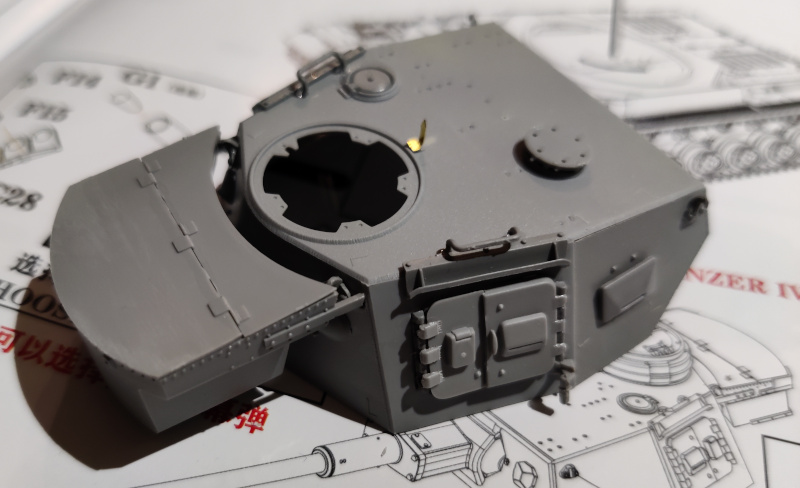
Turret f2
Working on the turret's f2 version started with the front edges getting the hatch-holed armour plates. In the ausf G these would've been solid instead.


The raised edges were also to be sanded or filed away as well. I took off the bulk of them with the xacto blade and then sanded the remains down. My result was most likely imperfect but better than if left untouched.
When my other gluings had cured I attached the hatches (closed) onto the turret, I didn't think it made much sense to leave them open if you could only see vast emptiness and a part of the cannon's loading end. There was a silly amount of additional details, in the end I managed to break off only the little photoetch arrowhead, which I presumed to be the "this way forward" sign for the commander to get a bit more of a sense of the tank's alignment when peering out from their periscopes.


While working on the surprisingly flimsy side hatches, I also built the basket that was destined to be installed behind the turret.


75mm KampfwagenKanone 40 L/43
This was where the lottery in the world of choices did: the nice metal barrel was meant for the even larger G-model's L/48 cannon and I couldn't use that in the f2 in good conscience. I'd keep it for later, so the loss was measurable in time only.

Assembling the cannon was pretty straightforward business, even if a bit flimsy in a couple of stages. The tiny bars of the rear part were about to give me (more) grey hairs but in the end it worked out and nothing was going to be seen anyway, so why was I worried in the first place?


All this was to be attached together and sturdily.

Fun detail: the tiny corner hatches could've also been made openable if the assembler hadn't broken one of the two hinges while detaching it from the sprue. The assembler might have been pretty excited about these opportunities, had the tank had something inside to show.


Amazingly the construct was still movable, the cannon's elevation was still changeable. That was great, even if there was no real need to play with it in the end.
Cannon into the turret
The cannon fit into its slot in the turret pretty nicely. The most challenging moment came when all the three connecting surfaces were to get aligned in place at the same time: the turret's shell, the cannon with its shield, and the relatively small-footprinted turret's inner floor / ring part.


Commander's cupola
The final subassembly was the commander's cupola with a cool collection of periscopes. According to the instructions there were two types of periscopes to choose from: open and closed ones. Were these another all or none -options or could they be played with individually? I dangerously assumed that the commander could do what they felt like in the real thing, but for my empty tank I chose to be totally buttoned up with closed 'scopes. Still, I really appreciated the option I had never encountered before.


This cupola didn't have a rail for the MG, nor the MG itself, but I wasn't missing one either.


Being a worrier, I was gently worried about the turret fitting into the hull, and if the turret survived the pressing-turning operation. As usual, I was worried for no reason.

Dry fitting, cont.
As I did so often, the tank's bits had to be dry-fitted and admired from different angles. For the fun of it I piled on the tank some of the extra stuff, like the jerry cans, just to see how it looked.


It looked fine, to me at least. The tracks and a handful of paint layers were left anymore. So almost done, right?
No comments:
Post a Comment