Painting at last
Now we got to a more fun part in this operation. The assembly had been, thanks to the photoetch stuff, a bit frustrating so priming was a mood lifting moment. Painting the details was even more fun.
Green green rockets
My first idea was to use blu-tack to stick everything for painting, but I had thrown mine out as it had dried completely. It was about 23 years old, so it wasn't a huge surprise. Instead I used a few old pegs and brushed the rockets green (VMA 71022 Light Green).

When the warheads were dry, I painted the remaining parts. I painted the rocket engine nozzles dark grey just to get them a bit different. Before installing these into their crates I had to gloss varnish them, apply decals, and matt varnish them to seal the show. I still hadn't invested into the decal solutions, so I was using just water and very limited patience.
Rocket crates
This solution cannot have surprised anyone: I started the painting of the crates with dark grey (VMA 71055 Black Grey RLM66) a piece at a time. Some of them I had to touch up a few times, some of the more difficult crevices didn't want to accept paint that easily, and I didn't notice that from more than a few limited angles. For example, this photo here showed a bit of plain metal in the rightmost crate's left bottom edge.

In between all the other pieces I patched my rocket crates first with black where I saw plain or almost plain metal. The frame edges I painted with the dark grey, not aiming for perfection but decent looks, piece by piece. I still had a few steps of that work to go, especially if I wanted to get dents or scratches on my boxes. With the assembly results not many extra dents were even needed anymore.
Posture test fit
Trying out a random crate, this one was a bit difficult to align with the hands of the guys. Or maybe their hands were poorly aligned when I built the humanoids. Right now I just wanted to see how this looked in general.


Preparing the wood painting
Over the black primer I airbrushed some off-white (VMA 71119 White Grey) to get as simple starting point as possible. The wood had been difficult in the past, so I was worried of this prominent detail. A white basecoat was what the video clip I linked to the last time was suggesting so I wanted to give it a go.

Personell process
While playing with the airbrush and white paint I also prepared my five plastic nazis. I aimed downwards from high angles, my goal being strongish light/shadow effects as a base, on which I could just apply thin layers of colours. Or then I'd use contrast paints that I didn't own at this point, so maybe not that.
Once again I was dry-fitting to see how mimicking the box art felt like:

Decals
There were only four decals in this whole set. I prepared my suffering with a layer of Vallejo's Gloss Varnish on the rockets. This was done like the painting, in two stages, to ensure full and messless coverage.

When the varnish had flashed, I sliced off the two decals of each of the rocket types, which left me with a backup copy of each. Just in case I cocked this up somehow. For a change I didn't feel bad about the decal application process, as they set in place pretty nicely.

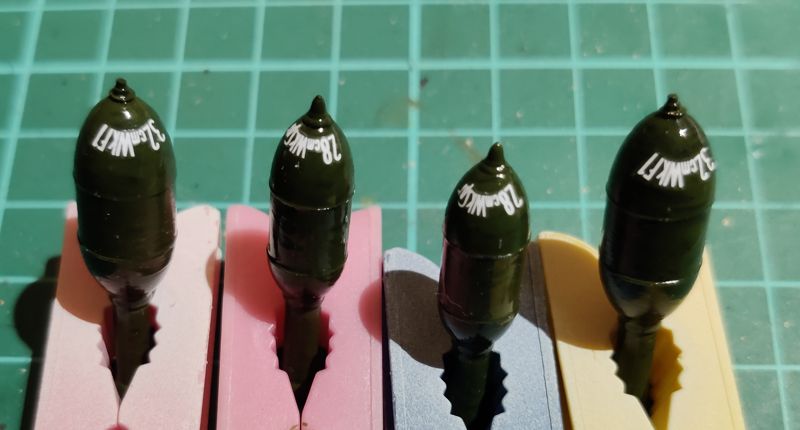
With the decals dry I dullcoated them in two stages. This time I used AK Interactive's Super Matt varnish.

Extremely funnily three of the rockets fit inside their Packkiste crates, one of them didn't. Or to be more exact, that one Packkiste couldn't accept a rocket. This one rocket was going to be the one that was being tweaked by the launcher.

I might have been a tiny bit agitated, had more than one of the rockets been left out of their crates. The rockets looked decent already, but the crates needed more care and weathering. Maybe I was going to come up with something silly for the rockets as well.
No comments:
Post a Comment