Mastodon

8.3.23

Jagdpanzering 8

Eighth session

When I got back to the model, I ended up taking care of the rear deck's assortment of engineering tools and the other equipment. One of the backup spare roadwheel holders (on the leftmost hatch, right next to the jack) snapped while I was removing it from the sprue. Despite its flimsiness I managed to fix it.

The deck contained tools that have become very familiar with other German tanks, such as those wire cutters, shovel, axe, the aforementioned jack, crank and also the barrel cleaning rod in sections on the rear wall of the casemate.

The 75mm PaK 39 had to be shortened a bit from the tip, according to the instructions. I didn't install the muzzle brake, also because my friend Tape had already liberated it from the kit to his own projects before he sold the set to me. That didn't affect my project, especially as the component wasn't required. I cleaned the seams a bit after gluing the halves together, especially the partially painted bits revealed some ugly lines.

As an interesting thematic leap the build path went to the fenders that were glued to the bottom of the casemate itself. There were ample opportunities to get corkscrewy results, but I seemed to have avoided them nicely.

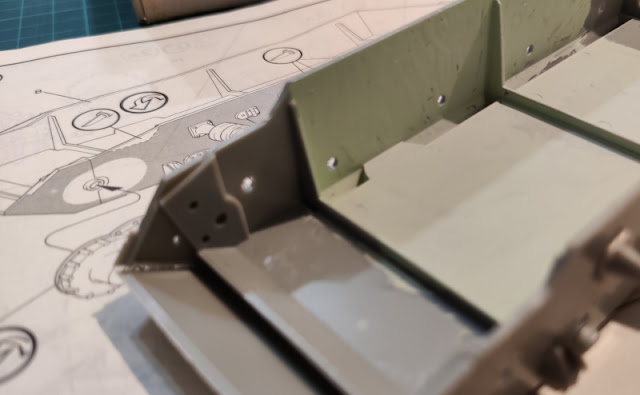
Armoured plates were installed to shield the side grilles. At this point the drawings were abysmal and the pieces themselves had no clear "install here, this way" bits, slots or holes. I went eyeballing which has traditionally been a recipe for a disaster or two.

 Another to the opposite side. No, it didn't look right at all.

I proceeded by gluing the fenders to the rear end of the tank as well. During the process I fortified the connections a couple of times, in case my pretty old jar of glue was getting a bit less than reliable due to impurities. There were some signs of it, but so far extra gluing had been enough to fix any issues.

1.3.23

Jagdpanzering 7

Seventh session

Most of this session's time went into the rear deck's setup. First I installed the engine deck's side grilles. I was a bit concerned about their position being good, but in vain.

While the grilles were setting I glued on the headlight. I didn't check yet if I needed to pull an extra length of electric cable or was it good enough for a modeler like myself.

After that I returned to the rear deck to glue in the various handles and such.

The second hatch of the engine deck slipped in effortlessly. In addition I glued onto the deck that massive double-ended megawrench (or spanner, however you prefer) and the Zughaken or C-hooks (tow hooks, thanks Adam Mann for what I learned today).

That flimsy-looking and -feeling bar in the rear scared me a bit, but maybe, just maybe it wasn't going to get hit much and snap while installing something else. One could hope.


22.2.23

Jagdpanzering 6

Sixth session

Propelled by the good feeling from the earlier test I kept poking the armour plate joints. I still left these without the glue-softening, as I thought I'd first treat them all mechanically first and play with the chemicals in the end.


With the previous session's bits well cured I glued the roof plate into the casemate itself. It fit in very nicely.

Next up was the front armour plate of the casemate. No problems there, either, which was a bit unexpected. Some engineering tools needed new holes drilled in, their places were pretty nicely marked onto the other side.

Between all the other little things I finished up by gluing the prybar-like thing and the fire extinguisher onto the right front fender.

15.2.23

Trying out something very new to me

So this is what happened

For many years now I've been thinking, not very seriously, for something that had just gotten stronger in the last months. For example, Adam Savage's tested.com channel in Youtube has occasionally had videos where he has done weathering with oil paints (among other products). At some point last summer I joined the #miniature-painting channel in the company Slack, where some colleagues have been showing off some oil paint weathering/blending stuff on their WH40K items. Other skillful modelers with their videos haven't been too harmful (or helpful, depending on your point of view) with this theme.

I noticed that I had been talking out loud about this, caught myself looking at the oil paint tubes at a local bookstore half-seriously, or checking for people's comments in a Finnish modeling site about different brands, and finally I found myself ddg'ing for some local stores (physical and online) and their Abteilung 502 offering. I really, really would've loved to go to a store near my office, or ordered something from a local-ish store. But. But the useful-looking colour sets were either out of stock, or had an offensively long waiting time, or didn't exist in their catalogues at all. So I had to look further away. Funnily enough the offering of (the German) Amazon was quite limited, they of course listed a huge variety even if they had none to actually sell.

Cojones, I thought, and ordered them from the makers themselves, AK Interactive located in Northern Spain. My shopping cart ended up containing some Odourless Thinner (ABT111), a Mapping Technique Lights and Shadows set (ABT303, containing ABT002 Sepia; ABT035 Buff; ABT050 Olive Green; ABT092 Ocher; ABT155 Light Sand; ABT170 Light Grey), a Vehicle Weathering and Effects set (ABT302, containing ABT001 Snow White; ABT080 Brown Wash; ABT093 Earth; ABT125 Light Mud; ABT130 Dark Mud; ABT160 Engine Grease), and two rust colours (). To go with them I also ordered three new synthetic paintbrushes, I also wanted a metallic palette but those they didn't want to sell at that point.

The palette I found from Hobby Point's web catalogue, though they didn't have any of the smaller ones (with fewer of sub-bowls or whatever those were called) I preferred when I asked, so I left my contact info and set to wait for a later delivery. The same evening I got an sms telling they had found one last larger palette and put it aside for me. That was nice.

I ordered the paints on a Friday two weeks ago. The palette (and an 8B graphite pencil) I fetched yesterday, and in the early evening the courier brought the packet to our door (they knocked at the door while we were eating dinner, I got up and to the door immediately and the dude was already marching away, having gotten about ten meters away). At least he turned around to bring the box instead of sending the traditional "we tried to deliver but you weren't home" message.

So yeah, that's what was going on this time. I wasn't expecting my first attempt (the currently WIP Jagdpanzer IV Ausf f) anything mindblowing but just some first steps in learning something new.

Why did I order this amount of paint just to try a method out? Well, I thought that if I was going to try this I would try it properly and just one single colour wouldn't give me enough data. I could've gone even more overboard with paints but I thought this'd be a good start, and that these paints would last me a good long while.

8.2.23

Contact point problems

Cotent warning: wounded fingers

My atopic-psoriatic fingers haven't quite enjoyed the early winter's temperatures and all the snowwork that has been required. This wasn't anything new, I've suffered cracked fingers over years now, now I just happened to have a couple of fingertips bleeding from both hands at the same time for a while (up to weeks), or otherwise in some inconvenient and uncomfortable state. If just tapping the keyboard for work and fun was sometimes so painful that I had to skip using my index fingers for example, doing some scale modeling wasn't really any more enjoyable.

This has been the main reason for my Jagdpanzer's progress being somewhat slower than what I had intended. Over the years you may have seen glimpses of my digits in better or worse condition, depending on the time of the year. Just to document it for my own later checking I took a photo a couple of days ago when they were pretty bothersome again.

Anyway, as I don't really use blogspot.com to check the 'Mumblings but check the output in an RSS reader, I didn't have a clue how the jump break I added before the photo. If my foul memory served, in the feed those things cut the post content there and add a "do you want to know more?" link. There was only one way to find out and that wasn't going to include reading documentation.


1.2.23

Jagdpanzering 5

Fifth session

Dry-fitting the wheelery

This is how far we got before the first dry-fit photo was shared. And this was just a quick check to see if the wheel and sprocket collection stayed in place and half-aligned to begin with.

Casemate roof

The casemate's roof got a couple of larger hatches. I decided to glue them shut because the insides of the vehicle were just empty. Again, I was also pretty baffled by the previous owner's paint marks.


25.1.23

Jagdpanzering 4

Fourth session

Jumping just a bit around the build path moved to the return rollers. I had to admit, that I had to recheck how they were called, these pieces had not been common in my projects so far.

Luckily there were only four sets of these flimsy bits on each side of the tanks. Had there been many more, I surely would've broken some of them by accident...

I was a bit surprised as the instructions now told me to cruelly slice off some bits of the front left/right edges of the Panzerwanne. Of course I did as instructed. The cutting lines were pretty clear, so I didn't have to guess or do this blindly.


18.1.23

Jagdpanzering 3

Third session

Now that I found one of my pin vices I could proceed with the rear armour plate. Or punching holes through it, as the remaining pieces for this stage required locating holes for their pins.

Rather excitingly 66,666...% of the freshly drilled holes were left to wait for a bright future. As long as the instructions were up to date, I was expecting zero problems with these.

An effect test, again 

Next I cleaned up the lower glacis plate for installation. Based on the recommendations of a couple of colleagues, I had listened to some episodes of Uncle Night Shift in 'tube and while that guy was taking his processes to a few levels further, some of his ideas sounded plausible for me to try even if I wasn't going to try all of his ideas. One neat little thing I saw in one of the first clips I saw: making/improving the flame cut markings in the armour plate edges in the jigsaw-puzzle -like joints using a hobby knife (and then toning it down a bit with a quick and simple dash of liquid cement).

Just to be kind of safe, I started with one section only. The result looked neat, and it didn't take much time at all. At this point I didn't play with the liquid cement and postponed it to a later timeslot.


At least based on this test on the lower glacis plate the results were nice-looking and a pretty hassle-free thing to do. How that affected the full model itself remained to be seen.

Lower hull work

Now I  glued the front- and rear armour plates into the bottom hull. A good amount of the suspension setup got also installed, the road wheel spring housings were still waiting for their turns.

What in the Empire had been done next to this model, as the bottom of the model was that splashed?


11.1.23

Jagdpanzering 2

Second session

With the larger wheels out of the way for the moment, I got directed to the assembly of these thingamabobs that held the idler wheels. In the photo below the first one was done, while the second one was in its component form. Yeah, the lightning setup was awful, my apologies.


In addition to the bits above I glued a few key pieces into the rear armour plate. The required holes were left undrilled, because I hadn't set my pin vise as a key tool, and I spent the rest of my hobby time searching for one of them.


4.1.23

Jagdpanzering 1

The first session

This gently short first building session was short, because I had started by documenting the project init details. For this model the first steps were assembling the Panzer IV's road wheels and its friends. Detaching and cleaning them all was, as everyone who's ever done this probably agrees with, pretty tedious.

Rinse and repeat, rinse and repeat.