Mastodon

10.5.23

Jagdpanzering 19

Nineteenth session

Before I started painting the Balkenkreuz to my model, I spent a good moment searching for a nice simple list of which units actually had had Jagdpanzer IVs to begin with. Just to avoid making a completely ridiculous choice of using a unit that had never been assigned a tracked vehicle ("Hey, those crossed potato mashers could be fun, who're they?" -> "Oh crap, I am not doing a Dirlewanger vehicle, yuck!"), or something like that.

I was cross-referencing Wikipedia and Tanks-Encyclopedia about the usage of these vehicles, then I looked a the stencils I had, and the names of the divisions. From a couple of options I chose one semirandomly. My choice ended up being the 9th SSPzDiv Hohenstaufen, that also had in their organization a convenient unit, the 9th SS Tank Destroyer Batallion (I didn't think I had a stencil for subunits but I had to dobulecheck that later) that could give a home to my tank.

Why an SS unit? Their stencils were the easiest to find and recognize from my set.

There was a silly little challenge that I encountered with the Balkenkreuz stencils: I only had one of each size and type, and these tin cans usually had many of the same cross on them, I just couldn't take a production line approach, or I didn't dare to on my second attempt with them. So I did the full left one first, and a divisional marking to the left front corner.

As my white I used the fitting Insignia White (VMA 71279 Insignia White).


The whites of the Balkenkreuz looked good, the division mark was otherwise good but I had failed with the masking tape and there had been a tiny gap between the stencil and the tap, and there was a cursor-like line highly visible. Blast.


I aimed the black stencil onto place and taped it on.


And crap. I hadn't pressed my stencil tightly enough onto the model's surface and the black paint had flown over uglily. Fixing that at this point would be lots of fun™️. And I had managed to mismask and there was a similar ugly white line below the cross. Sigh.

Without letting that drag me down I repeated the stenciling-painting process on the right side of the tank.


And that worked out perfectly. Luckily something went the way I meant it to.

Speaking of that, what exactly was the problem with the left side of this model, as all the problems gathered there? I decided to take a break and repaint the failures again some other day. Now I was way too annoyed, and that, as I had learned, wasn't the mood for fixes.


A fixing round

After a couple of nights of sleep I returned to the paints. First of all I masked out the fixables. By the divisional marking I wanted to delete the white line, but obviously to protect the marking itself. On the left side I left a larger area open, so I could pretend I was keeping the camo pattern safe.

I started my fixing by airbrushing Dunkelgelb as multiple thin layers, blasting air only between each paint layer, until the ruined Balkenkreuz was hidden. Then I redid the green and brownish parts, and also repainted the front glacis plate's paintjob.


Redoing the left Balkenkreuz

I had misaligned my Balkenkreuzen vertically, the right one was noticably lower than the left one. Now that I was painting it anew, I also fixed my targeting somewhat. The painting order was obviously the same as before, now I just was much, much more paranoid with my masking tape application. Again I blew some air to help with the paint curing, unlike my more usual approach that has relied more on time itself.

Again the white edges worked perfectly, like in a book. Or should I talk about [video]tutorials these days instead? I was paranoid, like I said, with the black part and its masking tapes.


Funny thing, I didn't even think of being worried while detaching the masking tapes and the stencil(s). Somehow I was confident in my ability to do things correctly this time. And yes, this went really nicely this time. The camo pattern also behaved well enough.


I also painted quickly the now missing dots by hand, and added them around the vehicle now that I had a nicely tight-tipped brush in my hands.


3.5.23

Another work queue update

A surprise souvenir

To protect the innocent I've left out some details from this description 😅

A few weeks ago a colleague of mine encountered a model that caught their attention, and thought that I'd been pretty excited and talkative about tank models. Confusingly they brought a model kit and a matching set of paints as a souvenir.

I've always found the various mine-clearing addons on tanks pretty unusual-looking, so I was pretty curious to see how this one would turn out. Funny thing: I noticed that I had started thinking of how to paint and weather the mine rollers the best way, while looking at the box art.

First I needed to get the Jagdpanzer IV finished first, then do something quick for variety, before taking on this Soviet tank. I was told that these Zvezda paints were also water-soluble, so I could airbrush them on the model.

26.4.23

Jagdpanzering 18 A and B

Eighteenth session in two acts

After finishing the camo pattern I stopped to ponder what I'd do next. In my mind I had two main paths: a) trying out the oil paints, and b) preparing the metal bits.

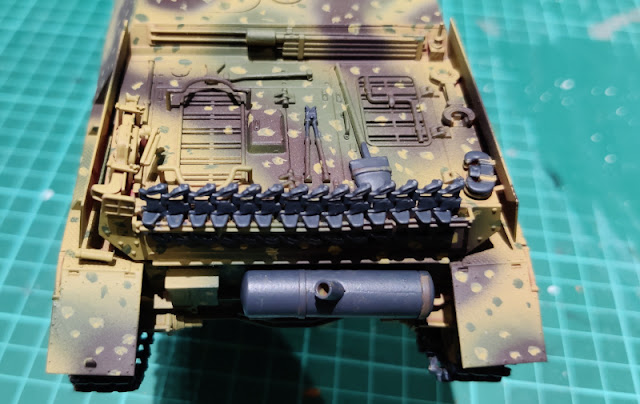
I felt that if I prepared the base of the metallic parts at this point, I'd have a better playground for the oil paints later on. In other words, I trusted my eyes so little, especially on the junk-filled rear deck, that the weathering would become much easier if the engineering tools and such were actually distuinguishable from the rest of the tank.

An easy choice, then, and with that we proceeded in the flowchart to the line b from the decision salmiac. I used the same dark grey (VMA 71052 German Grey) on all the metallic bits and pieces, I didn't start masking and airbrushing even the tracks but did those with one of my smallest brushes. And now, painting the shovel, I encountered a problem caused by the age and kilometerage of said brush: the tip of the brush wasn't a singular point anymore but looked more like a saluting Spock. Most of the metal parts were doable with it still, just the tightest spots like the edges of the tools were difficult without making a mess. So, for a second time in this project I stopped working when I noticed that things were just not proceeding the way they needed to.


Sequel

There wasn't much that was missing. I had ordered those three new paintbrushes (different sizes, but each small) for accurate work, as my all pre-existing brushes had already seen years of use and you could tell. I painted the remaining parts with a fresh, fine-tipped brush. While painting these I noticed a couple of bits that I had managed to miss earlier: the crank on the righthand hatch, and the long crowbar on the left side, halfway under the jack. This did verify in my mind that I had chosen the correct branch in my process.

At this point I wasn't going to poke the wooden handles or the paper-wrapped wire cutter handles, but I had an idea for them and they could wait for a moment. The barrel cleaner rods were also wooden, with brass connectors, but the block in the end was a bit of a mystery: was that a funnily modeled brush, or a its protector that could remain camouflaged?

I also added some dark grey scratches on the jack, it was not supposed to be a long-abused bit with its Dunkelgelb basecoat a distant memory. At this point this looked functional to me.

Periscopes

This vehicle was supposed to have four periscopes: three of the traditional, fixed place blocky replaceable prisms and then one round and unprotected one in the sliding plate. Interestingly I didn't find enough prisms from the sprues while building, so one was missing completely.

Each got painted with the same German Grey as all the other metallic parts so far. Then I mixed in some flat black to the paint, and painted the glass parts to be a hint darker than the frame. I also used this same darker dark grey to paint the unlit convoy light in the rear left corner.

After that I added some lighter grey (VGA 72749 Stonewall Grey) to my mix, and painted a tiny sliver to the bottom of the glass to depict a periscope reflection. It was a pretty subtle effect, but maybe it worked.

I guess I could've left all this for later, in fear of making a mess later on, but I did it now because I had the paints at hand. Now I needed to remember to use a bit of a gloss varnish on the periscope glasses and the convoy light. With this progress it might be weeks later in the calendar.


The same evening I painted these, when going to sleep, I was thinking if I should do the emblems next, before even thinking of any weathering. Maybe that was the thing to do, so that the markings, whatever I ended up choosing in addition to the Balkenkreuz, wouldn't stand out from the rest of the model like my balding head in a wig store.

19.4.23

Jagdpanzering 17

Seventeenth session

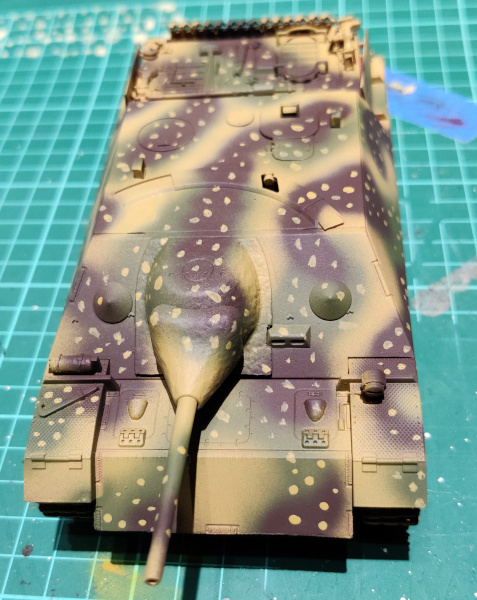
Dots after dots after dots. For some reason I have always skipped that part of the Hinterhalt-Tarnung, maybe because I subconciously expected it to look ridiculous being done by me. But almost everything had to be tried out at least once, so the Jagdpanzer IV project got to be a test platform for a bunch of new methods.

The whole idea behind these dots was to look like sunbeams filtered through the forest's canopy. Somehow that sounded pretty cosmic, but on the other hand it also sounded like a pretty neat idea.

On the Dunkelgelb surfaces I was supposed to add either green or red-brown dots, and dark yellow dots on the green and red-brown surfaces. Some people have cycled each of the colours but I thought it was going to be enough to try out with just two. In my mind the red-brown might be a bit too strong, so I decided to go with green dots as my second colour. Also, I had been thinking while airbrushing the camo, that I should've had more green and less red-brown.

Dunkelgelb dots

Being cautious I started applying the dots from the lower front glacis plates and then proceeded upwards, via the rool to the engine deck and the rear plate. The side walls I dotted last.


Some areas, worst being the bit below the track armour in the back wall, suffered a bit from my random dots being less than random in application. They also somehow were a bit too similar in shape and size. Or that's how it felt like to me, and I tried to poke anything that caught my attention. In general this looked pretty decent already.

Green dots

After I was done with the green and brown areas, I changed to the green paint and added dots to the remaining Dunkelgelb surfaces. Again, some individual places disagreed with my eyes, having too much regularity in them to my liking.


All in all this vehicle looked pretty good to me, I was properly baffled by it. Or to be more exact, I was surprised by how content I was with this

12.4.23

Jagdpanzering 16

Sixteenth session

Like I said the last time, I was figuratively at a crossroads. Instead of dashing into something I did spent some time checking different German camo patterns. There was a specific, quite dramatic-looking, pattern that I had been itching at implementing myself for a good long while, but I didn't want to use it on this specific unit. In the end I decided to implement a pretty traditional freehand three-tone camo, but for the first time I'd also do the little dots often seen in the ambush camo.

Hinterhalt-Tarnung

Green

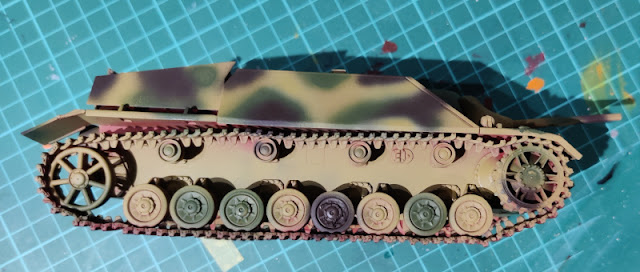
I started the painting by thinning down my green paint (VMA 71019 Grün RAL6007) somewhat so that it wouldn't clog my airbrush after sitting in its bottle for over a year. The first green splotches that defined the rest of the pattern I sprayed over the left side wall of the casemate, and let the rest just flow. In these first two photos the frontal green areas were maybe the weakest-looking of all.

The sides of the Panzerwanne were left in basecoat because it was all behind the running gear, shadowed and also covered by dirt, making the camo pattern there pretty pointless. And as far as I could tell that's what ze Germans also did back in the day. I just chose a couple of randomish road wheels to be painted green, and applied some green shapes to the idler wheel and the drive sprocket.

Yeah, I based some of my choices on my memory. That was the "danger" breakpoint n+1 in this (or any) project.


My gently thinned paint dried wonderfully quickly, it was so nice to paint as I could just spin the model in my hands without too much worrying.

Red-brown

While the greens were drying I cleaned up my airbrush and thinned some red-brown (VMA 71031 Rotbraun RAL8017) in the same manner as before, but in a smaller quantity. I went around the model and searched for parts where the brown areas could come to break up the shapes even more. Again, in hindsight, I could've used less brown and left more space for the green.

Finally I did the same semirandomizing with the road wheels and added a touch of brown to the idler wheel and the drive sprocket. Just like with the green layer earlier.

Some of the dunkelgelb bits had gotten a bit too constricted for my liking, so I touched them up before packing my tools away for the evening.


That ended up looking like a pretty typical Project Mumblings camo. While painting I was thinking if I had indeed formed some kind of a set of stereotypical shape-breaking tricks that I have repeated way too often. Especially looking at the mudflaps in the rear that feeling got pretty strong.