A metallic weathering session
I guess I had complained clearly enough that the metallic pieces could not stay steel-coloured. They wouldn't have been any better in aluminium, like the instructions suggested, if you asked me. Luckily I hadn't been silly and painted them all with chrome, that'd looked even stranger.
The first photo of the series showed a number of scratches on the rear end of the carriage. Those came from dry-fitting the lifting fork earlier. The piece went on nicely, but getting it out almost required some loud swearing.
Oily Steel
My weathering process started with a heavy-handed drybrushing of oily steel (VMC 70865 Oily Steel). The steel basecoat was so slippery that this paint didn't really stick on with a gentle touch, so I had to take this more seriously than I originally intended. Especially the loader's slide for the grenades was going to need some more work later on.
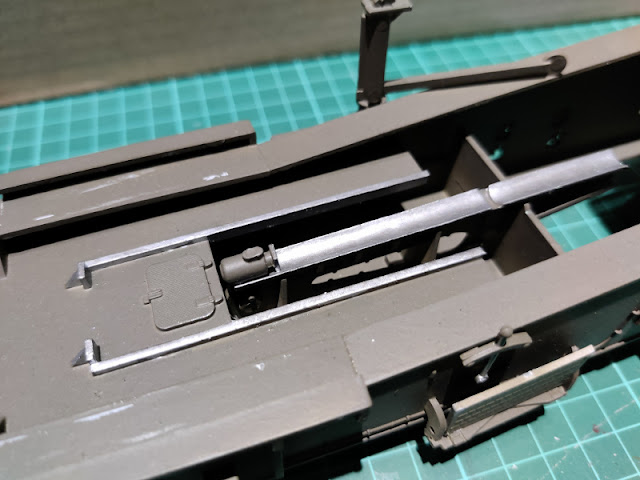
The cannon's barrel's middle segment looked somewhat better after it got oiled, even though the effect was still a bit light for my liking. This was a good direction.
The lids of these who knows what hydraulic liquid containers and the strange rails also ended up looking somewhat more normal after a bit of oilying, but still the problem was that the change was quite small. Still, the worst edge of the bling had been dulled, but it clearly needed to be toned down even further.
Gunmetal Grey
As the steely engine covering plates of the Flanker had gotten much more better-looking with Gunmetal, I took that paint out next. The rear-carriage's metallics got nicely darker again, but still I was thinking if a brown or black wash would be needed in the end.
The barrel's look definitely improved now, its surface wasn't an even, steely-shiny fresh piece of metallic plumbing, but a bit more worn and something that had seen some life; repeatedly greased up, cleaned up, then regreased for storing, and cleaned up again for a firing that was never going to happen. Again, a really good direction for this part of the cannon.
Guessing that the same cycle of being treated with the same products was what happened to these front-carriage's bits. Mere gunmetaling didn't bring enough "lived in" feeling to this area, in my opinion. Especially the snowman-shaped lidset was practically crying for some disgusting weathering liquids on it (perhaps the VWE series' oil stains and such would be at home here).
Of course before any sort of washes and weathering effects I'd need to fix a couple of pieces, blast a couple of shades of brown to filter the whole construct to look a bit more like it had been in the deserts of Nevada for the Operation Upshot-Knothole.


No comments:
Post a Comment