Mastodon

13.2.19

Withstanding the weather of Tunisia

The final details

I had decided that this plane wasn't going to get heavily dirtified, weathered or modulated. The sun-toasted decals (see last week's post) were enough in my opinion. The only clearly visible change I did anymore was that I painted the anti-slipping surfaces on both sides of the cockpit dark grey (Vallejo's RLM 66).

The always as happy-lookingly grinning engine's cooler grille I just dabbed with some black on top of what had already ended up there. I also drybrushed the exhaust pipe ends with a direct but gentle exhaust gas flow towards the back, both on top and bottom of the wings, and somewhat along the airframe itself. Maybe pitch black wasn't the best choice for the most critical eyes but again, it was more than good enough for me in this project. The exhaust stains weren't, as I had wanted, incredibly strong and heavy.

Why did I add the no-slip parts so clearly, then? I hadn't really thought of it much, they just brought some more details to otherwise so simple a paintjob. During the same heartbeat I also decided not to apply a wash of any sort.


Oops, I almost forgot!

Oh right, while brushing on Vallejo's matt varnish (70520) to cover my back I realized that the damn thing had some forward-facing machine guns as well! Instead of black or almost black I quickly painted the tiny nubs metallic (VMC 70863 Gunmetal Grey) and to the tiny tips I dabbed a speck of black as the open mouths of the barrels. I also drybrushed the radio operator's MG with the metallic paint while I was at it, to simulate some wear and tear.


Oh, the difference on the character of the sandy colour with a different lampset! The last photo also showed nicely (unlike on the phone's screen) that the main bomb indeed had the yellow stripes. So I had that provably documented after all.

6.2.19

Varnished decals

Fighting the silvering

Being the lazy pig I am I applied the glossy varnish (interestingly Humbrol's bottle says Matt Cote, but it has always been very glossy to me, but after a new search I found out I just didn't know how to use it properly) only where I was going to insert a decal and nowhere else. Yes, I was going to apply decals despite my neverending complaints about them.

So: I varnished mostly corresponding areas of the bottom and top surfaces of the wings. Then I varnished the rear airframe from the back of the canopy up to the tail wing. Finally, just in case I was going to use that bit that made me think it was the unit's individual funny thing. While writing this subsection the fact was that P("any extra decals") = 45%.


Decals

Spoiler: fml

Let's get that out of the way, everyone was expecting it anyway. I was applying S7+AT as this plane's markings to the airframe. The first side went ok. The second S7 turned into some purple profiteering jellyfish and I couldn't undo the first one anymore.


There I was, asking myself again: why in the Empire do I always give these pieces of crap more and more last chances? Either I was an idiot or an incurable optimist.

To business

Under the wings I applied the largest of the three Balkenkreuz, no issues there. I wasn't mad enough to use the slices on the dive brakes. The middle-sized crosses went on top of the wings and the smallest ones behind the tail band. All good there.

Then I started pondering which markings to use, if any. Despite my usual fears nagging on the background I decided to go with a set. From one suggested variant I took substring "AT" and used it at the end. To go with that I took the other substring "S7" (no, I was not going to cut those in two and apply them character by character) and the first one behaved as hoped. But as I already spoiled the surprise, the second '7' turned into boiled spaghetti and I just swore inside my own head.

Despite all this stupidity I attached the silly shields to the nose of the plane not giving a flying hoot if it was like this in the history books. As a personal comment I thought that the shield was ridiculously oversized compared to the rest of the plane.


Dullcoating

As the interwebs had re-educated me, I shook and mixed the Humbol dullcoat like a maniac with maracas, and spread it around the plane. That crap took way, way longer than Vallejo's matt varnish to dry, but I wasn't in a rush. I left it to cure over the rest of the evening and night.

The next morning this is how the Afrika's conqueror looked like. Maybe I'm just used to the sharp-contrast nationality and whatnot markings, but somehow I got the feeling that maybe I should've gone with a lighter touch with the paints. But then again, they didn't look bad, just quite different.


30.1.19

The first fixing round with some brush painting

Some brush painting

Canopy

After the paint had cured on the canopy I somewhat anxiously tore off the masking tapes. The result was, as I guess was somehow predictable, suboptimal. There were some white primer overflows here and there, which I scratched off to the best of my abilities with the tip of an hobby knife. For some covering up I did a bit of fine-tip painting over the nonsense, where I needed to. It was somehow tolerable from a distance, after all.

Now plese remind me, why I'm not primarily an airplane guy, hm?

Details matter

The propeller blades I painted almost black (VMA 71055 Black Grey RLM66) and the bottom half of the spinner that had turned blue I returned back to the yellow-brown world. While pondering on the bombs my searches took me via the FSM forums to some odd and unexpected sites (http://www.warbirdsresourcegroup.org/LRG/bombs.html), where the Luftwaffe's bombs and their variants were described very nicely. It was a very handy link, now if I only managed to remember it in the distant future!

In this case the bomb pairs slung under the wings were model SC 50 Bi (reason for this choice: the colour) and the underbelly bomb was an SC 500 Grade III (the only one listed, no need to choose). With this in mind I painted the little bombs dark grey and left the main one blue, I just touched it up a bit here and there. The big one then needed a yellow stripe in each sector of the butt-end, between the winglets. So that's why I did (VMA 71002 Medium Yellow), it just didn't stand out too well out of a sky-blue bomb.


Fixing this and that

At this point I realized - while duckducking colour photos of the propellers of the jericho sirens - that I should've painted them sand-coloured, or to be more exact: I shouldn't have painted them blue in the first place. Learning is good, they say. I decided to fix them by hand and I think I saved at least half an hour of masking time, not to mention the time I could potentially have spent fixing any overspray.

By my gut feeling I masked off an area for the white theatre band. These have never worked the way I have wanted, but as I haven't found a better, more reliable way, this has been my method. I did the band and the tip of the spinner with white paint. To avoid the overflow, just like with the landing gear, I left the airbrush at the dock. And to make my life that much simpler.

While I was on a roll I also painted the radio operator's MG's barrel and handleable bits along with all three wheels completely black. I thought that in this case the contrast difference would be strong enough and this way they could maybe be distinguished from the dark grey bombs. Maybe I should go again to look for the rubber-coloured paint, just so I could at least once say that I have done wheels "correctly".


23.1.19

Priming and basecoating

A sandy base to Tunisia, for example

I airbrushed the vast majority of the plane's surfaces with a sandy colour (VMA 71246 Yellow Brown) that wasn't Dunkelgelb but looked pretty decent to me, especially after it had dried. Maybe I'd modulate it a bit when I reached the late stage of the painting process.


Not quite cerulean bellyside

The RLM blue (VMA 71101 Hellblau RLM78) wasn't that sky blue to my awful eyes, more like something from the endlessly grery, raincloudy, late November, but who was I to declare to an air ministry of how to name their paints. This was definitely supposedly be in the very core of their domain, not mine. Anyway, my image of this paintjob was a bit "toned down". That didn't mean it was wrong, just different from my own personal expectations. So, nothing new in the land of the Project Mumblings!


16.1.19

The gloriousness of a multi-pane canopy and masking tape

A masking tape adventure

I've always liked the general look of Stuka's multi-window pane setup. The last time I built a Stuka I tried to mask it by assembling it out of a gazillion tiny tape flakes and that didn't work out at all. After that I've done what worked better (and usually pretty well) then: first the inner panes were painted darkly, then the whole outside is covered with masking tape. Then the window lines are traced with a sharp x-acto knife (this is where the dark inner bits come in handy) and the excess tape bits get torn off. The result should be and has almost always been a more or less perfectly fitting maskset.


Either I wasn't as patient as I should've been or the knife had gotten dull, but this time all I achieved with this otherwise wonderful and simple method was loads of cursing. So as an A/B test I decided to give the fragment approach another but most likely doomed go. It wasn't going to be perfect but I just had had it. The second photo shows the results after the first masking session of the B variety.


I was mightily lazy and just popped the MG+window bit off and protected it with tape from the inside. This led to me having to paint the plane and the canopy imperfectly attached. It didn't seem like a noticeable issue and I thought it was actually going to be the simpler solution.


Please remind me never to attempt a Do-17 in this scale, no matter how amazing their nose windows were. The mere thought of it made me shudder.

9.1.19

Sleeve-ranks and more assembling

Adding the rank bars on the coverall sleeves

Yet again I ducked for the rank markings of the Luftwaffe for these ranks I pulled out of my sleeve. For simplicity I decided that the first guy'd have a single set of moustaches on his sleeves while the other one had a moustache underlined by a horizontal bar. Both'd be white as I really didn't feel like making a mess or multiple passes with yellow, if I really didn't need to. The white paint would also stand out a bit better, I thought, as the coveralls and the bibs were already yellowish and yellow, respectively.


Pictured: some flying colonel, who's being blinded by a misleadingly bright future
As a foundation I painted grey-black rectangular blotches on the sleeves and later I attempted to paint the tiny, tiny white  blobs on them. The radio operator got the single moustache so he was an Unteroffizier (which translated to a sergeant? Weird shapecount, considering that the other armies and branches usually have used three somethings for sarges, but who am I to complain?). The pilot then got the underlined moustache, becoming a Herr Leutnant, a lieutenant. Nothing too fancy but maybe even believable, I hoped.


No, you couldn't recognize anything there, but they are there and that mattered the most.

Employing some factory workers

At this point the instructions told me I had two options. Open dive brakes or closed ones, wingtip hardpoints loaded with either a pair of small bombs each or single external fuel tanks. Rather surprisingly and shockingly the Project Mumblings took the divebombing option in a divebomber project.


From under the masking tapes a pair of almost good-looking landing gear pods emerged. One of them was going to need a tiny bit of puttying, but they were quite an improvement from the last time I had seen them.

Next I glued the tail stabilizers with their diagonal support bars. Those settled into the airframe beautifully! Afterwards I tried to rererecheck that the damn wings were set straight, but that's what I've always done and always there's been some criticism afterwards :p

Under the aiframe I installed a couple of antennas and other things. Those identical hook-like things were to be glued on, with a glue specifically sold by Zvezda, so there's another case of "no glue needed", again.


Moving on, I assembled and painted the radio operator's MG and attached it to the rear glass piece. At this exact moment I realized I was just about done with the whole assembly part of this project. Before getting to that I thought I'd make my canopy masking subprocess a tiny bit easier by painting the frames from the inside. But nope, the plastic practically refosed to take and hold any paint on its surface. Gnaah.


2.1.19

Building session 2

Bit by bit

As the paint had dried I continued with the building itself, conciously ignoring the little dudes' sleeves bare at this point. My program consisted of installing a curious square-shaped window piece in front of the bottom of the airframe, between the wings. This looked like some sort of a "do we still have the bomb in there, Hans?" window or something. I had never encountered this detail in my previous Stuka models, so I was a bit uncertain of its purpose.

The cockpit

The next step was the traditional mashing together of the airframe and the wings. I was quite concerned of the fate of the poor little guys' shoulders but with some wiggling and a couple of reaimings everything settled together amicably and there weren't any huge gashes anywhere, either. The few gaps were sorted out with a drop of liquid glue and a bit of pressure over a short period of time.

Behind the first part of the engine's radiator (or oil cooler) a new neatly shaped arc was installed. Behind that I attached the main bomb on its amazingly swinging rack. A smarter modeler would've painted those separately, but as we've maybe realized over the years, yours truly is always not quite that smart.


As you could tell by the image 2, I still had space to paint the rank insignia to the arms of the coveralls. Maybe I would have to come up with some kind of ranks for them, but I didn't know anything about these things, what kind of chaps were paired and how they were typically ranked. I guess I could make the radio operator a general and the pilot a summer trainee replacement for an auxiliary loader's assistant. That'd keep us on the track, considering the quality of jokes in this blog.

Landing gear

I was very pleasantly surprised by the four-piece landing gear. In theory the wheels would be spinnable and there were even separate propellers for the jericho sirens!


Generally speaking these bits were really good but after assembly the fronts of the cupolas were grimacing more uglily than myself when the alarm goes off in the mornings. So I applied some glue, pressed them together for a good long while and then tied them together with masking tape. In case my first assault wasn't providing me an end-all solution, I'd use pegs for the second one.


26.12.18

First paint drops

Judging by my calendar it's been quite a few months since the last time I got to paint anything. At least I've had some variety in my doings and some of it has been good, too.

Primary

At this point in the project I took the bare minimum surface area to work on, that being the dudes in their seats and the cockpit itself. Then again, as German as a language is full of exceptions and exceptions to those, I also primed the propeller and the spinner already. I just love contradicting myself in one single thought and sentence.


The cockpit area

To keep things pretty simple I airbrushed the cockpit floors, walls and the dashboard with dark grey (VMA 71055 (Black Grey RLM 66)) carefully. Had I bothered masking off the wings, I could have saved maybe a few minutes later on. I was somehow expecting to end up filling and sanding the joint of the airframe and wings so I didn't really mind that much. I also painted the cockpit's part on the airframe that is visible outside but under the canopy.

Finishing this step I airbrushed the guys yellowish (VMA 71246 Yellow Brown) as that seemed like a pretty decent choice for a desertish DAK coverall and would be distinct from the dark cockpit. Unless I made an utter mess of the canopy in the later stages.


Some manual work

Without any great illusions of anyone ever noticing the dashboard I still dabbed a black (VMA 71057) blobs on just about each of the lumps on the indicator board and then on a bunch of them I added some white (VMA 71001) smudges for better diallikeness. It did look like a dashboard. From a certain point of view. Finally I poked a few bits on the cockpit inner walls with yellow (VMA 71002 Medium Yellow) to mark some random lever ends and whatever they marked that way. Of course I had forgotten to fetch any of my red paints so all those I had to leave this time.


While messing around with black I painted the handle of the joystick, the radio devices (2) and the crew's boots (which with these sculpts looked like either walking shoes or that they had their coverall legs over the boots instead of tucked in). Then I prepped their goggles by painting them black as well. Maybe I'd apply something metallic to make them look more like old goggles instead of modern scifi helmet visors. In any case I wouldn't be able to make them look authentic so anything would pretty much be ok for me.

Later I applied some white highlights on the FunkGeräts to make them look a bit more like something else than black cubes in an almost black environment. I didn't go for any special authenticity or anything, just a hightlight for potential visibility.


After I was done with the crew's shoes I painted their bibs (I assume they were lifejackets in real life) with the same yellow I used before. The sculpts were whatever so I just painted instead of worrying too much, as I had made my mind already. You know, being stubborn.


Last but definitely not the least I painted the leathery flying helmets and gloves brown (VMA 71041 Tank Brown). Then I fixed some of their pant legs that hadn't gotten proper airbrush coverage with the yellowish brown.

When I was done with the dudes at this point I painted their seats with the same cockpit colour I used before (RLM 66) and plugged the seats with their owners onto the floor. If I remembered to do the red bits the next time, good, but if I missed the plane wouldn't crash and burn for it. Maybe I could take a look at the seatbelts while I could. Otherwise the next round would (hopefully) be just pure building again.

19.12.18

Reference hunting

Target locked

Ages ago I had decided that this'd be a yet another different plane. More clearly put, I had never painted a flying Deutsche Afrikakorps device (not that I had made many going on the ground, either), so why wouldn't I send my Stuka to scream over the skies of North Africa?

The plane

Somehow I remembered seeing a set of Luftflotte 2 camouflage patterns. Most of those had a splintery or splotchy pattern. Of course, in my mind's eye a simple, plain Dunkelgelb (RLM 79) with white Operational Theatre markings just looked the absolute best in this case. Based on my quick image searches I wasn't the only one, even though I was admittely in a small minority.


The Stukka [sic] would have a plain light blue (RLM 65/78) belly, as RLM has decreed without any nonsense at all.


The crew

That being said, the plane's camo pattern - or in this case the lack thereof - wasn't going to be a problem of any sort, but the tiny figures that were a surprise to me had the potential of becoming a tiny problem. Basically any sort of a Luftwaffe pilot reference would've been just ok, I guess, but I was looking for a more location-accurate sources. After a good amount of very obscure ddg'ing I had found myself on weird forums and who knows what else, but the main idea seemed to be that either they had a blue-grey coverall with a yellow vest or a dark yellow (could also have been faded olive as well) coverall with a brighter yellow vest.

A screenshot from an Afrika Korps -forum (!?)
I really wasn't sure what the original colour of the helmet had been and what time has done to it. I guess I could use these pics, depending on how well or badly the details were on the tiny dudes.


Maybe they'd be all right in the end. The helmet was pretty clear, but the coverall's colour I'd have to ponder a bit, as I wasn't sure what made the most sense. Generally it looked like that the coverall was dark (which wouldn't stand out of the dark cockpit interior) or a light one (that would stand out of the cockpit but would look awfully close to the airframe). Just by this set of thoughts I'd most likely go for a light coverall because it'd also sit better with the sandy North Africa scenario. I just didn't feel too happy about having the plane and the clothes in the (almost) same colour, for reference see the halftrack linked earlier. In this case the skin tones I had used were also awfully close to the outfit colours, so I'd need to pay attention to that while painting.

An absolute must would be the Luftwaffe rank markings on the shouldersleeves of these chaps (and before that I'd need to come up with what rank each had to begin with) and on their chests (if there was space) some sort of flying eagles and other sillinesses, figures allowing. And that's always been awesome fun! Not that anyone was ever going to see them in the completed model, but that has never, ever been a meaningful argument in my books.
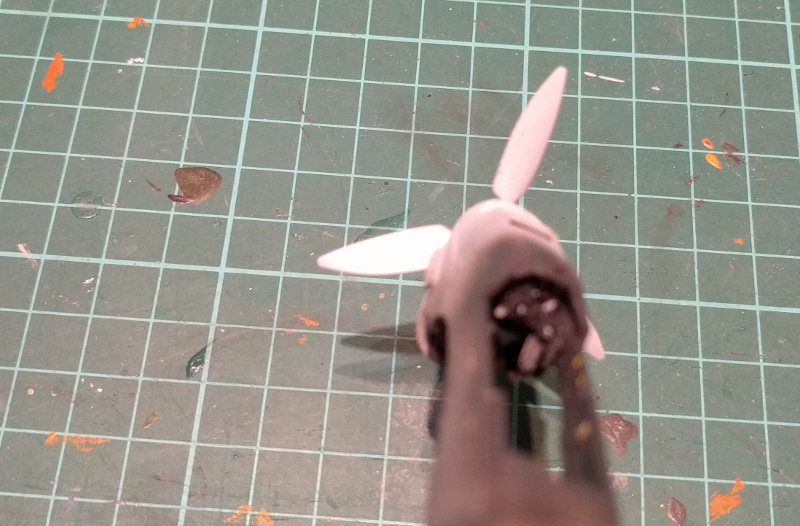
The cockpit

Had I been smart (or stopped to think), I'd painted the insides of the airframe halves before joining them together. But as I wasn't, I didn't. Now I'd paint them at this point instead. Then again, I'd had to apply glue on paint, which usually fails on many levels - and I'd still had to fight the instrument panel separately. And again glue it after painting. Dunno, maybe I just have no idea of how to optimize airplane build/paint order.

On top of the basecoat I'd apply a black-grey (RLM 66) layer or two and then drybrush for some details, that one could maybe, perhaps, potentially see through the canopy. Most likely this would not be the case. While typing this post up I couldn't check the pieces, if the radio equipment &co were modeled so that they could be told apart from the rest.


I could always highlight some cables and the sides should have some levers with red and yellow ends just where the pilot would reach handily. Maybe there were some lumps on the model, but with a closed airframe poking those details with even a tiny airbrush was so-so, if it made any sense at all anymore.

Anyway, this has been the traditional 'Mumblings thinking out loud as always. Don't be confused if by (or in the middle of) the next post I've changed my mind completely, again. These things have always been pretty dynamic, I think.