More details
The engine room had been dominated by the red-brown so far, mostly broken by the motor's air filter's whiteish cover. To improve this I painted the radiator grilles and their top covers with grey-black. I wasn't sure if I was going to use any decals there, either.
While working on the grey-black I iterated through all the torsion bars at the bottom of the tank, as far as they were still cleanly painteable (or paintable?). I also painted the driver's steering wheel, the two front seats and backrests. The driver's righthand dashboard also became dark, I assumed it was to visually separate it from other functions.
First I painted the faces of the radios dark grey, then I started searching for reference images of FuG2 and FuG5 radios and especially for information of that top box, if it was the commander's FuG2 or something completely different. Not that I could've recognized any of these by just their shapes or surface textures. More research was added to the TODO list.
Following the painting guide I also painted the drive sprocket's openly spinning disks on the inside. I still had no idea about anything, but they sounded like an insanely serious workplace safety risk, if I had guessed their function correctly.
This was just the first of this type of painting detours, I still had plenty of details that weren't taken care of. Such as the glasses of the spare periscopes. The darkness of the torsion bars should be best visible in the next photo.
I had also started painting the firewall's fire extinguisher, it was still waiting for the metal band before I was going to paint it red for visibility. Also the boxes I guessed to be batteries, located on both sides of the axle, were still untouched.
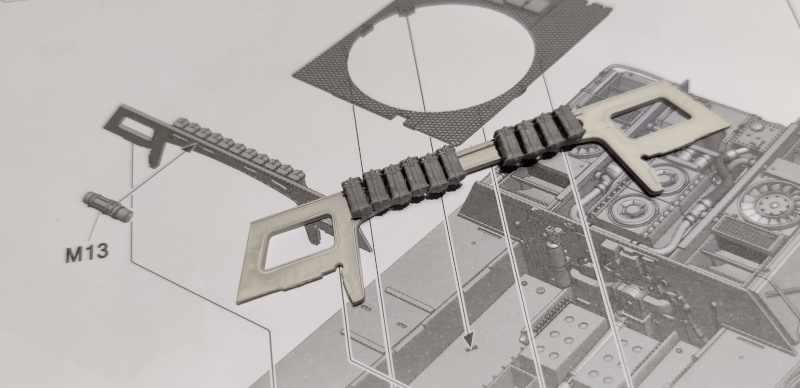
There were quite a few of these small bits that I had deliberately not primed yet, so the radio operator's machine gun's ammo boxes were pristine. I decided to glue them on now to the rib piece and paint them in place later on. Apparently the way of attaching these boxes was completely up to the builder, so I used as many as the instructions said, but instead of attempting to spread them out evenly I divided them into two inequal groups.
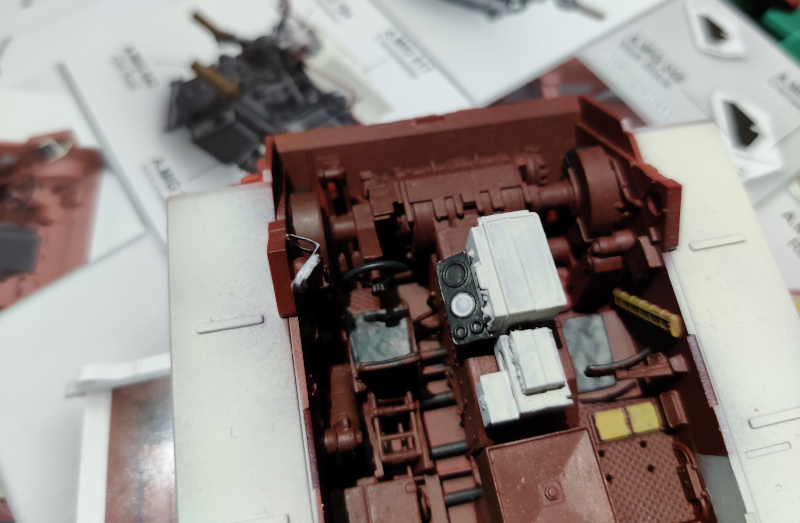
The combat compartment's floor housed three boxes that were to be painted dark yellow (VMA 71025 Dark Yellow), and I thought there were also a couple of similarly coloured containers on the inner walls, that I managed to forget with my limited time. The batterylike boxes I did paint this time, just like the final fuel lines that you could at long last see in the rear end of the tank.
These two photos above also revealed that I had been working on the upper hull so that the driver's and radio operator's hatch-set was glued onto the deck. Their hatches were also installed and the head protectors were also painted (again with grey black).
I abused my time machine to show a couple of internal photos from a couple of building steps further ahead, as I had been poking at the details here and there. The rear edge tanks had their airing caps painted, the firewall's fire extinguisher was now painted red, and the long block at the radio dude's legs was now dark yellow. The periscope glasses were still untouched, but at least I had touched up the first dials of the driver's dashboard. I also once managed to find a reference image of that dashboard, so I could attempt to finish it up at some point.


No comments:
Post a Comment