The rear deck
Assembling the rear deck started by the plate that was going to be located on top of the motor and a service hatch. Some of these bits I had primed previously, some I had ignored. Those tiny edge-positioned hooks were, as always, a source of swearing.
Installing the almost completely built slab into the rest of the rear deck was a bit more complicated than I had been mentally prepared for. Those two bits in the back, where the rear end of the plate were connected to by a tiny surface, they were so flimsy that it took extra time to get the joints secured. Doing the gluings in a couple of time-separated steps it worked just fine.
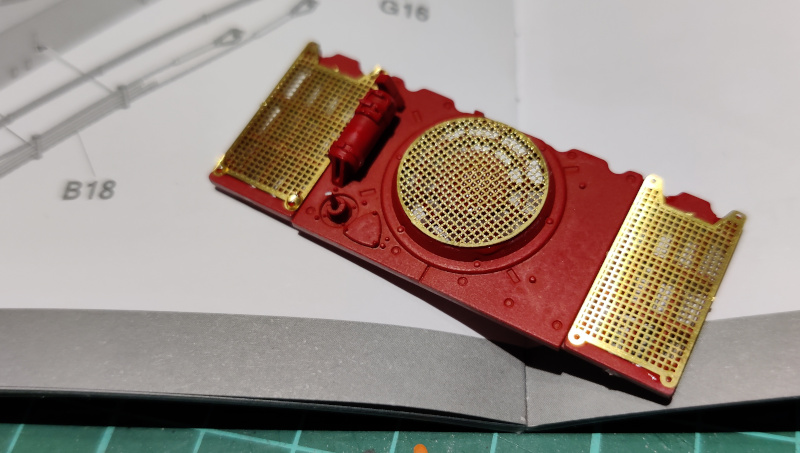
Iron Man look with PE
At this point I sat to think for a bit if I should glue the next two pieces first and decorate them later. I decided that it was going to be simpler to do it the other way, so the tiniest details could be easily accessible without the bulk of the full top of the tank being on the way.
Following the instructions I started with the right plate and its fire extinguisher, which was followed by the base of the antenna. My biggest problem here was that if my superglue had gotten out of date, the photoetch bits would've had to wait a day or two. Nicely enough the superglue was still ok.
These bright almost goldlike PE bits on top of the red primer reminded me of Iron Man's power armor. I was completely sure that someone had already done an Eisenmann tank, so I didn't even think about it.
In fear of knocking off the tiny hooks I decided that I'd do them later. To prove my point I had already managed to lose one from the main slab (and properly lose it, how else?), and I didn't want to think about how annoying it would be to crawl after even tinier pieces at that hour. With cats.
The next evening I started from the most annoying part or parts, when I started gluing on the tiny hooks in their places. One at a time with with tweezers.
While working on the left desk plate I went mad and started with the minihooks, because after fighting those everything else would become an actual pleasure. Between the photoetch grilles I added a pair of hedge trimmers, in case someone wanted to work on their topiary skills somewhere on the French countryside. They also received a PE attachment piece for extra decoration. Right now the tiny bracket didn't really bring much extra, to be honest, but I trusted it'd be better after a layer of paint.
The rear deck of the King Tiger was pretty full now. A new layer of primer would also help quite a bit. I should just remember to be careful with the grilles.
A misstep
This was a mistake I recognized much later, even though I was wondering about the weirdness at this point. Why was the front upper glacis plate so weird-looking? Before committing to the gluing stage I dry-fitted and stared at the instructions with my eyes more or less crossed "it shouldn't look like that but that's what the pic says, so I guess I have to follow it".
In plain English, my mistake was that I positioned the inner piece way too low and around the upper "lip", instead of under it and at the same time inside the tank. As said, the instructions weren't too clear with this.
Engineering tools
The upper hull's outside was progressing much more nicely with the engineer tools on the deck and along the sides. I wasn't too sure if I was going to add the tow cables later on or not. If I was going to use them, I'd do it later, because that was going to be beneficial for the painting process.
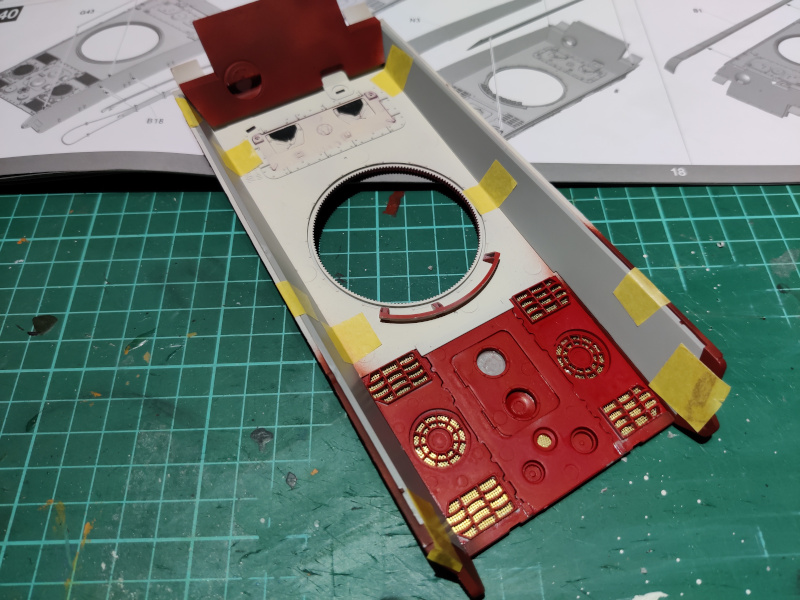
Interior armour plating
The upper-inner armour plates slid on pretty nicely. I applied some masking tape to press them tighter in place and to release my hands for more value creating tasks.
This was the point in time when it dawned to me: I had done something wrong, as there were large gaps between the walls and the radio operator's machine gun's ball thingy (or its outer armour bulge) didn't align at all! The misalignment was measurable in millimeters. I detached the inner panel, swore a lot at the fancy instructions, dry-fitted even more and found a decent position for the piece. Frustrating to say the least.


No comments:
Post a Comment