Primes
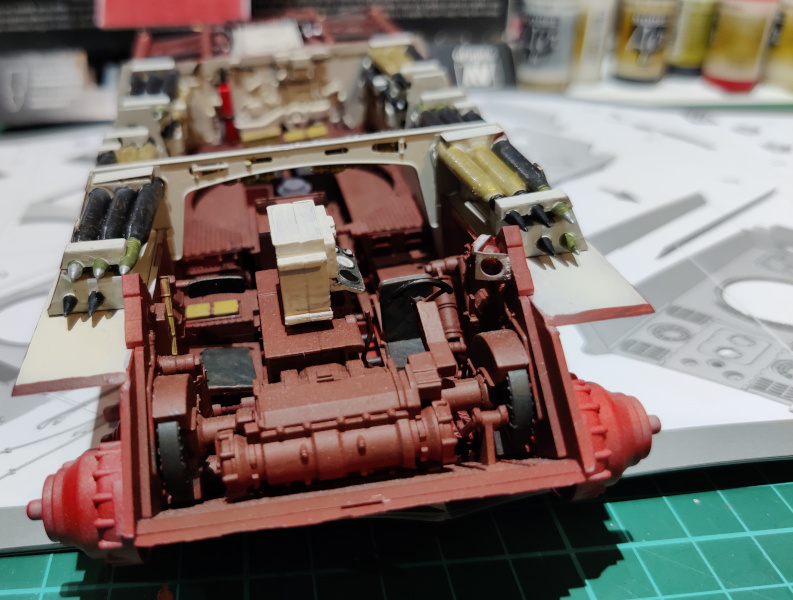
Yet again I found myself priming some pieces. While I was at it I primed the upper hull's new bits red; with the bone I primed the ammunition, the MG ammo packs, the PE shelf-ends and the new inner walls of the upper hull.
Then I painted the machine gun ammo packs and the photoetch pieces grey-white. The accidentally knocked-off A-shaped pieces that I had glued on the last time I also painted now (in the second photo, on the blue masking tape), as they were handily available withouth the hassle of masking everything else off.


All of this fun stuff had eaten a couple of evening's hobby time, as I chose to paint each part from two directions with a long drying time in between. I just didn't want to ruin the surfaces with fingerprints and whatnot. While the airbrushings were sitting tight I poked the lower hull a bit. I added some variety to the red-brown flatness by painting the piece of machinery under the turret's basked with Engine Grey.

Painting
At this point I repainted the grenades with the paintbrush. Those MG pouches installed onto the rib piece looked like they were all brassy as well, but this wasn't the case: it was all Dunkelgelb.
Now that I was done with the airbrushing for a moment, I also handpainted the shelf-parts of the ammo racks with grey-white, except the outside-facing angled surfaces. These outer edges I'd paint red-brown later on.

With the brassiness applied I started pondering on what kind of shells each of the shelves contained. There were four variants on offer, one had a brassy case with a black grenade; the others had a blackish shiny metallic case with different-coloured projectile variants (green body with a large or a small metallic tip). Sadly I had absolutely no idea, what any of these translated to.
The always-so-helpful interwebs were (again) very much in disagreement about the colourings of the rounds, I was only interested in following the provided painting guide. For example, in a reference pic below the black and green projectiles were clearly differently shaped, obviously, as they were very different weapons. The model's projectiles were all the same, so that didn't really help me here.

Using my trusty RNG I chose a bunch of cartridges and painted their cases metallic black (VMA 71073 Black). Looking at the labels of the reference pic above my choices were most likely pretty unrealistic, for as far as I had a clue, the Germans had much more demand than supply for the AP shells. The rest of the ammunition were going to be various types of HE or HEAT shells. Of course I was going to have a load of shells in the turret as well, so this wasn't the end of this story.


Installation
Being my paranoid self I checked yet again, before starting with the glue, that all the components were certainly in their right places. A couple of those had actually ended up in the wrong stack, but they were pretty easy to notice and recognize as a false entry.
I glued in the photoetch sheets to the backs of the front- and rearmost racks, but the ones in the middle didn't make sense to me the way they were supposed to be installed. The funny thing that none of these were shown in the painting instructions, either, so I just skipped the bothersome ones.


This one post ended up summarizing over a week of time. A part of that was because I took my almost paranoid paint-drying times seriously.
No comments:
Post a Comment