Mastodon

29.6.22

Lego assemblage

Evenings two and three

Legs

Picking up where I left the previous night the build proceeded somewhat naturally to the thighs. I followed the instructions obediently and didn't optimize by building mirrored bits at the same time. I was in no rush.


The thighs were pretty quick and unsurprising to build. Most worries I got came from the stickers and their alignments. His shanks, on the other hand, were much more complex, espeially those chromed cooling vents were pretty neat.


In this photo I had the right lower leg already build and attached, its left sibling was spread all around the table, somehow arranged by colours and types. I had no time or interest in proper knolling.


Here we had the legs without the feet and wheels. The progress was rapid and enjoyable, and I, like I've said, was smiling sillily all the time. Even without his feet he stood nicely and steadily, despite the flimsy look.


That's how far I got with my second building session. On Wednesday I proceeded to assemble the feet. This time I went for a parallel build as these were identical. For a brief moment I thought these could be posed more, but they had twin ball-joints for sturdiness, not posability.

For the posing needs I'd just need to order that Masterpiece Optimus v3. Ahem.


Somehow I couldn't remember off the top of my head if the G1 toy had fuel tanks or not (I checked, yes he did but they were solidly in place) but this one had them. Their 90° rotation was checked by the little "I wonder what these are going to be for" details in the legs.

Sixpack

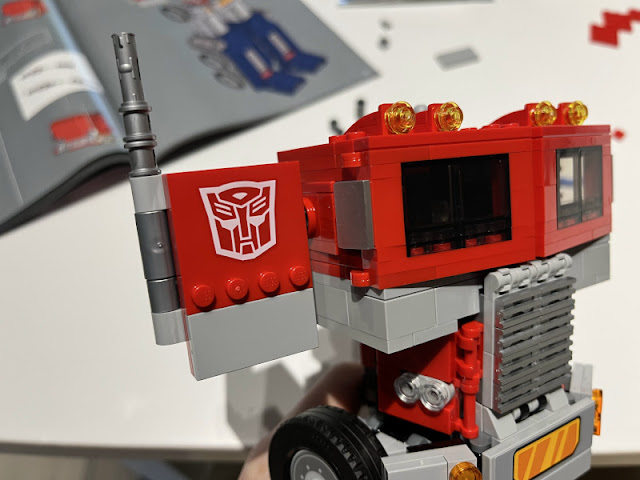
Comparing these next to photos you could tell that I had originally attached the drive light pieces into the upside-down set grille. I noticed it when I was trying to attach the bumper piece but the claw/bar connections didn't just align decently.


:D

Having assembled this chunk the right way, Optimus' sixpack clicked in place just as you expected and the front of the truck folded nicely into the sides of his torso. I really couldn't wait to check how the transformation was going to work.

Arms

Work on the arms started from the shoulders. These sturdy boxes got cool chromed exhaust pipes that were just as distinctive as the ones in the toy. Luckily (or sadly?) these didn't spin around on their attachment point.


Building these mirror images was quick and getting them in place just increased my excitement for getting the robot finished.

The hands were neat and four-fingered: three plus a thumb. Of course you could've left the dark blue 3x1 flat bit off from the fingertips, to allow for a pretty cool degree of articulation. But as the left/rightmost fingers were pretty lightly attached, I didn't believe they'd stay in place for much playi I mean posing.

Again I really didn't even remember that the G1 Optimus had stickers on his front-facing forearms, but according to a quick image search the originals were much more hectic. These printed tiles were subtle and worked, in my opinion, wonderfully.


Head

Once again I was too excited to build something and forgot to take any in-progress photos. I just wanted to see how the build worked in the end. His hatholder was much larger than I had expected, but the robot himself wasn't small so scale-wise it was just what it should be. When I finally installed it, of course.


"Who dares defy the might of Megatron?"

Accessories

For me a sign of a good toy has been that in addition to the thing itself there were accessories from maybe short bit in one episode of the cartoon it was based on. And that's how it was.

The Matrix of Leadership

First of all I build the Autobot Matrix of Leadership that Prime carried in his chest cavity. I didn't immediately try if he could handily hold it, but it looked like it should be doable.


Energon Axe

While building the Metal Earth Models Optimus I was yearning for an Energon Axe, and now I had one. Of course this meant that in the near future my silly photos was going to contain a scene from More Than Meets the Eye, pt2's duel on the Sherman dam. I mean, I already had Megatron with his Energy Flail solely for this purpose.


Ion Blaster

Optimus' Ion Blaster was pretty stylish. On the first quick try I didn't find a handy way how to get it to stay nicely in his hand, but again, I had time to try things out.

Jetpack

Again, the jetpack was seen in maybe one episode but still, it was amazingly cool and fit like a glove. The rocket nozzles could be adjusted by some milliradians so they weren't completely static, but didn't offer much posability. The style overruled here, it was fantastic.


Data plaque

The final important detail was the traditional data sheet that told us kids who was the best in which category. This dude was clearly overpowered with his numbers.

The full accessories collection

Lastly I collected the little bits into a group photo. There wasn't much to say about the alt mode's register plate slab, nor was the Energon Cube anything too complicated, so I showed them here first. The funny detail with the Energon Axe was that in order to wield it the arm had to be popped off and the wrist turned around. But that's how it was in the episode itself: replacing the hand, so no real complaints here.

Alt mode

Now, with everything else out of the way, I started transforming my robot into a truck. Or a semi-trailer truck, if I remembered my terminology correctly.  This didn't take two and half a minutes even on the first try.

First the legs locked into each other, then the hand-arms rotated to the sides, the sixpack plates were spread out and pulled forwards, the torso was rotated 180° and the head got flipped away. Hands rotated and the thumbs turned out of the wa, then the legs were turned backwards. From the arms the ladders were flipped completely out, then the arms and hands were turned into the cabin so that the hands formed the front wheel wells. Finally the cooler/radiator grille setup / front mask was dropped down to cover the openings. Then the ladders were laid along the hull, the fuel tanks rotated to be more natural and the feet were flipped to provide the rear lights.

As an ultimate wonder-detail the handle-folded Ion Blaster had a space in the back just between the legs. It wasn't tightly attached as far as I fooled with it.


Magnificent! It was truly a great object. Of course, someone who knew their stuff had already built a theme-matching trailer and all. Someday soon the details were going to be shared with those of us with a bit less time and spare pieces, I sincerely hoped.

22.6.22

Project III/22

Lego 10302

Of course I started building this that same Monday evening. I didn't have an awful lot of time available, but I simply couldn't wait until the next day.

Chestbox

I really had no idea where I expected the build to begin, but apparently it started from Optimus' core with the container for the Autobot matrix of leadership. It was quite fun to see how quickly the random lump of pieces turned into something instantly recognizeable (a handful of pieces out of one and half thousand).


Center torso

Having been quick I still had some time to spare, so I kept on building. The center torso was a pretty sturdy bit and surprisingly narrow compared to the chest.

Based on the look alone I somehow expected the pelvic axle to be a bit too freely rotating, considering any kind of sensemaking posability. But after I had installed the torso part into the chest, the system felt good. Not that there was much weight to work with, with the limbs missing from both ends.

And that's as far as I got, two bags done, ten plus wheels to go (for some reason there were two non-identical #5 bags). At this rate I'd be doing this build for the rest of the week, grinning like a maniac.

Lego ideas: Cosmic cardboard adventures (40533)

Optimus wasn't alone in his transport box, there was another packet of Lego. It was one of these "buy enough and you'll get this to seal the deal" gifts, that was definitely not a bad thing. Somehow I forgot to mention this little detail in the previous, hastily and excitedly written, post.

The small lego person's room was very much filled to capacity by a cardboard box -based space fighter and a Power Loader teddy bear, and of course a kitty. Cats are good.


15.6.22

Stoooop the preeeesssss!

A half-secretive revelation

One of my RSS feeds contained a post where the Lego set 10303 - Optimus Prime - was revealed, and I started sharing the good news immediately. I even marked the first of June to my calendar so I'd remember to order one, to avoid the silliness of the DeLorean.

1.6.

I had to admit that despite the early wakeup for work next morning I stayed up past midnight (first local time and then Danish time), but in vain. When I got up ultraearly the next morning and had my laptop on, the set was available at last, and lego.com started slowing down only fifteen minutes later. I chose the standard delivery, as I didn't feel like paying 30€ for a couple of days of shorter waiting made any sense.

2.6.

For reasons I was actually at the office instead of working from home and my friend, who had also been ordering Lego obscenely early, had already received his box. Express delivery indeed. My order was at this point "processed" and "due to large demand the deliveries might be slower than usual". No shit.

7.6.

My box started moving at long last, from Belgium/Netherlands area. Why send things from a nearer point when you could start from afar?

10.6.

The delivery found its way to Vantaa at some point in the afternoon. Knowing courier companies, I wasn't expecting anything to happen before Wednesday, if even then.

13.6.

Despite Postnord's webui I managed to confirm that yes, I wanted my shipment that day as soon as possible, and at my door instead of some obscure pickup point or a kiosk a day or three later. They promised to deliver it during the evening, another system said they'd deliver on the 14th. Sigh.

In the evening a courier dropped the box by the door (despite me requesting a confirmed contact being made, but who counts?) and I may have been as jubilant as if I had received this in 1989. Maybe.


8.6.22

Washing the default Star

Wishy-washy

My paintjobs were so amazingly beautiful that I almost felt bad to start the weathering process. 

Again I was going to try out another mr Savage's hobby hints. Instead of carefully applying limited amounts of washes and letting them be, I was going to apply a good amount and then wipe off most of it. Done by a real pro it looked fantastic, I wasn't expecting mine to end up anywhere in the same universe.

Vallejo Model Wash 76518

I skipped the old and most likely mostly dried up Citadel's black wash (couldn't remember which one had been too thick years ago already), instead I took Vallejo's black one out. A perceptive reader may have noticed that I've been working in a kind of an assembly line way throughout the project, always starting with Timber Wolf. Now I applied a healthy amount of thin, black paint onto all the places that I wanted to darken compared to the surroundings.

As soon as I had iterated through all the holes and vents, I used a piece of kitchen paper to dab off most of the paint, running in the same order than I had painted.  The interim result was darker but not as overpowering as the freshly applied black wash in the previous photo (it'd calmed down a bit while drying, but still).

Following the same principle I went through the rest of the units. I mostly darkened any and all vents, Heat Sink -like bits and other joints. Whatever looked most like it would benefit from darkness, got it. Each of the gunmetal surface was included on this list.


I quite liked the subtleness of the effect, this was going to remain in my toolbox. Thanks again, uncle Savage!

Vallejo Model Wash 76512

To improve the camouflage pattern, I was going to do another washing round, this time with Vallejo's green. This time there were more and larger surfaces to treat, so I decided to work subsection by subsection. First victims were the Timber Wolf's CT and head. The difference was pretty noticeable, both in shade and the panel lines.

Again I took off most of the green wash with the kitchen paper, what remained, remained on the mini. The result on the mini's surface was much more gentle.

As a whole the Timber Wolf looked better, even though I couldn't say directly how it actually differed from itself about ten minutes earlier.


Like before, I followed my path: first applying the wash on a part or two in one go, then immediately wiping off the paint. I didn't take photos of all the parts and stages, as I felt that for process documenting purposes these were more than adequate.


Washed vs unwashed

After this one session I had three 'Mechs and one Elemental Point ready, two 'Mechs and the other Elemental Point waiting for their turn, providing something to compare to. Here the effect of my mostly removed green wash showed quite a difference after all. A positive difference, I might add.


Wrapping up the insignia

With the washings done and dry, it was a good moment to finish up the Clan insignia. The first bits were the sword-grasping talons for the Falcons, then the beaks. Each painted with the same yellow (VMA 71033) that I had used before.


Blackness

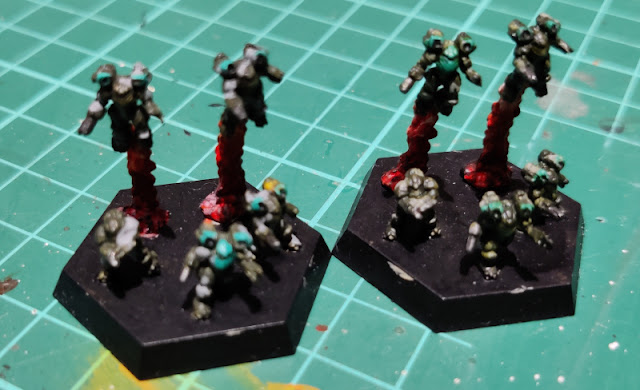
Something had remained bothering me in the rocket plumes. I took some black and drybrushed it gently, especially to the oldest and outermost, the most cooled down parts of the expanding fireballs. Maybe that improved them somewhat.


While drybrushing I attacked the Executioner's Gauss cannon to look a bit less fresh, even though I knew perfectly well that it had no reason to look sooty. In my opinion the barrel just looked too clean and fresh.

My experiments in this project had gone disturbingly well, so I felt brave enough to try out something else the next time I painted. It was only an Executioner, after all, nothing cool that could be ruined with a silly mistake.

Group photo n+1

Yet another WIP group photo to celebrate a finished stage. Progress was quick and enjoyable.