T-34/76 PT-34 mine clearing tank OOB
The model I started in the very late '23 was now complete, a few calendar months later. This time I used a yet another approach to documenting my process so each of the ten posts covered a very varying amount of real time.

Based on the filenames of my photos I had taken 198 work in progress photos to be edited, divided under 8 themes (and posts). I had no way to calculate the amount of actual time used, all I knew was that the hour count had to be enormous, as one post alone usually covered the happenings of a handful of sessions. Finally, I took 15 photos in the light tent with the final model, and editing those took a moment as well.
It could've gone better
This world would be a weird place, if everything went perfectly and nothing needed (or allowed) grumbling after the fact. Of course this project left something to desire, and that was a good thing because it gave myself some feedback for improvements.
PT-34
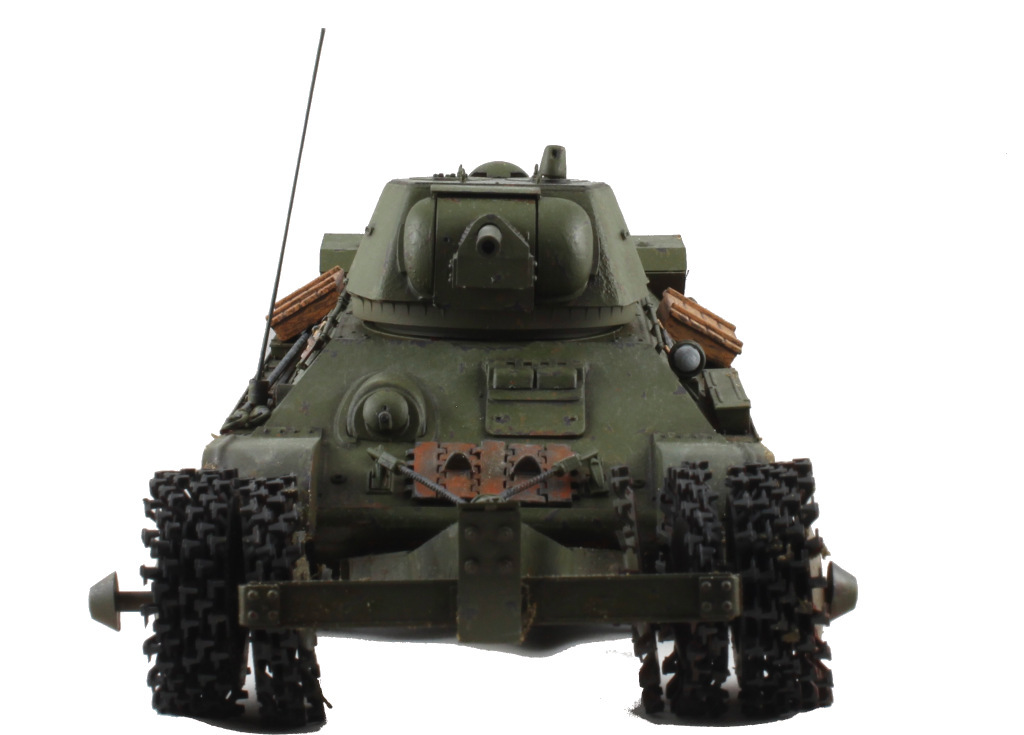
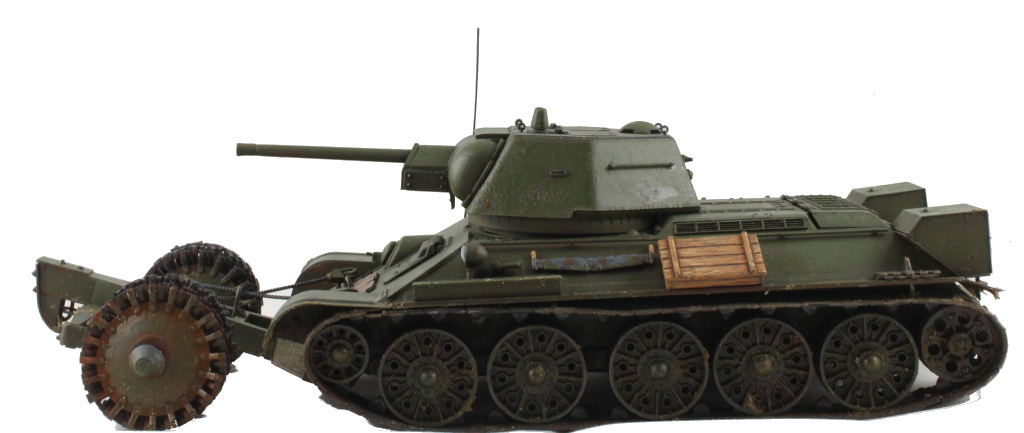
The mine roller device with its instructions. I was somewhat confused by the instruction sheet at some points while building, and as I wasn't familiar with the way these things worked (or how they'd looked like in real life) I had no real way to trust my own instict. Now the roller discs didn't end up standing straight like I had visualized based on my own expectations, the relatives in the Parola Armored Museum, and the box art.

If I was a diorama person, and I might be one if I had the space for storing such constructs, I could've cheated by smashing the rollers into the position I wanted with the base. Floating freely it looked a bit silly, as supposedly heavy steel wheels were flopping like conscripts in the waiting area.
Unique identifiers
My tank was left without a unit number, red stars, and a catchphrase. I had even considered using the roundels from the decal set, but the number and texts I'd freehanded myself. Most likely this was caused by the repeated issues with the green basecoat, and as I was clearly hyped about the chipping attempt right after painting the bare steel bits, I simply forgot the order of business here. The white details should have been painted (or decals cursed on) before any fancy stuff.
A couple of years ago I might have just shrugged, added the missing details over everything else and then applied some touch-up weaathering to cover it up a bit. Now I accepted my mistake.
Tanker's smile
The 1,5mm++ -sized gap was truly baffling, because it didn't show any warning signs in advance. Of course I tried to fix it but I clearly hadn't got enough practice on this sort of work, and I most likely also used wrong tools as well. Or I was fixing it too late because I didn't realize my problem in time. So there, skill deficiency, pure and simple, and the only way to improve on it was to practice.

Another really confusing thing about the ravine was that the rest of the model was pretty much hassle-free. Perhaps I had installed the mysterious bits on the rear hull's inside badly, which then compounded into a large issue a few steps later. As an explanation this made more sense than one lonely piece of the model being over a millimeter or two off in one end.
Not going to ignore the successes
After my initial worries chipping was insanely fun to paint, and even in my own opinion it looked neat. I also tried to keep my head cool with the damages, because it was fun and that always increased the risk of overdoing quite a lot. We've all been there.

Working with the oil paints was still glorious and the end result enjoyed a huge improvement. I really couldn't emphasize that enough, because now the "oh crap now there's a crapload too much of that stuff there" was quick and easy to revert with nature's own undo function. Santa and his colleagues the Witch Kings also brought a few more Abteilung oils for me, so the modeler's happiness was going to be unlimited.

Those often-cursed vinyl tracks went on, stayed in piece, didn't (yet) pull the roadwheels askew, nor did they melt away while being painted. The result was also prettier than the unpainted metallic-shiny bits. Of course these were paper-thin in scale, but you couldn't always get everything.

Final thougs
All in all this was a fun build and a fun model to paint. It actually was my fourth Soviet tank (and my second T-34), and my seventh Soviet model in general ([T-34/85; IS-2; BM-21 Grad; T-35; MiG-29; Su-27; T-34/76 & PT-34]) so I wasn't completely stuck into kraut stuff even if I sometimes sounded like it! In this model count I didn't include anything earlier than 2001, such as the unlucky Polikarpov I-16 and whatnot.
Photos
I really needed to get myself a tripod for the photos. These photos that have been taken more or less on the same level were shot with the camera resting on a book (the complete Bone, again).


Now these last photos that were pretending to be something like 3/4 photos I took with the light tent's own monopod but the actual camera was a bit too heavy to be trusted on that one. Maybe I should've used the timer in addition, but didn't think of it in time. Maybe I'd think more the next time.


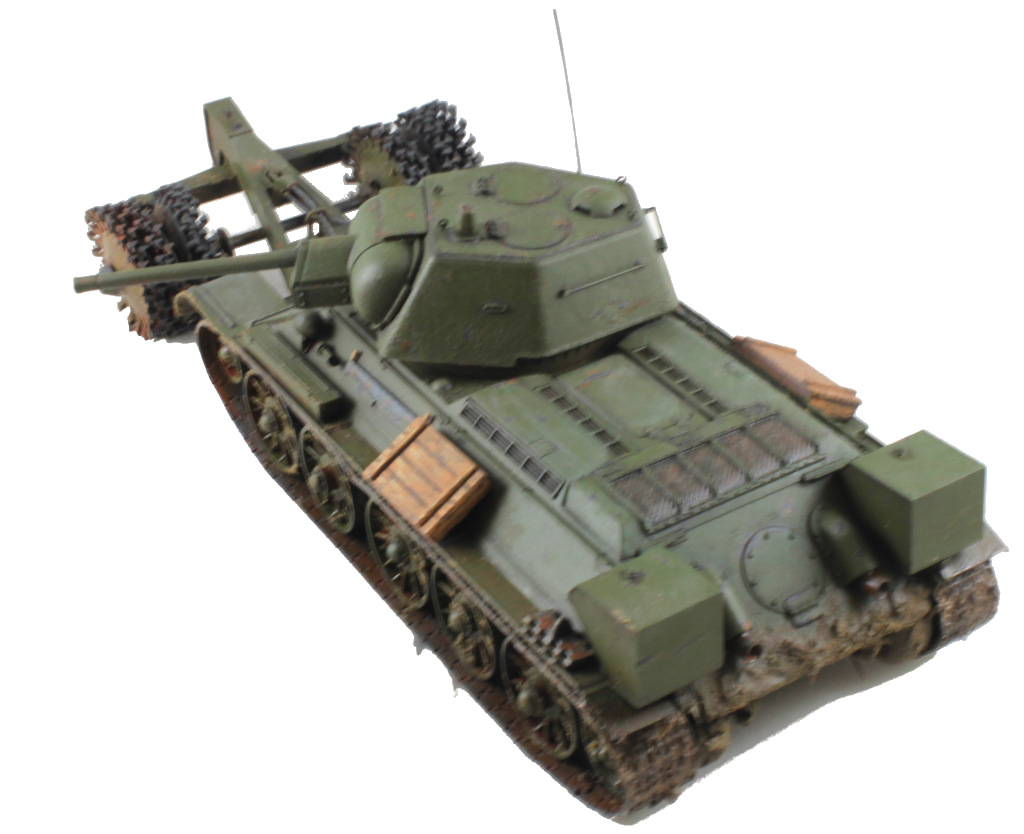
Exhibit A for the monopod-tripod-manual shooting: the last photo had moved a bit but gave enough of a view of the tank for me to just go with it instead of doing reshoots.
Next in 'Mumblings
A trash can.
No comments:
Post a Comment