Sepia shadows
First step in my shadow business was becoming a routine: a thin Sepia (ABT002) wash first. This time my wash ended up being a bit thicker than a pin wash should be, but that didn't prove harmful earlier, either.
To keep this short and simple: I went through all the gaps, panel lines, weldlines, holes, shadow areas and whatnot on the turret and the hull. The wheels I left alone on purpose, beacuse I hadn't got enough time for everything in one run.

On the hull side I left purposefully some more and larger shadows to the area that was going to be blocked by the turret, and below the tools and boxes. For a while I was thinking if I ought to wash the boxes with this wash, but I thought that the same set's brown wash might be more suitable. Of the metallic parts I only applied this onto the engine compartment's grilles, the rest would only get rusts.


The following evening I cleaned up the overflows, in these next photos most of the biggest stains were toned down.


On the wheels I went pretty heavy with the sepia. These hadn't got much special surface details except for a couple of chips and scratches I had done earlier. I decided that before I installed these, I wasn't going to do anything more serious on them, so I didn't have to guess their angles or anything in advance for the flows (Engine Grease sounded like a thing to use here).

A small, quick brown wash
For the boxes I made a small batch of the aptly named brown wash (ABT040 Brown Wash) that I only used on the wooden parts. It showed best on the boxes and the shovel handles, the saw's two tiny handles were a bit too small to show anything. The result was that they were a bit less bright and cartoony-looking.


Dark rust
Like before, I made a wash and applied it in places. Some of the obvious first targets were the unpainted steel pieces, especially the exhaust pipes and the spare track parts. I also applied some rust on the outer arc of the mine rollers.


Maybe less obviously I used the rusty was on the chips I had made previously. The purpose of this layer was to give more life and variety to the mistreatment. I wasn't quite sure if I'd also add light rust or not.


On the first round I had enough time to add a good layer of this wash onto the outer side of the tracks. Those would definitely get a light rust layer, but I hadn't made up my mind on how it was to be done. At this moment I was considering the toothpick-spatter method for randomness.
Light rust
Before I applied the light rust wash onto select spots I blended the dark rust regions a bit, because the previous layer had ended up a bit stronger than I had envisioned. After that was done I added fresh rust to rust-deficient bits. I started with the track armour on the front glacis plate, because I had not had the time for it the previous time.

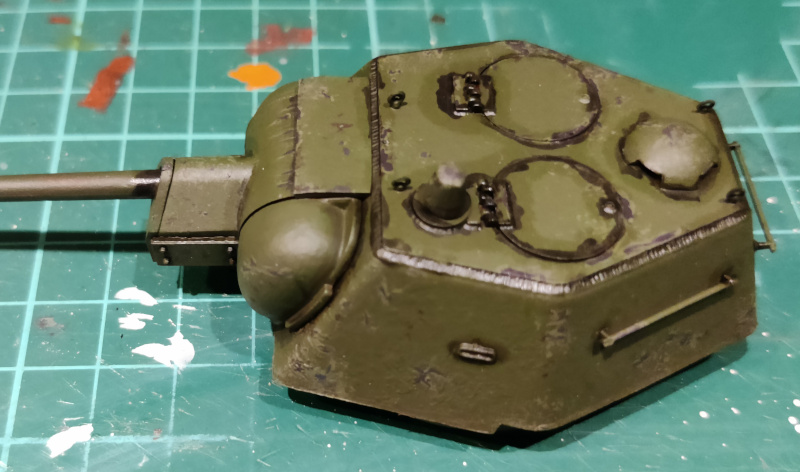
On the turret I added light bits on many of the already dark-rusted bits, only by the chippings. I tried to keep the fresh ones under tight control.


I tried out the toothpicking method on the outer mine rollers. As you could see in these next two photos, they did require some later blending especially on the left roller, but I was pretty happy with the way it looked on the rim. Like I have said numerous times already, I expected this to be the most abused area of the tank and that would also suffer most from the weather's not-so-gentle touch.


The bit that covered the joining of the lower and upper front glacis plates offered me a great place for fresh rust buildup caused by fluid flow and natural pooling.

One of the shovels had suffered more than the other. Now I just needed to fix the clasplike things.


The sole light source was decently banged up but not too abused. That steel box below it could've been made a bit rougher, but maybe it just happened to be in a fresh-ish condition. At least it didn't look like it was built two minutes ago.

I still had to clean up these grilles, this photo showed just how they had ended up after getting three different washes stippled on them.


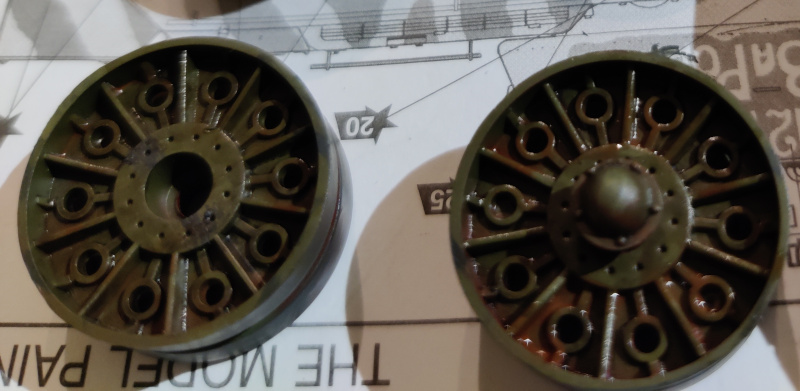
Somehow I managed to apply the fresh rust on the outer side of the tracks, unevenly but so that the underlaying older rust was still visible. After a few days of drying I'd go through the insides as well, but before that I intended to try out with the roadwheels what areas were going to be constantly grinding against another steel surface. This way my graphite highlights would (or should) work out better.

These vinyl tracks still didn't excite me.
The final generic touch-up round
I used one final evening to do some general poking around. Before anything else I glued the idler wheels in place, because they were going to be what I would use to anchor the rest of the running gear and the tracks. Idlers were attached with the most flimsy axles, so they weren't really usable for dry-fitting just by pressing them in place.
Earlier I thought that my rust spatter marks were a bit too strong, so I blended them with the round blending brush. This right side one looked quite a lot better now.

Then the left outer roller was much more covered, but I could still tone it down later down the road. I got the fake-looking splotches softened up and that was the most important thing now.

I also cleaned the track armour in the front, now the fresh rust layer was a bit more relaxed.

After a bit of blending the engine deck's grille was better as well.

One evening I got to give a rust-coloured double treatment on the inner surface of the tracks. I concentrated on the outsides as the core would be pretty much constantly ground clean by the roadwheels, drive sprockets and the return rollers. In this photo here the oils were still wet, the proper look was, as always, to be seen in a day or few.


While messing things up I added more (dark) rust to the roadwheels and drive sprockets, as I had left them still a bit clean the last time. Any and all oil and lubricant leaks, like I had decided at some earlier moment, would be done after installing the tracks.

In this condition my T-34 was with some pin washes, fake shadows and rustiness applied. A part of the applications were still fresh, so the shininess was going to go down with time. Before installing the various wheels and tracks I had to let the tank sit for a good while, I was thinking of playing it safe and give it a good number of days, up to a week.

No comments:
Post a Comment