Random, weird and apparently verbose text about plastic models, 'mechs and gaming.
27.7.16
25.7.16
Improving the summery office - microproject's revenge
Surprise!
Pressured by my coworkers and my own slightly disturbed mind I ended up doing what was expected. I decided to get back to modifying my desk fan a bit further. I left the blade bit to the office and carried to so far untouched parts home to be worked on.Excesses off and off to work
First off I removed the molded-on plastic rear grille with side cutters. Luckily the plastic was weak and didn't fight me one bit. The remaining stubs I cut off with the xacto and then I sanded the whole device thoroughly. At this point the device looked quite silly... but a bit of paint would hopefully fix it all.One of my coworkers had suggested that I'd glue all sorts of greeblies to make it look more engine-like. I did consider that but after a bit of thousand-box browsage I realized that I mostly had just styrene sheets, track links and sprockets. Also, I didn't quite trust in my scratchbuilding skills at all.
Paintage
Working very eagerly I forgot to take any work in progress photos, so you have to tolerate my explanations instead. To begin with I taped the motor box's holes shut, not pondering if I needed to or not. Again I used a grey primer so that I could see if I missed anything on the white plastic. After the airbrushing was done I removed the masks and applied the primer on the remaining bits with a paintbrush.
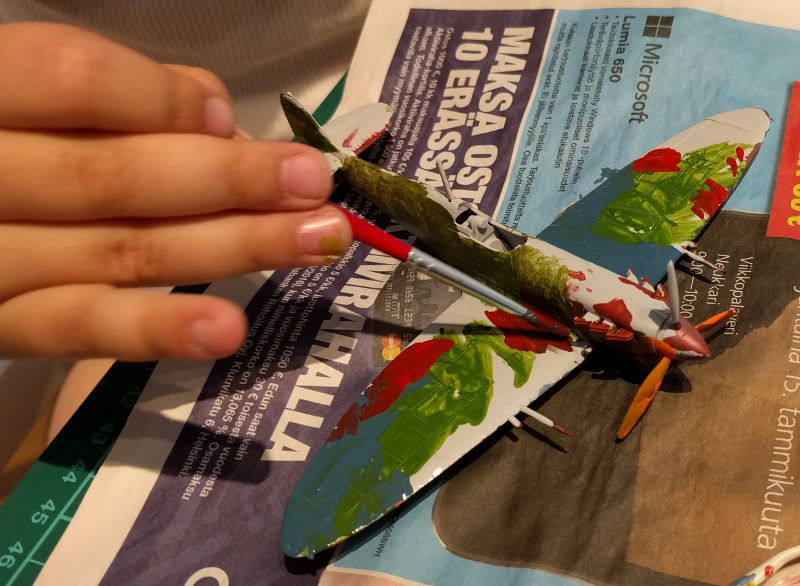
When all this was done I selected a couple of paint bottles and I guess pretty guessably took the Luftwaffe approach with its RLM colours. In other words, I was going for something like my previous
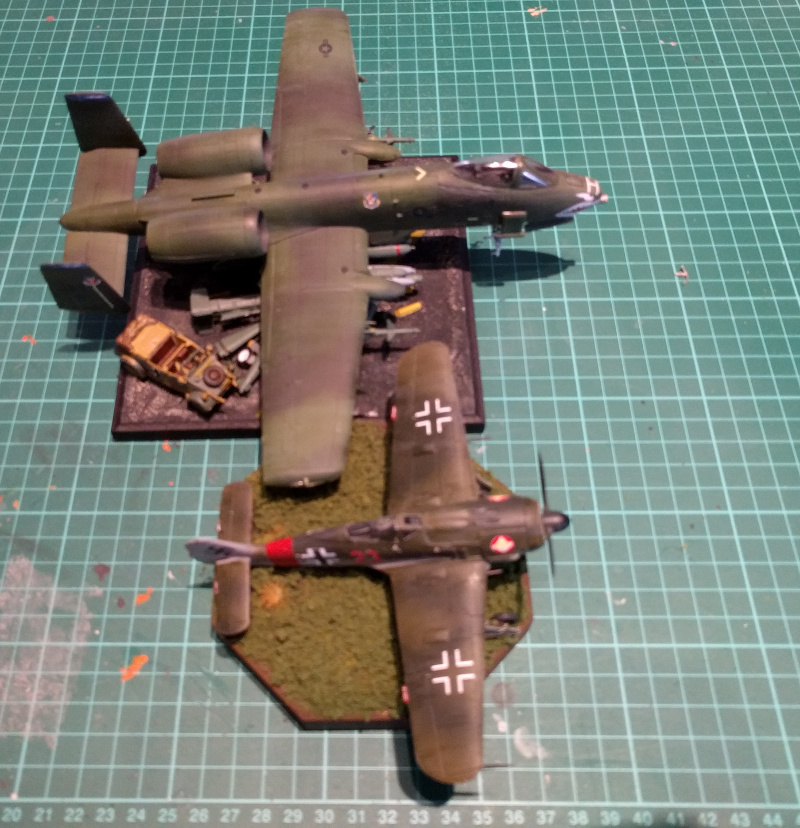
 Fw-190 project.
The only thing that was crystal clear in my head even before I started anything, was that I wanted this thing to have a yellow Eastern Front kind of chin. So I masked an area on the lower front and started airbrushing some medium yellow to cover it. I had to apply a number of layers for a decent coverage.
A Luftwaffe pattern
The base part I painted completely with a lighter grey, just like the underside of a plane. Most of the engine bit I painted with the darker grey but left an obscure area for the grey violet, mostly on the top. These I airbrushed this way and that way, with broad strokes and not stressing too much about the evenness of the coverage. With the darker grey I did some attempt at mottling on the top edge of the base. Of course I forgot to do the same with lighter grey on the bottom of the top block.Later on I fixed the thinnest parts of the paintjob with a paintbrush and did all the painting on the front and back sides that were kept untouched because of all the holes. This was quicker and easier than recovering or plugging the holes, as I would still have had to fix them manually in the end.
Finally I dabbed the edges of the camo pattern with a sponge bit, as they were a bit too hard-edged to my liking. Then I also did the forgotten mottling on the bottom of the main piece. At last.
The dials and knobs
At this point I masked off the surroundings of the speed dial, as soon as things were dry. Then I airbrushed it black as well as the tilt-lock knob. I was pondering if I should paint some indicators, rotation arrows and open/close -texts and such.Anyhow, I drybrushed both these pretty heavily with gunmetal and while I was at it did some more drybrushing here and there. I attempted to leave the overall feeling on the cleaner side of the spectrum as in this scale excesive bumping might look a bit weird. To wrap this up I washed the whole top module with brown. After the drying time was suffered through I matt varnished the device.
Detail work
The original markings on the speed dial 0 - 1 - 2 were just boring. With a coworker we thought that they could be renamed. After a short but uninhibited brainstorming session we ended up with "Aus - Achtung - Gefahr". Pretty soon I had to admit that there just wasn't enough space for everything, so something like "Aus - Ein - Achtung" could be crammed in readably. Being the funny guy I am I came up with the idea that instead of a warning an outright denial ("Verboten") would be even more amusing, so I declared that the fan would be either on or off - the strongest blow was forbidden as dangerous. Or something.Of course my Germanizied fan needed a proper name. Google's translator tried to suggest something as mundane as Fan and that wasn't fun at all. I mangled the words of the language of love a bit to get what I wanted. Just as I read that the fan's diameter was six inches, or 152mm in human measurements, the idea became very clear. This would be called the 152mm air through-blowing device, model 2016. As I already admitted, with a bit of violence and word-mangling I ended up with 152Luftdurchblasengerät16 and was most pleased with that.
To make the labeling part as easy for me as possible I printed out the necessary words with a properly gothic font (I found this from somewhere: Canterbury). It was readable, sufficiently gothic but still too complicated to by cut open into masks, so I did manually what I could. I was told it was readable. After this was done and the paint dry I applied a matt varnish layer to protect my precious texts.
Photos
Before I rereinstalled the blades I took a couple of "this is how it ended up" - photos. If someone was wondering the base's bottom being yellow, I can say that I once pondered painting the caution stripes on it but then came to my senses as that stuff wouldn't have fit this project at all. Now it brought the rear-airfame's yellow band to mind. Or at least that's what I hoped you thought of.As assumed, the propeller hid most of the front side's details. But the point was that they were there, they were done, even if no one ever saw or noticed them.
Just to show how things differ I took one of the untouched Matsui fans next to mine to show where we started from. The difference was noticeable and in my non-neutral opinion the difference is in my fan's favour ;)
Materials used
* VSP Grey Primer* VMA 71002 Medium Yellow
* VMA 71103 Grey RLM84
* VMA 71054 Dark Grey Blue
* VMA 71128 Grey Violet
* VMA 71046 Pale Blue Grey
* VMA 71057 Black
* VMA 71065 Steel
* VMC 70863 Gunmetal Grey
* VMA 71001 White
* VMW 765135 Brown
* 70520 Matt Varnish
20.7.16
Another very custom paintjob
I unleashed my Project assistant as soon as the model was ready to be painted. The chosen palette was familiar from the previous one: red/blue/green/orange, except that this time she asked to get some kind of a metal shade (VMA 71064 Chrome). On the first session she painted the bottom and some of the sides. Then, only one and half months she finished with the rest. Luckily we were in no hurry at all.
Early May
Late June
The resultset
The sweet mix of chrome and the other shades made this plane quite unorthodox. While looking at the bottom you could expect it to be the plane of half-red baron or something equally weird. But as I have said before and will keep saying, the main thing was that the artist herself was content with her doings.15.7.16
Improving the summery office - microproject
The office desk fan
I had a small desk fan on the edge of my desk at the office. One of those tiny flimsy devices (Matsui MF152W) with a plastic propeller. From somewhere I got an inspiration to modify it a bit, to make it less boring. So last Wednesday afternoon when leaving for home I pulled the propeller off and carried it with me.Init
First I sanded the bit all around both to give it some odd surface texture and to, hopefully, provide a bit more of a grip for the primer. I had straight on assumed that the shiny plastic wouldn't take the paint as well as could be hoped for.This time I chose the grey primer just because it'd stand out better than the white one. On top of that I airbrushed an uneven and imperfect layer of German Grey. Later that evening I painted a good bunch of layers of Medium Yellow on the outer edges of the blades. I didn't take a masking and airbrushing route for that but paintbrushed a pretty narrow line instead. The yellow band naturally followed the physical slanted edge of the plastic. Of course I did that on the front and the back of the blades.
The next morning I spent almost five minutes before leaving to work with my drybrushing brush and Gunmetal Grey. I concentrated my efforts on the middle bit and the leading edges of the blades.
The spinner's spiral
I had really, really seriously meant to paint a Messerschmitt 109 -like spiral to the spinner. But because the shape of the central bit was so stupid and I couldn't find a properly shaped* piece from home anywhere, I decided that I couldn't paint a spiral so that it wouldn't look somehow wrong. I googled bit and chose to paint a white sector instead, but not a quarter or half.Then I just laid some masking tape to get a good-looking angle and then protected the rest of the piece from overflow. Of course I didn't bother hauling my airbrush and compressor out just for this but did it by hand.
*) Of course I figured out too late that I could've bought one of those giant Kinder eggs (because the normal ones have a capsule which wouldn't help here) or something and used that to complete a proper spinner's shape. Maybe later in the future we get to see the part II for this project.
Finishing up
Then I gave the whole setup, especially on the clean white section a new Gunmetal Grey treatment, to change the overall look a bit further. After that I washed it all with a grey wash and finally in the late evening I applied a matt varnish to protect the result of my madness.The list of materials
I had used the very familiar Vallejo products, this time I thought I'd list them this way. It's amusing to see the amount of stuff that ended piling up on as simple a thing as this one...VSP 73601 Grey Primer
VMA 71052 German Grey
VMA 71002 Medium Yellow
VMC 70863 Gunmetal Grey
VMA 71001 White
VMA 71057 Black
VMW 76516 Grey
70520 Matt Varnish
At the office
On early Friday morning I reinstalled the propeller and turned the power on full. The project was a success, nothing broke!
P.S. I wrote all this in advance on Thursday, I just took and added these last two photos while sipping some morning coffee. So the lost work time could've been counted in minutes by a blind buzzsaw operator's left hand's fingers :)
13.7.16
Puttying, filing and priming
Canyon filling
First things first, I applied a hefty amount of Tamiya's putty to fill all these insane megagaps of the plane. This is one of the main reasons I've always found plane models slightly annoying: if something goes a bit off while combining subassemblies even if the subassemblies themselves align properly, everything's ruined. That's something I really don't appreciate.After the grey goo had cured for almost 24 hours, that being the next early evening when I had some time to fool around, I sanded most of the excess garbage off. Still, I didn' take too strict an approach. The best result would've been achieved, I assume, if I had sanded most of the greyness away, but then I'd also lost at least 90% of the still remaining surface details. I decided that a decent surface for painting was most important in this model.
![]() |
I had to fake the remaining parts of the landing gear bay doors with putty because the kit pieces didn't cover enough |
The sad greyness of the air farces
I wrapped up my part in the painting of this plane by priming it. Just in case I also sprayed some Vallejo Grey Surface Primer inside the plane, just in case the artist herself wanted to give her personal touch to the cockpit, too. The next phase, in any case, was not going to be in my hands.6.7.16
Building gently
I was completely sure that I had taken a photo or two of the cockpit pieces before I glued them inside the airframe. Still, I just couldn't find them, so I guess I hadn't taken the photos after all. The cockpit, as I had said in the previous post, was pretty weird-looking. It consisted of two plates: an instrument panel + something that looked like it was supposed to be the silhouette of the pedals that got an aiming cylinder glued on it and then a massive bar that was supposed to be the joystick - and a rear plate where the pilot's seat was glued on. There was no floor on this plane.
The wing assembly was traditional: a large lower piece that got the left and right upper halves glued on. These bits didn't align too nicely but they settled after a bit of fighting. Taping the key parts shut was essential, as they tried to grin quite a lot everywhere.
There was supposed to be a brick-sized piece in the inner front of the cooler, with a sort of a grille-texture on it. But the brick was enormous and the opening on the wing required a huge amount of cleaning up and carving. I sliced off thin, thin slivers off the brick, dry-fitting it after almost ever one, but still I managed to ruin it and threw it away. Maybe this model would survive that. Interestingly the wingtips had two options, either the one she chose and what you can see in the pic below, which was larger and rounder (the one I also thought looked more Spitfire-like) or the noticeably shorter and tighter-arced one.
All in all the pieces were ridiculously thin and were bending in strange ways. I didn't dare to cut off the sprue-edges too close but left them to be filed off later. I just had the feeling that the tiniest of badly made cuts would've left the wings with insane gashes that would've been a pain to conceal.
The pointier and longer spinner was chosen out of the two alternatives. To my eyes the exhaust pipes somehow looked way too large, but maybe I'm just confusing them with the Messerschmitt 109's in my mind. Also, the mighty bar that supported the antenna cable didn't look like it fit in too well, but I trusted that the glue would hold it well enough.
Then I glued on the gun's tubes, the wheels in their wells and the landing gear plates to protect whatever they could cover before I joined the wings and the airframe. When I had done that I just sat there staring with wide eyes at the insane canyon between the airframe and the upper wing halves. I'd really need to putty this one up before I got to prime anything.
29.6.16
Project IV/16
Subcontracting project II
My Project Assistant had been asking for her own plane model (to paint and play with, of course) for quite a long while, thanks to five consecutive planes I've done. From the Model Expo 2016 she bought, with her own money, a Spitfire made (or packeted) by Směr.The scale was the familiar 1:72, its variant was apparently 5c and the box art I assumed to be a representation of the Australian version. Not that it mattered to me, the paintjob would be Something Completely Different in any case.
Bits
All the pieces were spread over six sprues and looked like they'd require quite a bit of cleaning up. In my hands the plastic felt pretty flimsy, I just hoped it wouldn't get totally ruined while being cut off the sprues already... I was a bit concerned in advance. There were an amount of optional pieces, at least I could see at a glance two spinners, air scoops for the engine and canopies.Decals
The decal sheet had a good amount of markings, for both RAF and (according to the instructions) RAAF, so I had guessed correctly, it was Australian. Oh and the Chech roundels on the lower right corner. And the cheese-eating surrendermonkeys had their roundels there as well, I'd go mad with the choices. Most likely I'd let the owner choose which markings she wanted, if she wanted any of them on her plane.Guidelines
I'm pretty sure that the instructions for this plane were the shortest I'd ever seen, at least based on my (unreliable) memory. There were more decal-laying and painting pages than construction pages. Looking at the pics the cockpit interior looked very weird, even if you remembered that this was representing something designed by Brits.22.6.16
Finished: Project III/16
Last minute 'mumblings
First of all I shook all the extra junk off my baseplate. The grass coverage lightened up a bit, I thought it looked better this way. I took a couple of "just for the fun of it" photos with the Kübelwagen and then for size comparison also with the A-10. The car took way too much space from the limited area on the base, but I had to try as it was on the box art. Had this kit included some tiny plastic people, I'd tried to reproduce the cover pic, but no, it didn't so I couldn't.In case you were wondering the sorry state of the Warthog, the reason is that my Project Assistant accidentally dropped it on the floor on its roof. Of course it broke beyond repair, but that was ok, as I had already taken my photos ages ago. And it was me who left it there "just for a sec" in a dangerous place, so it was my own fault.
Now for something completely different: I chatted with a coworker of mine about the paints in general and the different shades. So I took a photo of all the paints and varnishes I used to satisfy my own curiosity. 23 containers were caught in the frame, only a few (5) had been used solely on the Kübelwagen. If you thought that I used 16 different paints to paint the Fw-190 and the camo pattern required only four paints, the obvious verdict should be that someone went gently but firmly overboard.
Heinz Bär's Butcher Bird
As usual I took a random pile of photos with as white and well-lit background I could arrange. I shot them from different angles and heights with the traditional cardinal and intercardinal directions. Finally I took a few pics of some supposed details. Following the proud traditions of the Project Mumblings the photos haven't been touched up beyond cropping and downscaling.Finishing thoughts
The Academy kit was extremely pleasant to build, the pieces fit best in all the plane models I've ever built. My nemesis, the decal sheet was fine in some ways (the decals behaved well, with few exceptions) but the printing did leave some to be desired. If all the Balkenkreuz and the JG1 insignia had a one-pixel offset that bled the background colour, they shouldn't have gotten through the quality control.Again I forgot to write down my time usage, so I can't really comment on it scientifically. If I said that I spent less than five hours in total, I don't think I'd be too far off. Those cursed decals alone took closer to two hours, over two sessions.
All in all this was absolutely the last plane model of mine in a good while. Maybe in the future I'll return on the wings, most likely with propellers. At least I haven't planned on investing in a single 1:72 scale plane, but something like a Bf/Me-109 in the 1:32 scale could be a pretty interesting subject, for example.
Subscribe to:
Posts (Atom)