Spot-varnishing, glossily
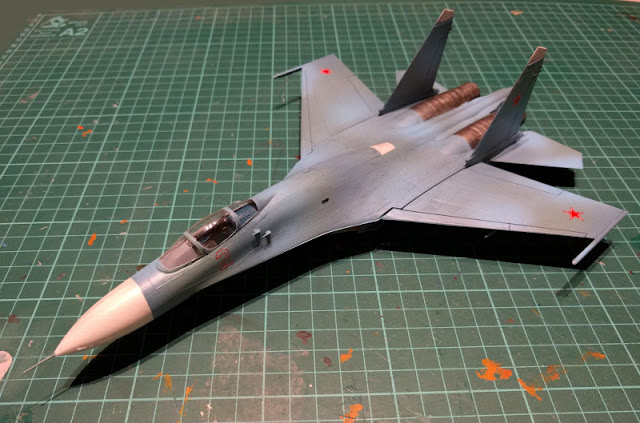
Following the tried and true method I went through all the areas where I intended to put decals on and covered it with safe margins with the clearcoat (Vallejo Gloss Varnish). I had chosen spots for three red stars, a unit number, and a warning stripe for the air intakes. Of course this applied both on the left and right sides of the plane.Now the unit number that went next to the pilot's side, it could be made up to four digits, if judged merely by the horizontal space - and the decals were of a noticeable size. The decal sheet only had one small number set for a plane that also had its number in the vertical stabilizers, the hull-numbers were just about as tall as a pilot's torso. My options were limited, no matter if I chose red or blue numbers, that there only were digits 0-9 per side, meaning that the practical combinations were definitely few.
My original plan did not include the caution stripes by the air intakes, not to mention any of those dozens of tiny squares and whatnots. Still, following the traditions of the 'Mumblings, I indeed changed my mind regarding the caution stripes and actually felt that they'd bring some essential something into the model but without making me swear my lungs out while working on them. Though considering these documented decal failures, it wasn't the first time I had high hopes for these little beasts and failed just about as often.
Those foul, foul transfers
I started this fight with the red stars, because without the roundels something essential would've been missing from the plane. If those first and most important decals got ruined, I could just stop pretending with the transfers as early as possible.To my great surprise the each of the stars fell in place beautifully and without a single complaint by me. They looked just fine and I was content. After the stars I applied the warning stripes, because they also didn't require any planning, choosing or triple-checking on positioning, just dropping in. Both of these also obeyed me, oddly enough.
After getting the more or less stock decals done I got to the individualizing part. I thought that I could go as mad as setting up a space-eating 1024, or 2028, but I realized that in addition to it taking a load of space, a three-digit number would serve just as fine. With these I meant to go for a power of two, but just when I started on 512 the five went all wet spaghetti on me - as these bastards often do, it also ruined 256 automatically. This didn't give me confidence to try 128 that would've, on failure, reduced my options pretty much down to something random. Instead I aimed for a true classic: 64.
That was otherwise a wonderful plan but the first six got spaghettified, or just plain ruined. Now it was perfectly clear that I was already passing the workable levels of annoyance and frustration with these little shits and just wanted to get it out of the way. My useful stock of numbers was rapidly dwindling, so I just took a pair of twos to represent, if nothing else, the silly fact that this was my second Russian jet.
Of course the second of the twos got a bit twisted while applying and both their positions left room for improvement, but I just could not bring myself to care anymore. Despite all my raving and ranting about how much I hate decals I still had not learned to just throw them away at first sight.


No comments:
Post a Comment