Mastodon

8.5.19

The starting point and some comments about it

A disaster zone

We could try to claim that this shuttle landed a bit too roughly into a difficult landing zone, maybe via a couple of sturdy trees. No, it didn't really look like that, as the detached pieces had all fallen off very cleanly without taking any damage.

As I mentioned before, the cockpit module had become detached, just like the shoulder cannons with their protective armour plates and the double-barreled laser cannon from the rear of the craft. The canopy glass had never been glued on in the first place, so nothing strange there. Except that... yeah, it didn't fit in perfectly.


TODO-listing

I had painted some little details by hand, back in the day. The reason for the cockpit interior being the same grey as the outside was, if my memory was to be trusted, because I only had very few shades of Humbrol's enamel paints. Lack of options, that is. I had apparently drybrushed some darker grey here and there on the outside.

[0]: sand more space for the transparent piece so it'd be flush against the airframe
[1]: repainting the cockpit interior


While documenting the underside of the cockpit part I was pondering if I should go down the sick path that I exposed myself to earlier, while searching for reference images with something like "Lambda class shuttle cockpit interior". The way I encountered those optical fiber cable setups with Arduino/RasPi setups and the Emperor alone knew what other awesome and time-consuming modifications... My sick mind was slowly churning some thoughts about adding some light greebling in some tactical places, like adding some cabling or somesuch into that front bin.

[2]: adding some three-dimensionality to the moulded details


The open-closeable ramp left a tiny opening between the cockpit and the main compartment, but still, maybe that area, from where Darth Vader disembarked in the Return of the Jedi, should be repainted too? Of course one couldn't see that without a flashlight in any case, and if it was going to be a dark one, what'd be the point? Of course the point would be that it would be done Properly, what else?

[3]: repainting the airlock-like chamber

This next photo showed the best in this series, how awfully the rotating twin laser cannons on the wings were: twisted and bent. If I was madder than what I am, I could've considered redoing them somehow, but that didn't sound too likely at this point in this model's life.


In my opinion the wings and the vast majority of the airframe were ok, my old paintjob just wasn't quite on the level I thought I expected from myself nowadays. Some of the next photos revealed that I had managed to skip some bits with my paintbrush altogether. Mostly these photos would also show how large the model was.


Here, for example, you could see unpainted plastic in the rear. Just like those hinges of the wings were just beyond description in the original model, so when I attacked them way over a decade ago with much less experience and much worse tools just to get the damn things installed - not to mention making them rotatable. The result of my craftsmanship was just that, foul. Maybe now I should do some puttying and sanding, wherever needed.

[4]: fixing the seams


This next photo would show clearly how the leading edge of the top wing was incredibly badly painted. I really couldn't remember how I did that. One of the restoration projects I ogled at had filled this gap with greeblies, too.

[5]: general repainting


1.5.19

Project II/19

A renovation project

Right, listen up! Now we'd be doing something completely new and different. A few time units ago I wrote some "oldies but goldies" posts of my old models that are mostly not alive or even kept around anymore. A notable exception was the Imperial Lambda-class shuttle Ondiv that had more or less survived four moves. During the last six years her cockpit had fallen off and the last surviving shoulder gun protector had also gotten detached. The other bits had fallen much earlier.


At least I had managed to keep the loose pieces safe and I didn't have to start thinking of how to replace them from scratch. While pondering on what I'd do to this SHU I found pretty impressive Arduino-based optic cable setups that I almost gave up.

Some folks had filled up the gaps between the wing plates but I didn't think I was going to go that way. Just regluing and gently repainting on the other hand, was clearly on my schedule. I thought I'd just airbrush the whole spacecraft white so that the original grey would remain as a basecoat to give some more shade to the end product. The insides of the cockpit would need to be fully redone, because my original approach had been "full grey in and out", the new interior would be closer to black.

While reading through one of the many restoration project articles I found (google-translated from French to something understandable) I remembered how foul the wing rotator pieces were and how ill-fitting they were. Also the canopy didn't really sit snugly anywhere at all, so most likely I would end up filing and sanding here and there anyway. In any case I wanted to leave the glass pane clear, nor did I want to add the length-wise running tiny white or grey panel strips that some people / models used.

24.4.19

Finished: Project I/19

Soundwave

"Laserbeak - prepare for flight. Course heading: northeast. Operation: observation."
 

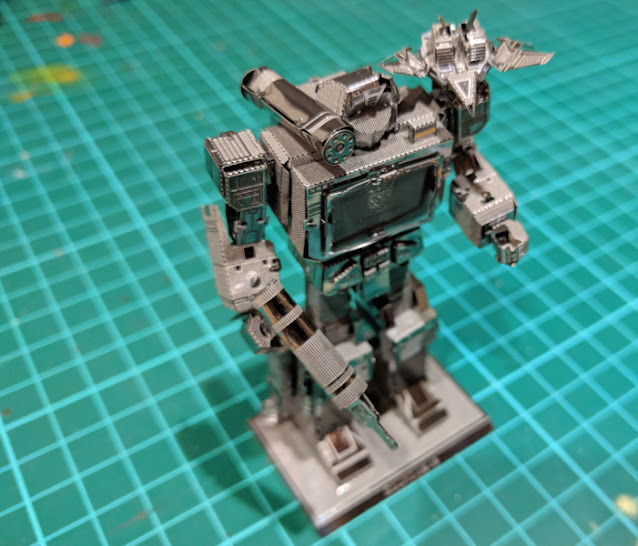
 If you remembered just about nothing about the Transformers or Soundwave, his voice ought to have stuck. With his Condor minion perched on his shoulder Soundwave looked like he was sending Laserbeak to spy on the baddies, a target or whaverer he wanted observed.


"Megatron, Laserbeak has returned. He has found a source of energy."


Silliness

Now that I had a larger and pretty damn poseable large version of the character portrayed by the metallic status, why wouldn't I have taken some silly photos of them together? Of course this led me to want a Masterpiece Megatron to go with my MEM Megatron... Well, I've wanted an MP-36 since I heard of it, but now I wanted it even more!


17.4.19

Final subcomponents

Head, shoulders, ...

Now that Laserbeak was completed, what was left was the last few steps of the instructions, covering about six pieces worth of activity. Soundwave's head utilized four of them. An Optimus Prime -like mouthpiece and a sunshade piece were installed on the faceplate itself.


Speaking of Optimus Prime, this head looked pretty much 1:1 like his or maybe my memory has been badly corrupted. I would have to check someday.

After installing those two pieces the bucket was twisted more or less into a U-shape and the top/back of the head was shaped into something like a fishhook and then used to lock the head in shape. This operation was loads easier and quicker than what I had thought and what it most likely sounds like.


Laser Cannon, the

The AA-batterylike laser cannon had to be rolled into a cylinder, but so that the rectangular attachment point was still attachable into its own counterpart. The shape went, predictably, only partially like supposed to, but at least it stayed intact. This thingamagick was then to be installed onto Soundwave's right shoulderblade and the backplate into his back. Only the lower right attachment point needed any force, otherwise it was all quick and swearless.


So he was finished as well. Next time I'd share the wrapping up pics and maybe causing some Kif Kroker -imitations here and there.


10.4.19

A minion for the forearm

Laserbeak!

Soundwave was now mostly completed, now I was strangely enough, instructed to work on one of his minions before his head or the shoulder-mounted Laser Cannon. The colourless bird could've been named either way, I decided to default to Laserbeak.


The top half consisted mostly of the torso plate, head and those engine-gun bits on the back. Lots of tiny bends were to be made but it turned out very recognizeable very quickly.


Finishing Laserbeak up was decently simple a task. Connect the legs to the belly part: check; belly part's edges up: check. Then connecting that piece to the top half was otherwise very easy but the backmost attachment piece came out so tactically close to every other subassembly that my poor eyes gave me a hard time seeing what went where and what was I actually supposed to twist and bend for proper tightness.


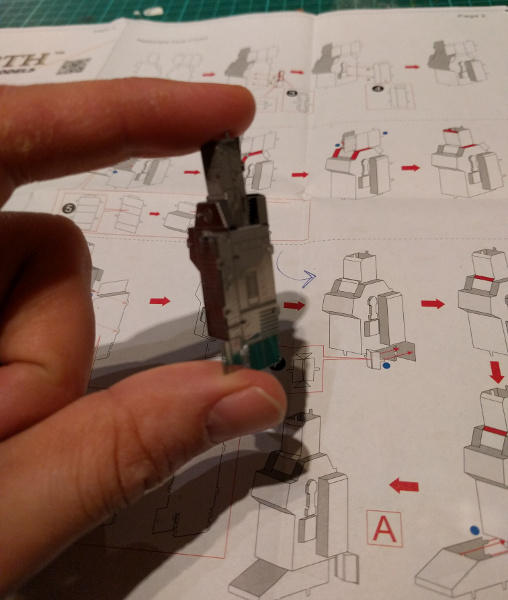
Below: a completed Laserbeak on the back of my hand. It wasn't large by any measure, even though you might not be able to get a clear sense of scale from this silly pic.


Next I installed Soundwave's missing arm on its place before proceeding. The instructions wanted the left arm to be pointing forward but I had gone and mirrored the other arm, not noticing the tiny difference in the booklet.

So, Laserbeak didn't quite fit sitting as it was supposed to be, on the forearm, but there was always going to be space on the shoulders of his master. Maybe with some gentle violence I could make him sit on the arm, too.

3.4.19

Another arm

A very short report

Thanks to the everyday busyness just building the left arm was all I managed for this post during a single sitting. Being an unarmed arm it was a tiny bit quicker to assemble, but that didn't help me that much in the end. I also didn't attach this arm onto the torso yet, as I thought that this'd make the next stepset a bit easier. Or not, we'd see.


27.3.19

The right hand of Megatron's right hand

The arm with a blaster

In the middle of my rush of building I didn't remember to take any pics, so what was left to show is the fully armed and operational severed arm. In his hand Soundwave carried an AA-battery-like concussion blaster.

The attachment of the gun and the hand were the weakest ones in the whole submodule, mostly because one of the locking pieces would've blocked the gun's attachers if bent as intended. So I twisted them however I had to in order to get the pieces tightishly together. Or that's what I hoped.


Somehow the instructions wanted me to keep RA off from CT at this point, but after consulting the remaining steps I decided that I know better and attached it anyway. This again helped the feeling of actual progress, as my mighty rohbut was another step closer to being perfect instead of me waiting for both arms to be ready before taking another large leap.


20.3.19

No torso twists here

Center of mass

After working on the legs the next natural piece was the hip chunk that was practically, as his alternative form required, the control button set of a ghettoblaster: ffwd and rwd buttons, a massive play button and the stop/rec buttons that oddly enough had the same identical engravings on them. Maybe I could survive this weirdness.


To accompany the hip controls I assembled the main torso, that being the cassette deck part of his. Somehow all these MEM sets that had this funny "this flilmsy bit here will be held a millimeter from everything else with these even flimsier tiny risers here" parts have always ended up being out of shape in my not too gentle hands.


Somehow, while assembling these tiny boxes, I just got the feeling that I wasn't doing any real progress at all. Just when I was about to complain the instructions directed me to stack these submodules into their places and the guy just progressed by leaps and bounds. Attaching all these '80s-style boxiness was quick and fun, the tiny 45-degree angles didn't slow it down at all.


Just look at him, he's already very recognizeable! All that was missing were the arms, the head and the whoknowswhat from his shoulder. Almost done.


13.3.19

Another leg day

The rest of the bipedaling bits

I continued working on the left leg for the short time that was remaining. That being the installation of the foot into the ankle and then restarting the process for the right leg.


The finished legs were tightly installed into the base of the hip. This subassembly then was to be attached to the baseplate and because the legs were pointing arrow-straight (Picture 3) they needed to be forced open a bit so that they'd connect with the base in a bit less stiff pose (Picture 4). This wasn't the first time when a "completed" component had to be bent or twisted against the connectors and especially against its own natural angles and that has made me queasy every single time it's been done. I really, really didn't want to break them at this point when I couldn't fix or cheat my way out of it.


6.3.19

Leg day

Getting started

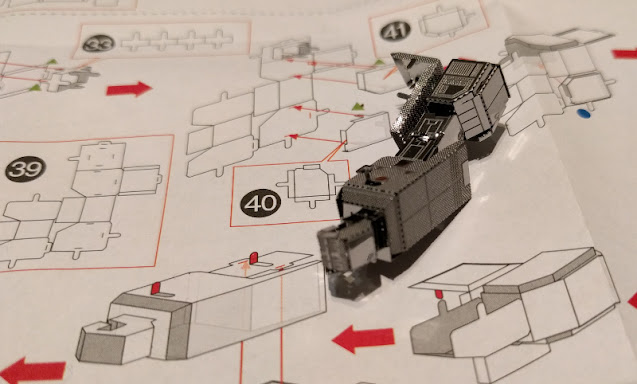
This model got along on the wrong foot and as the photos below revealed, what little I got done in the first 45mins. There were quite a few tiny bits as greeblies and as the original was a Japanese mecha design from the eighties, it had funny flaps and whatnot. And this was just the thigh + shank part of the first leg.

It was ridiculously slow going, but as we have grown accustomed to, my burn rate would improve noticeably as I got back up to speed and especially when working on the mirrored pieces. I've learned something over the years and kits, seeing that I didn't push any of the attachment bits into my thumb this time, either!